Welcome to Kate's Blog!
Check back frequently for the latest updates and designs.
You can view other older posts from Kate on the Tot Toppers Blog.

maker’s bingo 2025: the prize reveal
37 incredible prizes
it’s time for the big prize reveal, y’all! if you’re still waiting to decide whether or not you’re going to play this year…I have a feeling once you see this list, you’ll know what to do! britt and I are so incredibly grateful for these amazing sponsors. the generosity and support they have provided us for our game has been encouraging and inspiring to say the least.
whether you win a prize this year or not, we hope that you’ll check out these wonderful companies who have made your odds higher than ever! this is a long post because we really wanted to show off each sponsor, but the accordion below will give you a quick version of each sponsor & their prize(s). we’d love for you to scroll and learn all about these amazing companies.
without further adieu, enjoy!
-
100 € gift card
-
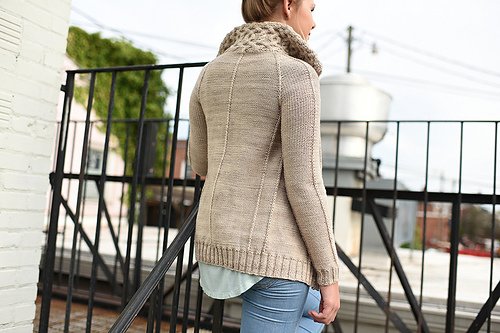
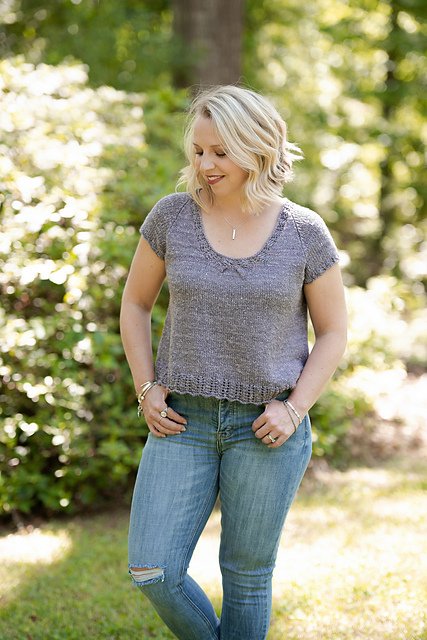
10 skeins of Serenity (100% cashmere) + the Serenity Cardigan pattern from Kate Oates {value $510)
-
3 skeins of your choice!
-
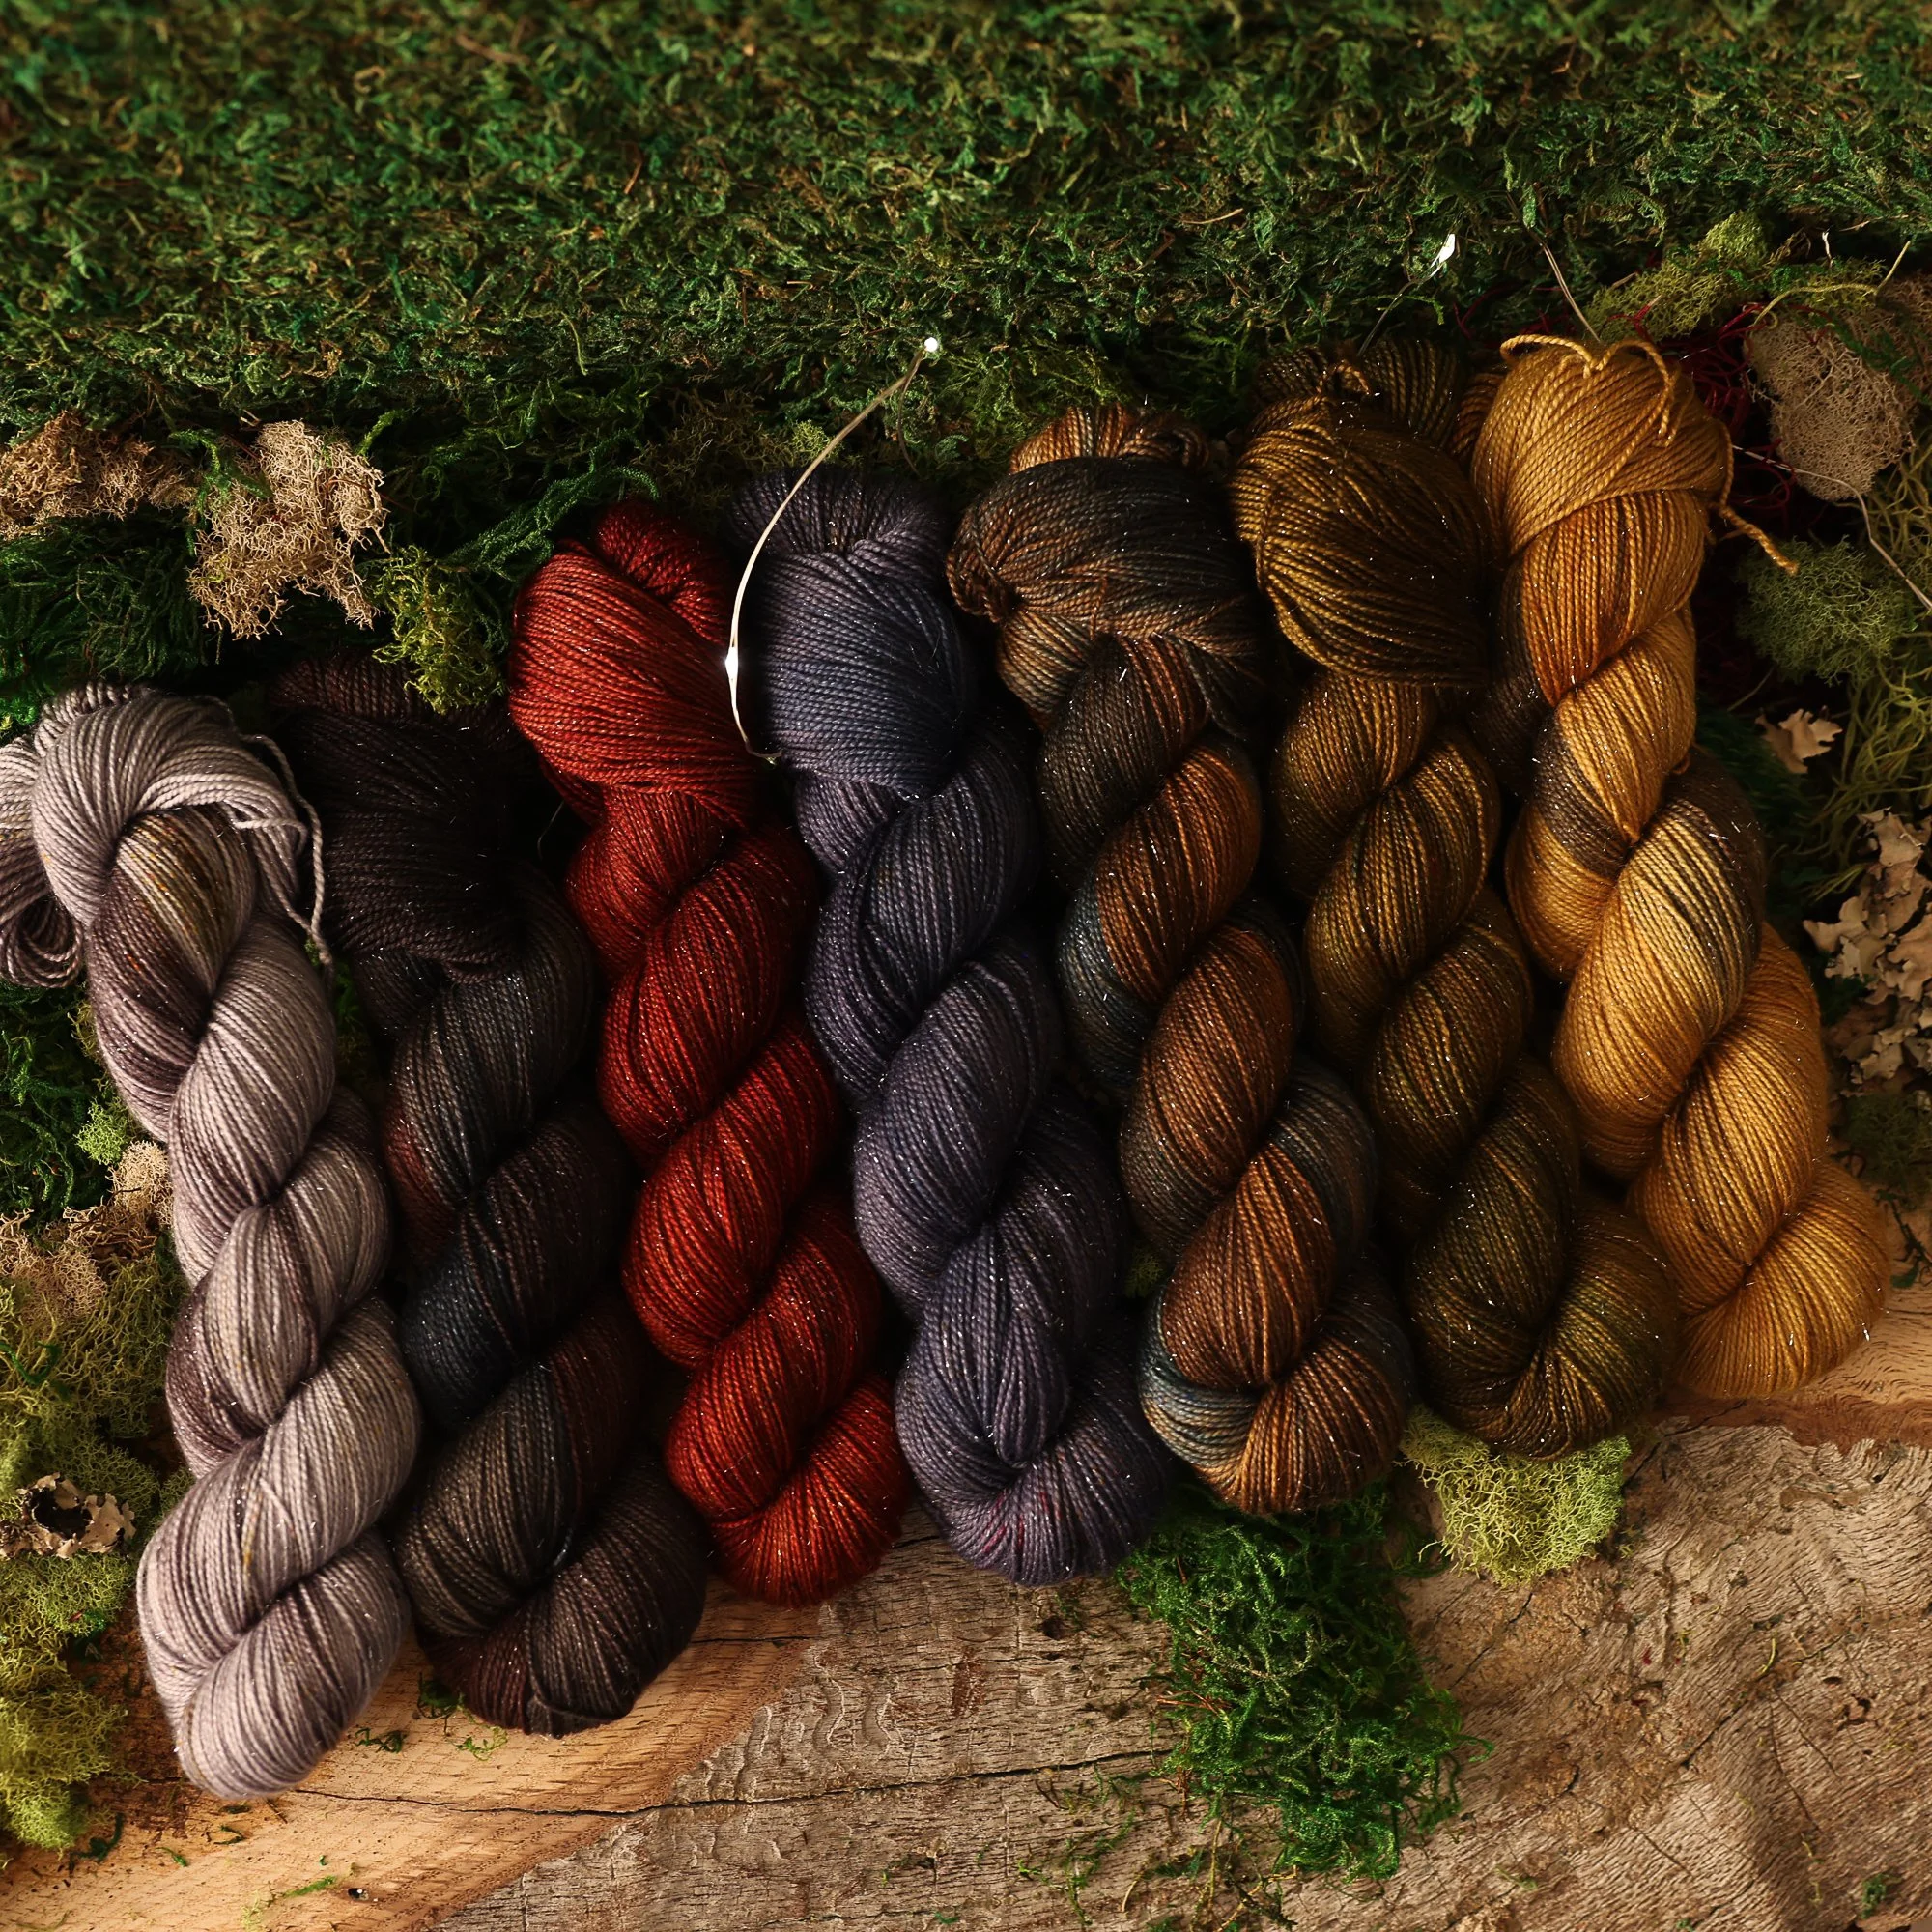
25$ gift card, candle, BMYS sticker & two cloth labels
-
Tourmaline Crafters Talisman {$125}
-
$100 gift card
-
$100 gift card
-
Floral Stitch Marker Set
-
Hudson Beanie Kit
-
Impervious Shawl Kit
-
30 min one on one consultation to discuss any of your sizing challenges with knitting patterns!
-
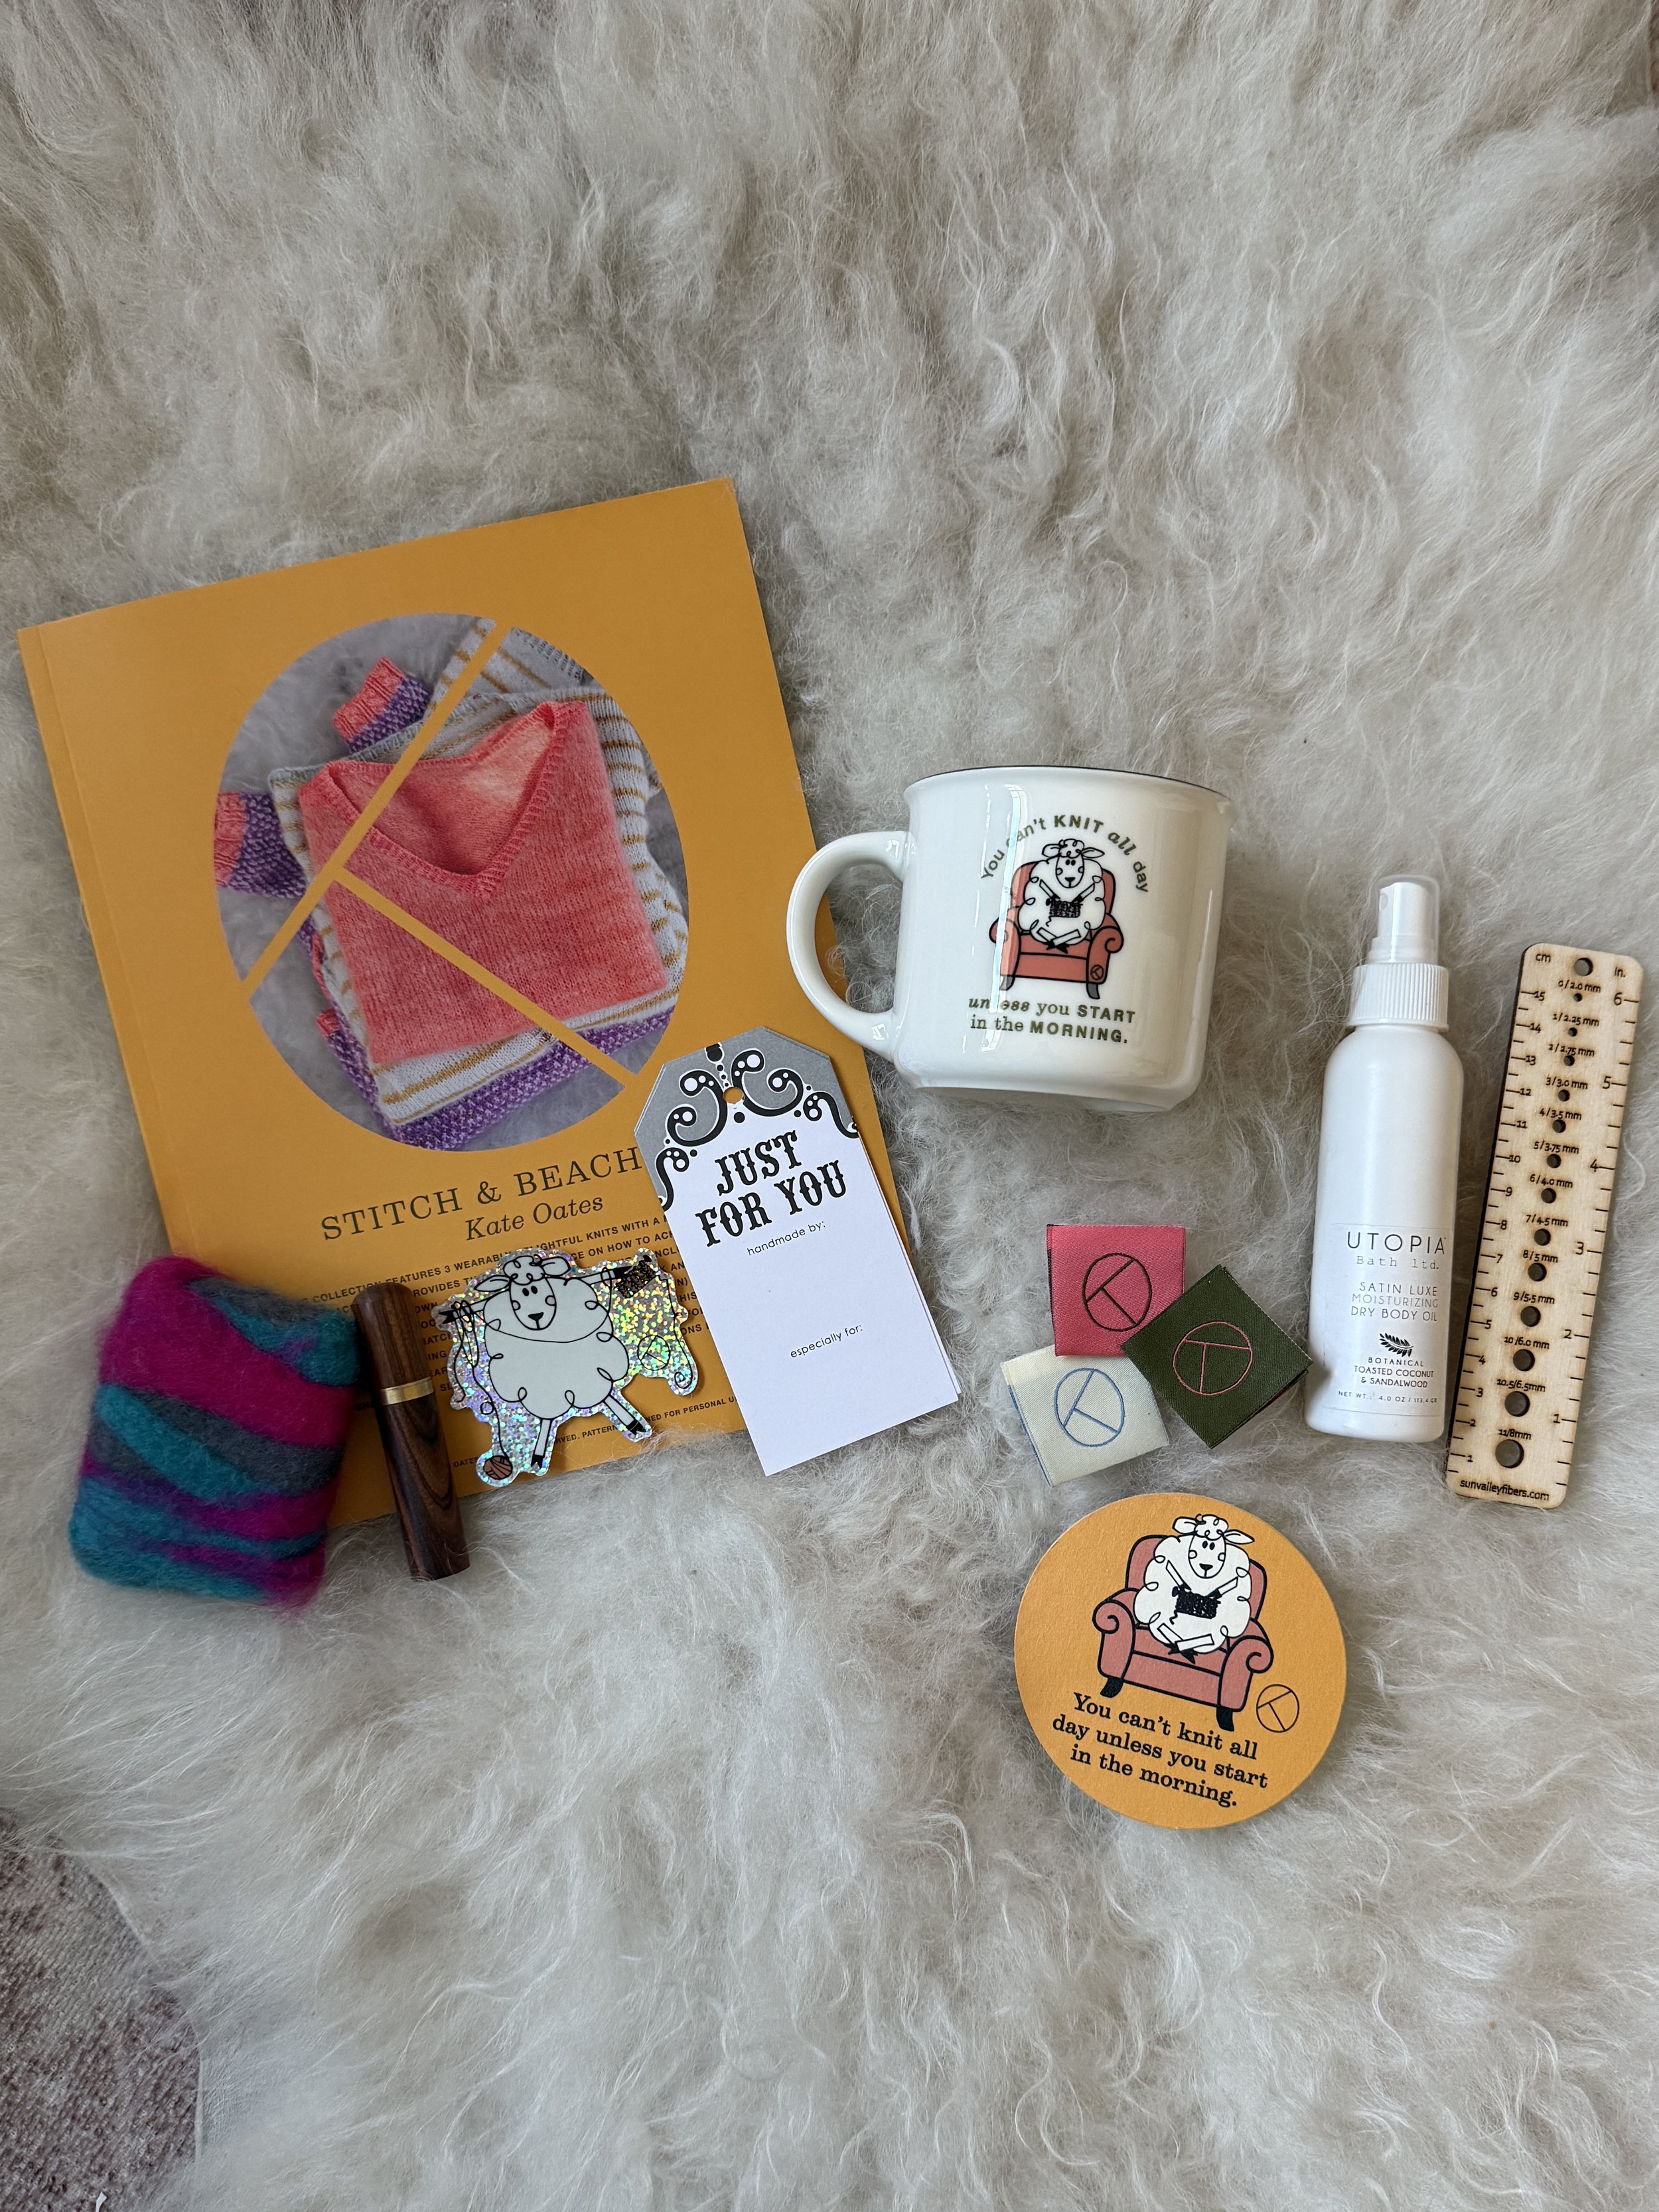
TWO winners will receive this $165+ prize package:
hard copy, book version of my 2025 stitch & beach capsule collection + digital
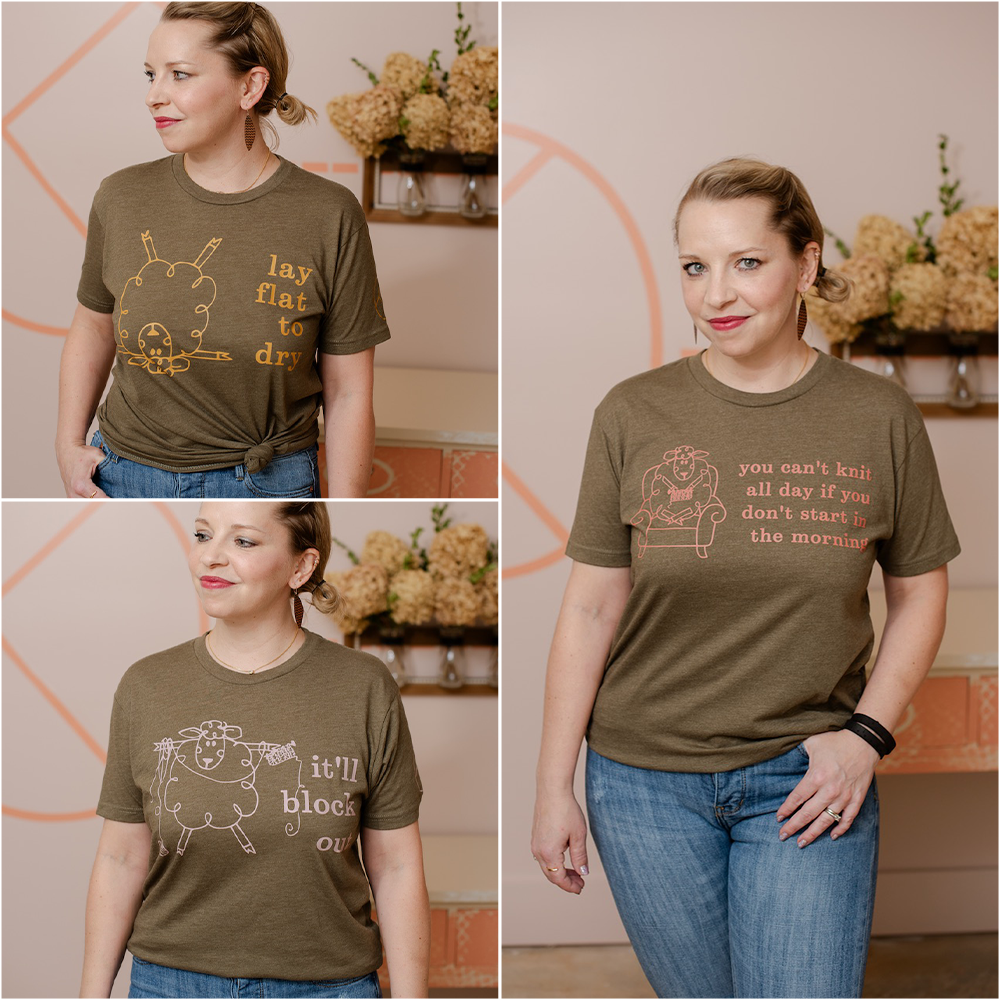
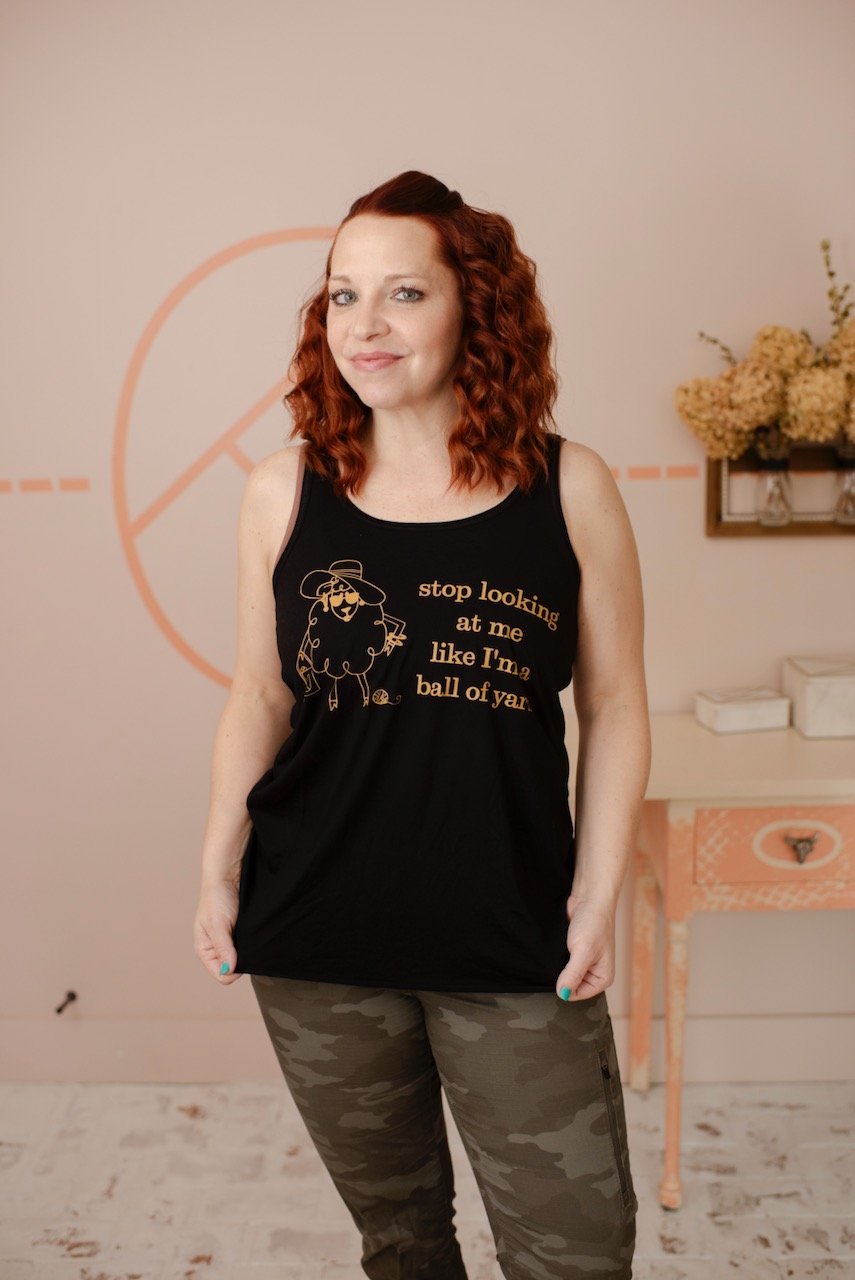
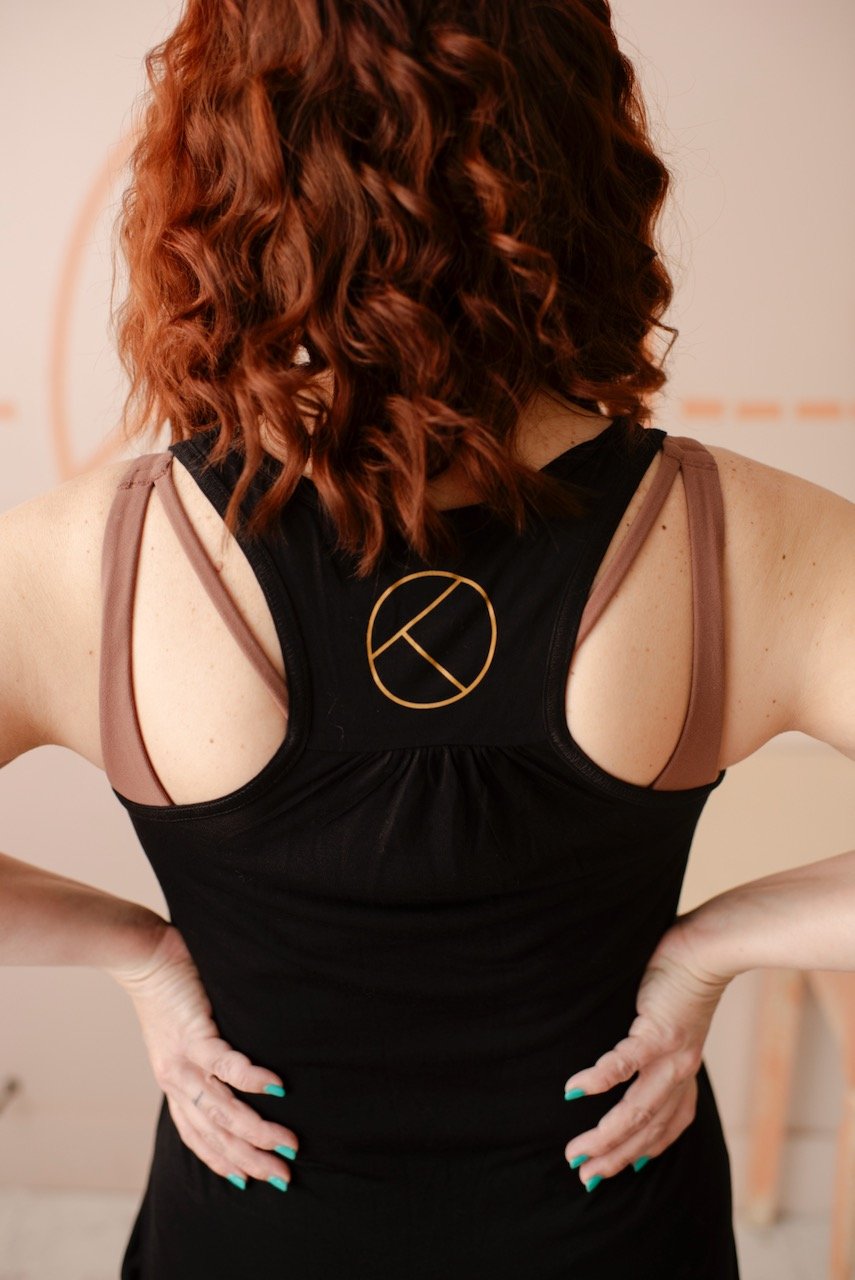
tank or tee of your choice from my pre-printed selection
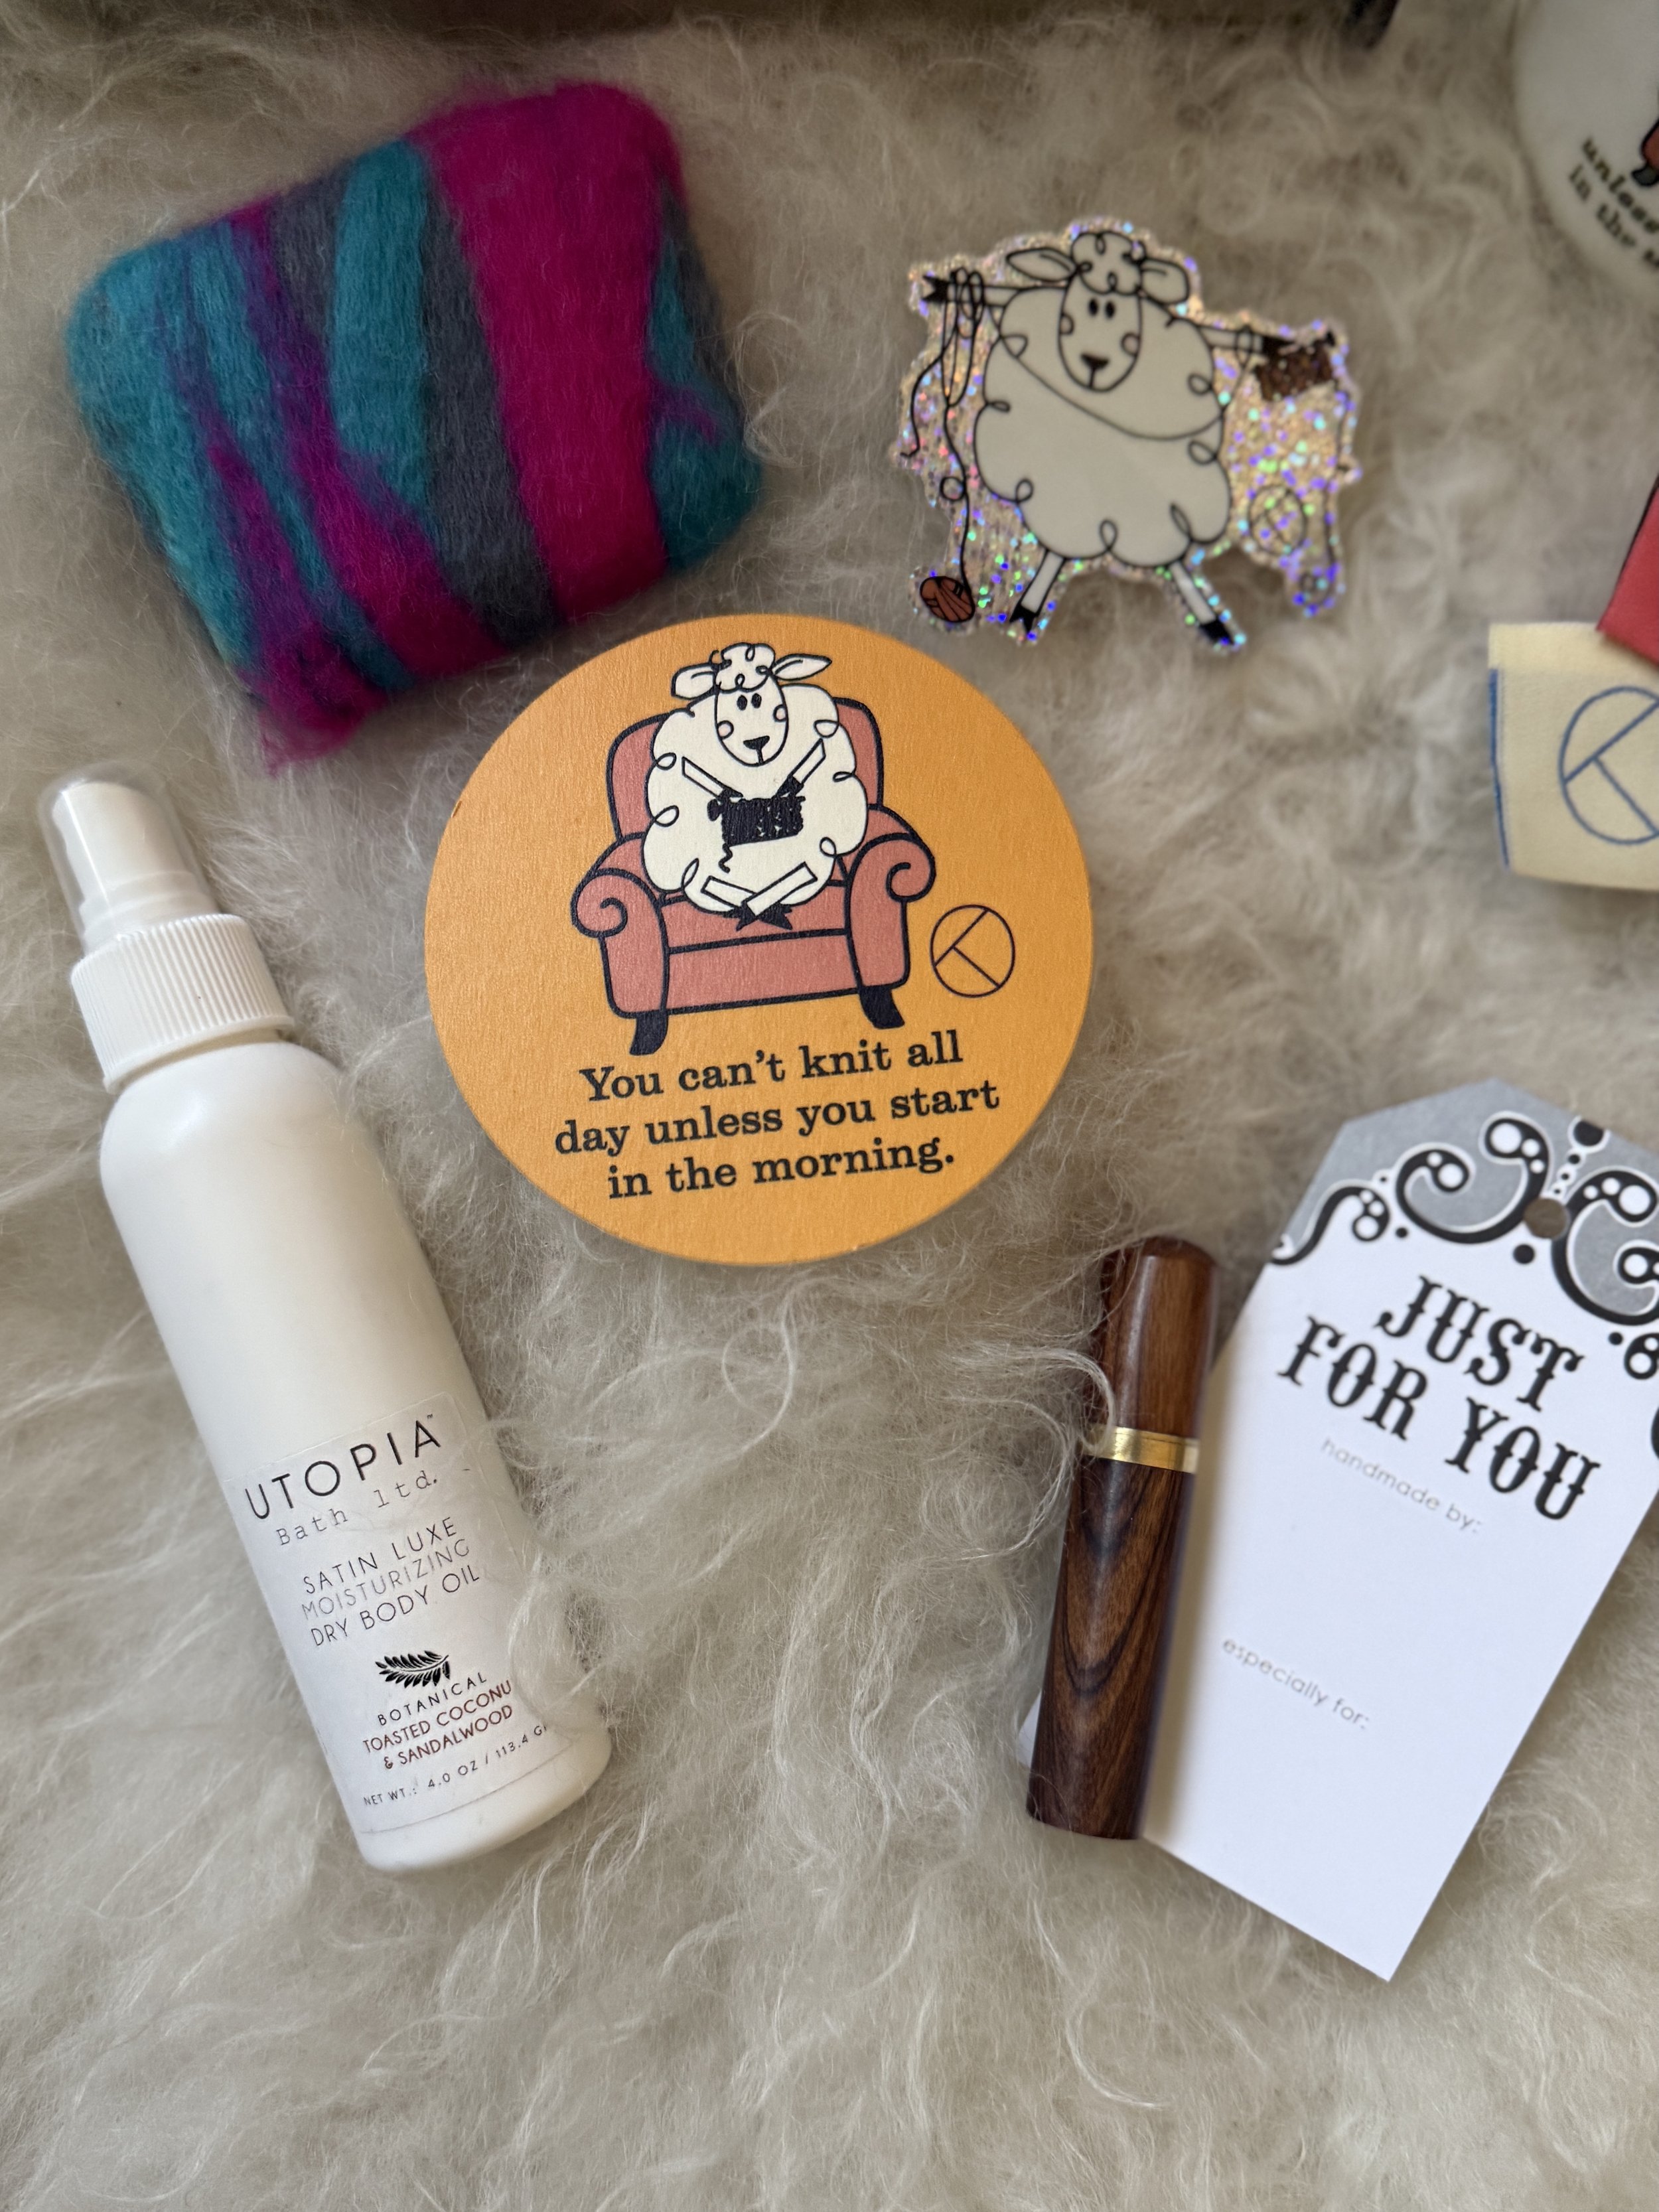
a wooden tapestry needle case including 3 needles, from nnk press
“knit all day” coffee mug
goat milk soap from whitetail farms
“knit all day” coaster
“Tangled Mess” vinyl sticker
Sun Valley Fibers wooden ruler & gauge
2 Knitterella “just for you” project tags
3 cloth KO project tags
-
classic pint berry basket with ladybugs
-
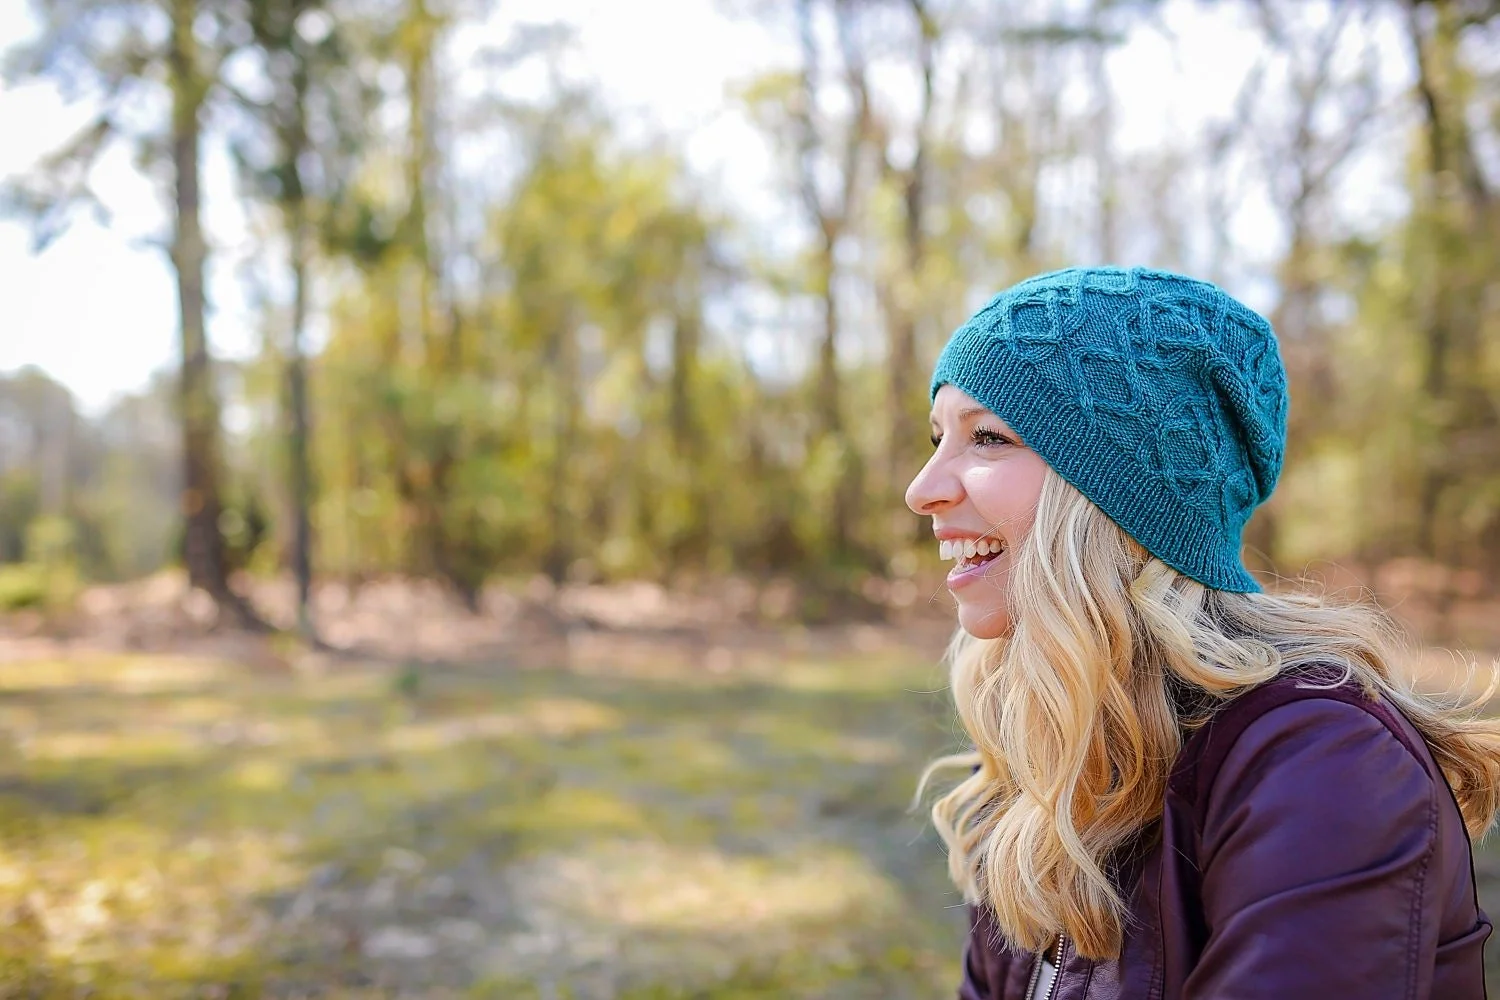
Full-size skein of Making Tracks LITE in a limited edition colorway, two minis of Making Tracks LITE Undyed, bundled up in our "We Will Rock Ewe" project bag in addition to Kate’s Lovebirds Hat pattern and a fabulously coordinating pom pom
-
Minipalooza pack: 6-skein set of 20g cakes
-
Prism Path Shawl Kit (Knit or Crochet)
-
a lucky player will win a coordinating mini set (yarn!) and mini notions zip pouch
-
$100 Gift Card
-
$50 gift card
-
2 skeins from plied yarns along with a tote and a ko pattern of the winner’s choice {$75 + value}
-
Three prize packages up for grabs:
ONE WINNER WILL RECEIVE THE SUMMER CRUSH ISSUE OF POM POM MAGAZINE, A BUNDLE OF MINIS AND A HANDMADE SCRUNCHIE
ONE WINNER WILL RECEIVE LAINE MAGAZINE, A SINGLE SKEIN OF LEIZU FINGERING AND A HARD COPY VERSION OF THE TWISTY VIOLET CAP WHICH ALSO MEANS YOU GET THE DIGITAL VERSION OF MY NEW TWISTY LACE HAT WHICH IS ABSOLUTELY IDEAL FOR YOUR SINGLE SKEIN
ONE WINNER WILL RECEIVE LAINE MAGAZINE & 2 SKEINS OF LEIZU FINGERING
-
two skeins of Yani fingering Assigned Pooling yarn in the colorway “Give me Soul” & a stunning handmade ice-dyed notions pouch.
-
two winners will receive $35 gift cards to shop svf!
-
Trug (bag) in the winner’s choice of in-stock print patterns
-
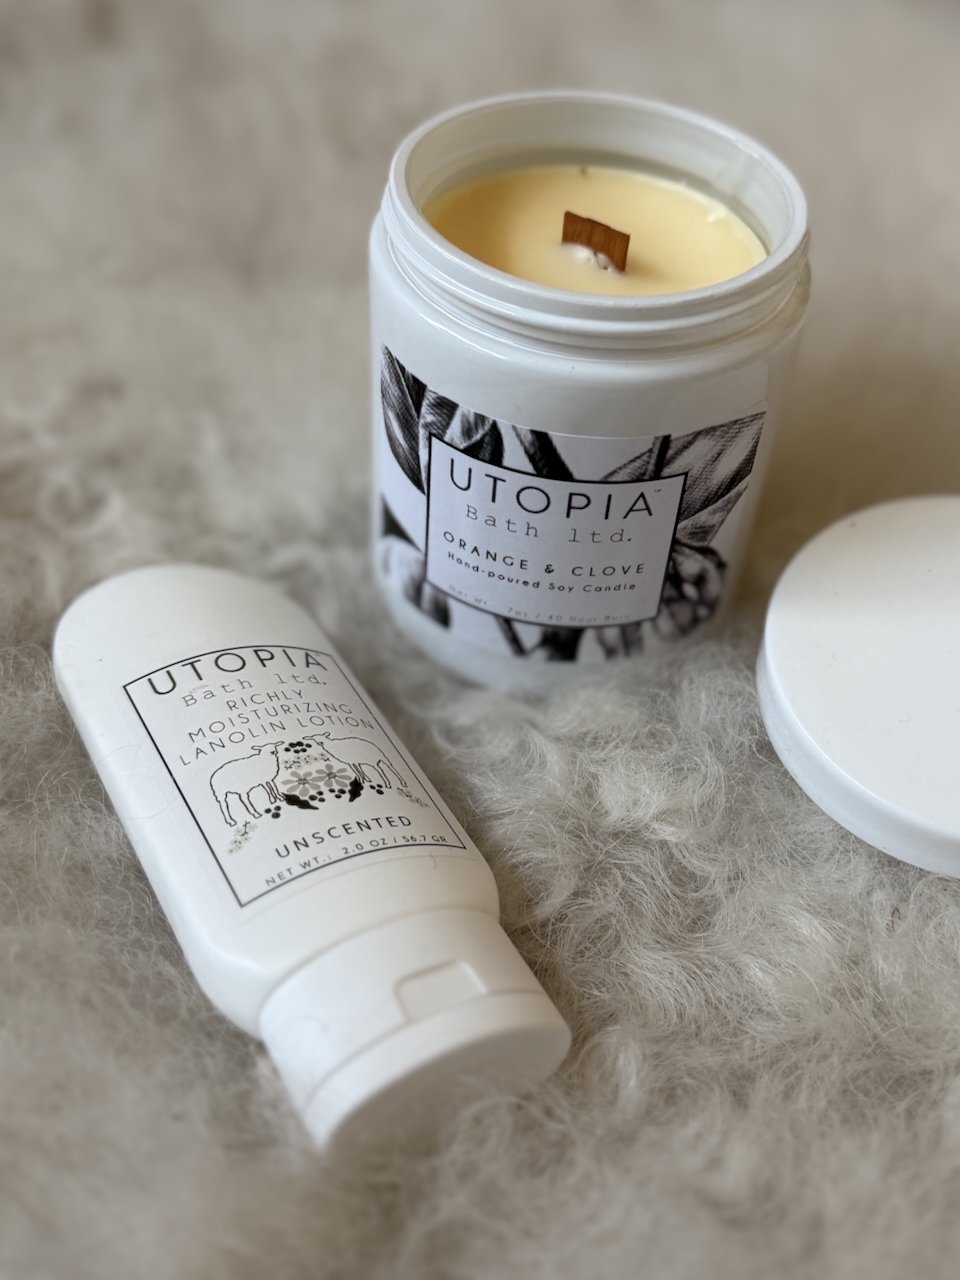
2 oz unscented richly moisturizing lanolin lotion + an orange & clove scented 7 oz candle {$40 + value}
-
6 skeins Retrosaria Vovo Rosa Pomar, 2 skeins each in 3 Marled colors including Dust Pink, Lisbon Blue, & Undyed for approx 900 yards total along with a beautiful bag designed & illustrated by blue rabbit house + project tag {$115+ prize value}
-
$30 Gift Card
-
Mini Marshmallow set: 7 mini skeins, composed of 90/10 extra fine superwash merino wool and nylon. Each mini is approx 20 g with 89 yards. {$55}
-
$75 gift card
-
details coming soon!
-
details coming soon
la bien aimée
our primary sponsor this year is la bien aimée.
not only are they offering a fabulous prize, they also collaborated with us on our makealong design for both the knit And crochet versions!

one lucky winner will receive a 100€ gift card for fabulous shopping from lba.
about la bien aimée
Established in 2015, La Bien Aimée is an artisanal dye studio located in Paris, France. Aimée Gille and her team dye beautiful and sophisticated colors of yarn that reflect a unique and vibrant point of view.
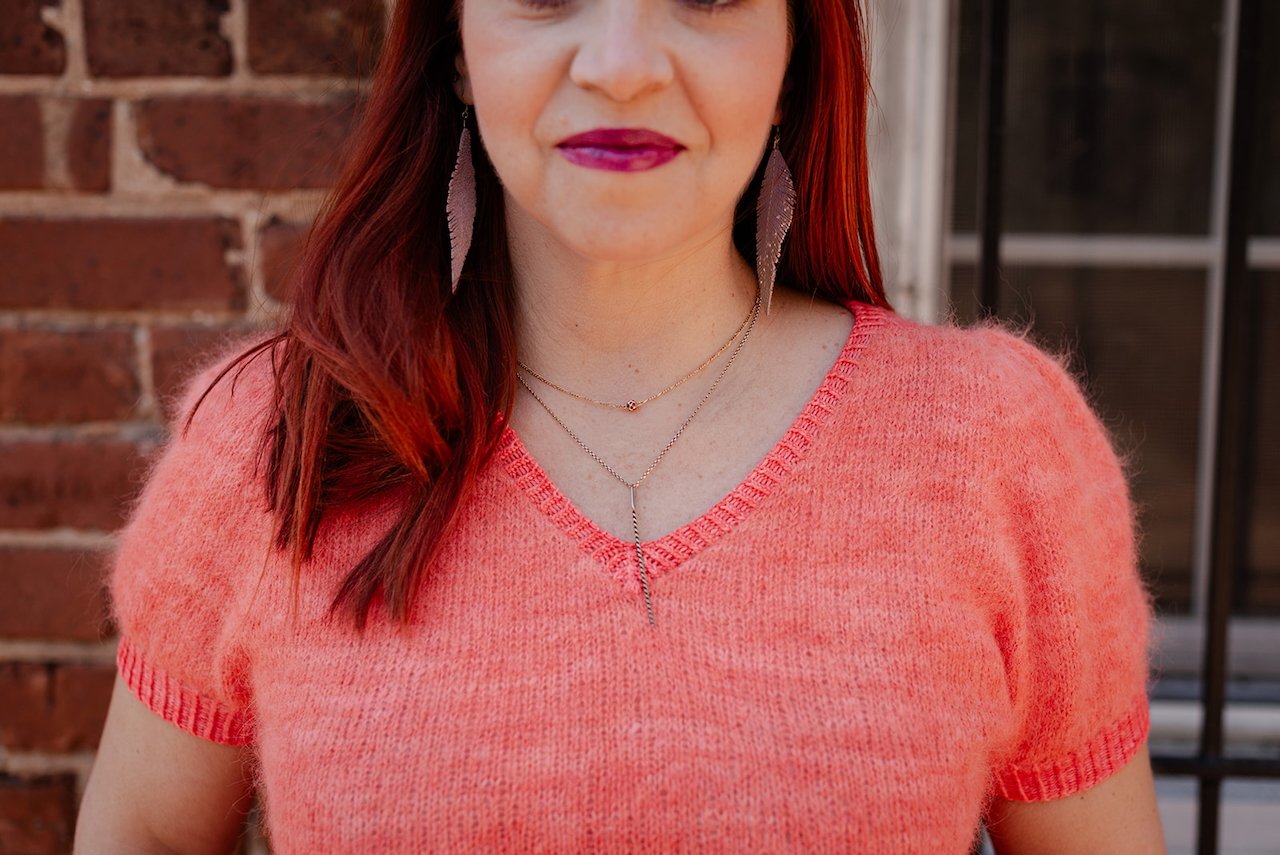
not only do I consider aimee a precious friend and have had the pleasure of her company on multiple occasions, I’ve been honored to work with lba on a number of designs, so enjoy the pics below if you need some inspiration on what to spend that gift card on! click on the photos for details.


anzula yarns
one lucky winner will receive my Serenity Sweater pattern and 10 Skeins of Serenity in the Au Natural colorway. serenity is 100% cashmere and this prize is valued at $510. Yup, you read that right.
as with la bien aimée, i’ve partnered with anzula with a variety of projects and I had to share them with you to brag on this awesome company.

about anzula
Anzula is located in Downtown Fresno, California. We are passionate about good yarn and vibrant colors. Our team hand-dyes yarn and fibers made from the most luxurious fibers in the world like cashmere, camel, tussah silk, linen, merino, targhee, tencel, alpaca, yak, and milk protein. Our intense love of knitting, crocheting, weaving has lead us to create over 140 stunning colorways, all of which are available in every yarn base we offer.


bad sheep yarn
one lucky winner will win 3 skeins of the yarn of their choice from bad sheep yarn!
this company is special not just because of their gorgeous products, but because our very own britt is a part of it!
about bad sheep yarn
HI, I'M MARCIE. I’m the artist behind Bad Sheep Yarn! I started to knit when I was 10 because I loved the Little House books and it was just the next logical step to becoming Laura. I kept knitting all through my teenage and adult years and eventually I ended up here, running my own yarn dying studio! And what a delightful whirlwind it is. At Bad Sheep Yarn we firmly believe that the beauty of hand dyed yarn is that it makes every stitch an exciting new adventure. It’s my honor and joy to create yarn that makes you fall in love and your fingers itch to create.


black mountain yarn shop
one lucky winner will receive a 25$ gift card, candle, BMYS sticker & two cloth labels from this fabulous lys. this prize is valued at over $50 and you’ll have no trouble at all spending that $25… just sayin’.
about black mountain yarn shop
BMYs is located in the north carolina mountains and a frequent favorite stop of kate’s! owner’s danni & jason have hosted kate in person on more than one occasion (they even got ryan, “mr ko” to come), and are always generous when it comes to supporting bingo! you may notice that benjamin, jason & danni’s son, is a favorite snuggler of mine!


birdie parker designs

oh this is such a good one! one lucky winner will receive the Tourmaline
Crafters Talisman valued at
$125.
I ran into kristi at nash yarn fest and it was such a treat! I have quite the collection of her products myself and if I wasn’t an ethical individual, I may not have posted this particular prize, lol!
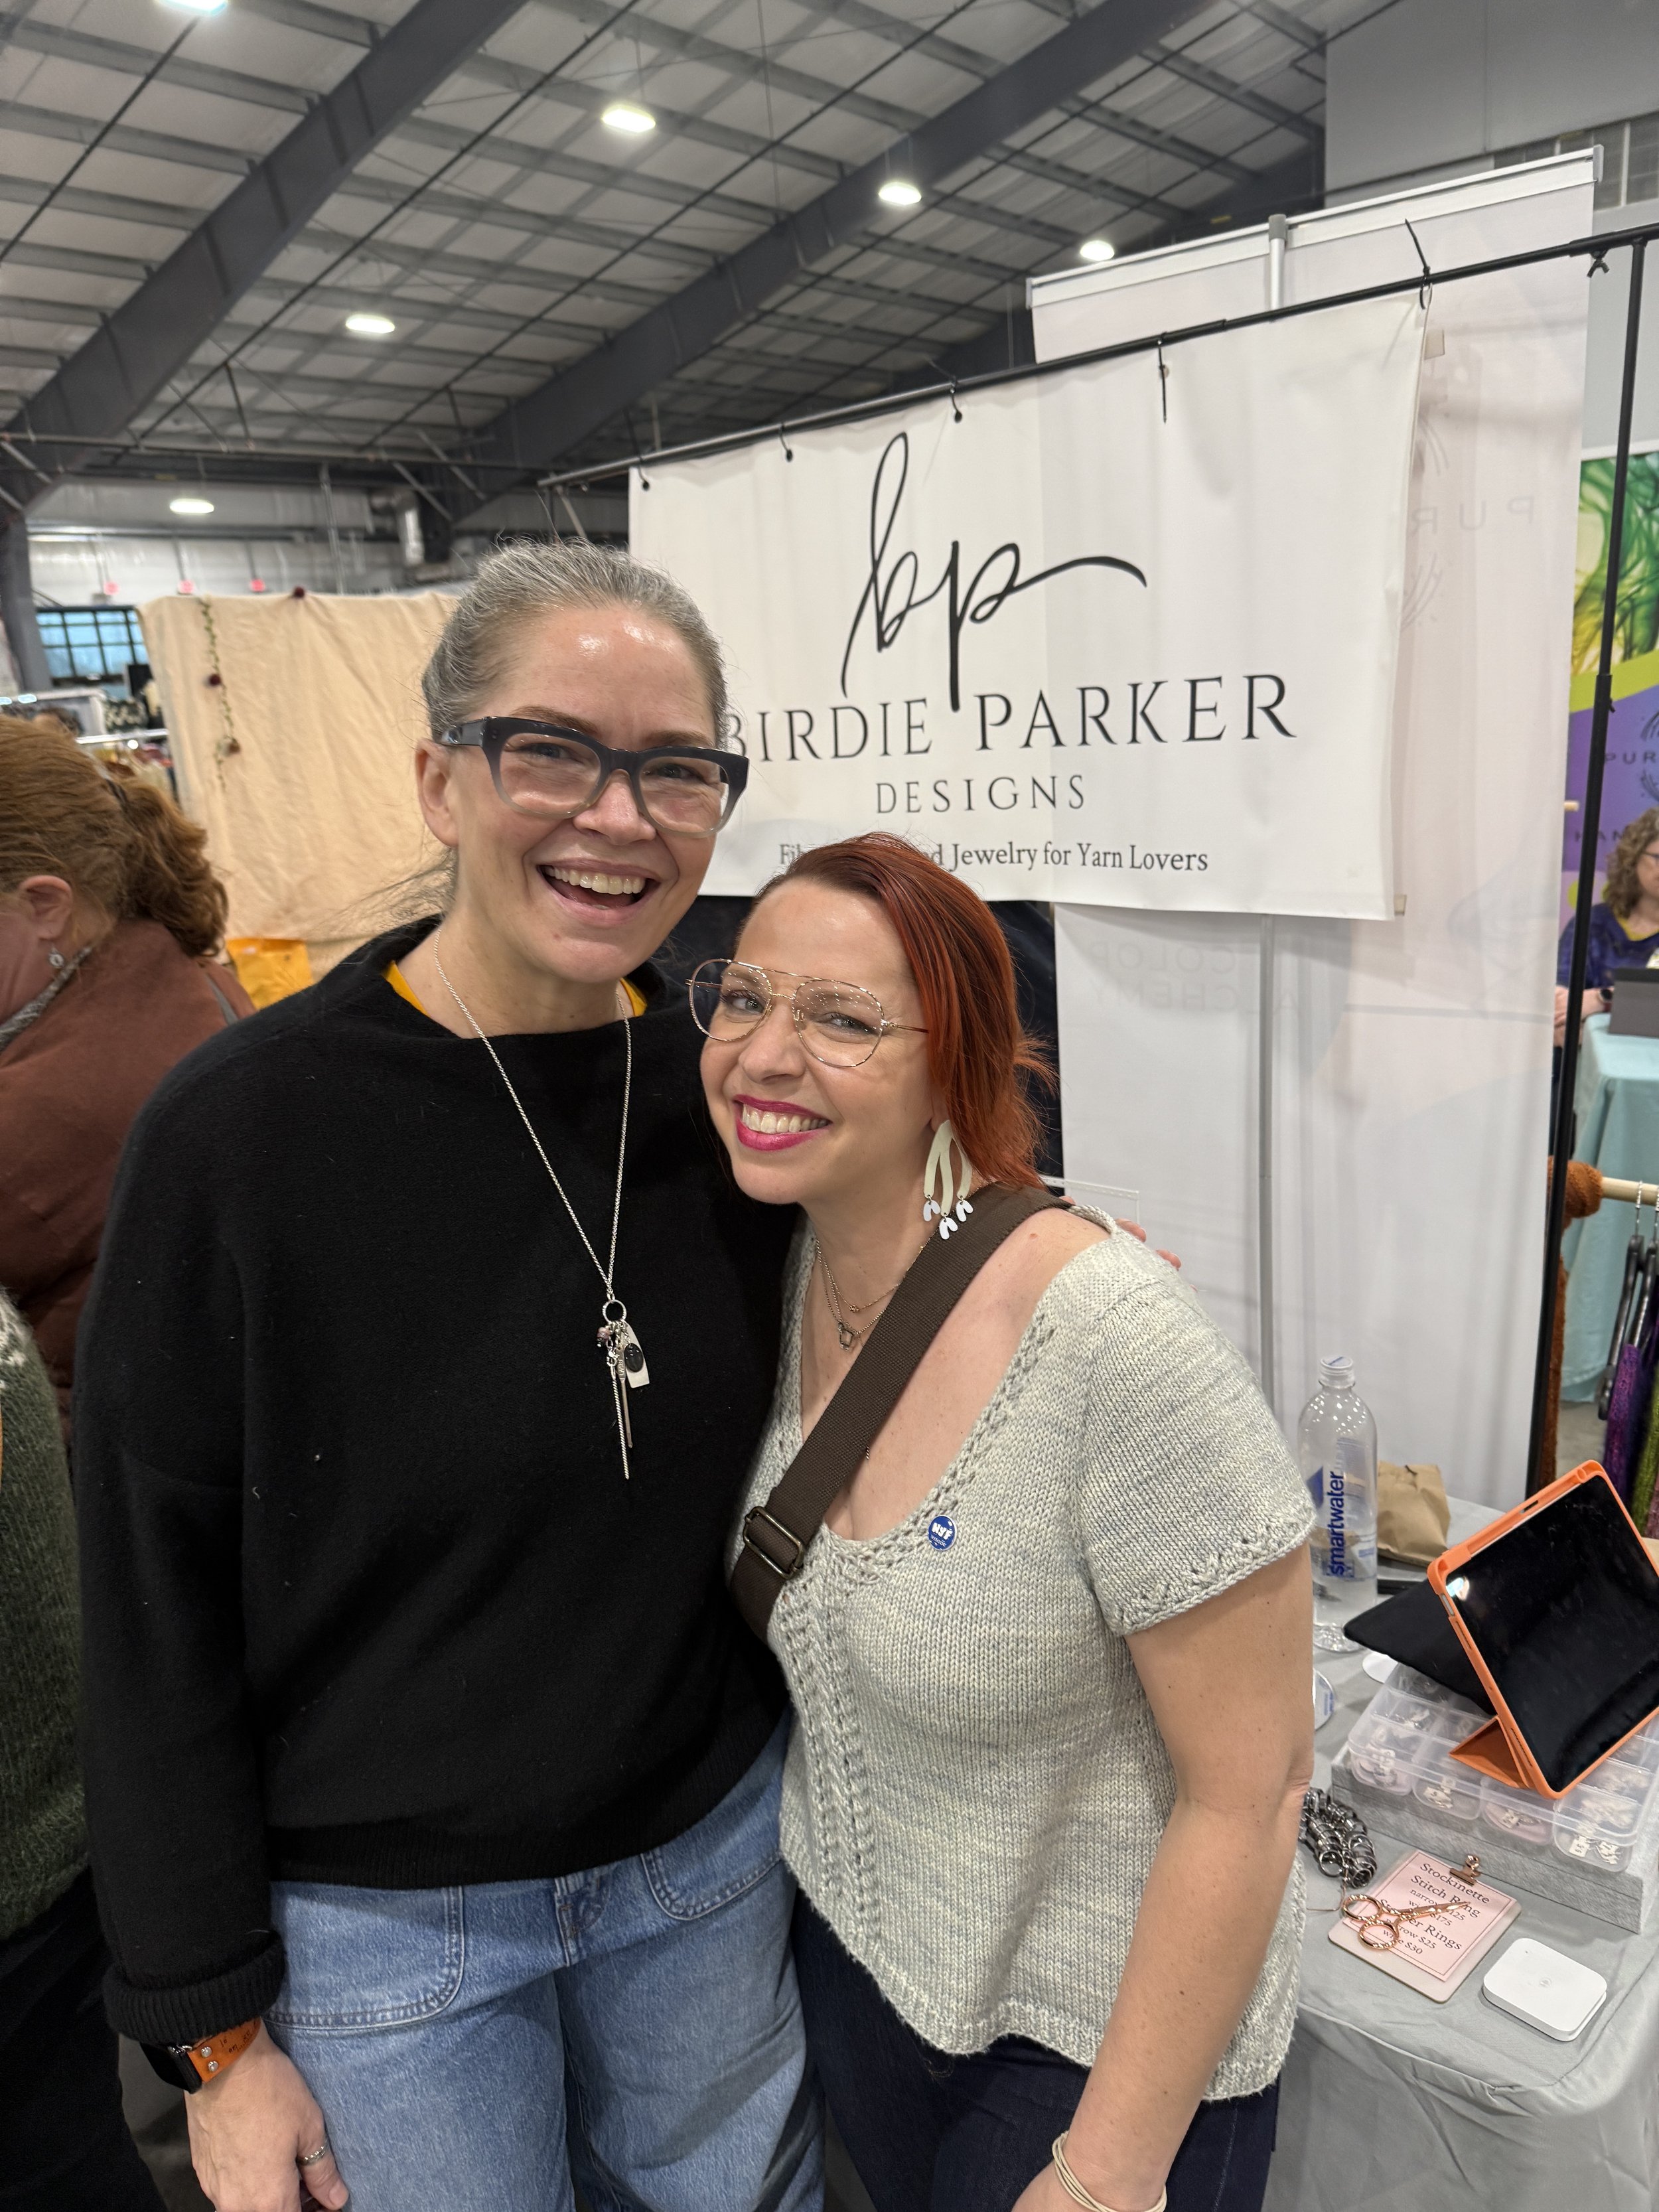


about birdie parker designs
Birdie Parker Designs is a line of jewelry and accessories for knitters and crocheters, fiber artists and yarn lovers. All designs are crafted entirely by hand by Kristi Jensen in her home studio in Northridge, CA. A lifelong dabbler in many art forms, Kristi earned a BFA in Metalsmithing from California State University Long Beach in 2016. Birdie Parker Designs came about as a desire to combine her two passions, Metalsmithing and Fiber Arts. She utilizes many different techniques to create the knitting themed jewelry and accessories, including electro-etching, kiln-fired vitreous enameling and hydraulically pressed forms.
When she's not in the smithing studio, Kristi can most often be found knitting, sipping wine and actively trying to contain an ever-expanding stash of yarn.
dyeing wishes yarn co.
one lucky winner will receive yet another incredibly generous prize, a $100 gift card to dyeing wishes for whateva ya fancy!
about dyeing wishes
Playfully dyed yarn and spinning fiber. I'm a one woman operation based in Connecticut. I'm so grateful that I get to bring my love of knitting & crochet, yarn, art, nostalgia, and the fiber community together to bring a product to the community that helps to spread joy and love! I'm constantly inspired by nostalgia and the world around me, and when I'm playing with colors on yarn and fiber I'm at my happiest!

fangirl fibers
are you loving these gift card prizes as much as I am? another lucky winner gets $100 to spent at FGf!

about fan girl fibers
Fangirl Fibers specializes in producing high-quality, hand-dyed yarns inspired by various fandoms from pop culture, literature, movies, TV shows, and gaming. Our unique approach combines the passion of avid fans with the expertise of skilled artisans, resulting in yarn collections that resonate with enthusiasts that allow them to create unique. one of a kind creations. Our product line features a wide range of hand-dyed yarns, notions and apparel are meticulously crafted to reflect the essence of each different fandoms. Our collections include exclusive colorways, and themed kits that cater to knitters, crocheters, weavers, and other fiber artists.


an oh so useful and lovely prize! ONE LUCKY winner will receive a set of hello lavender’s Long Floral stitch markers. this set includes a primary marker and two accent markers. The entire set will come with Lever Back attachments that fit up to 8mm knitting needles.

you know I love roses so I just adore this set! it may or may not be in my cart right now… i’m so grateful that britt introduced me to this lovely company!
about hello lavender
Reshma is the founder of Hello Lavender. She is a polymer clay artist who makes stitch markers and earrings, and she recently began offering hand dyed fiber and yarn as well. She started the business back in 2016, and after launching stitch markers in 2020, her husband Mike was able to join the business full time in 2021.


hudson & west co.

this lucky winner will recieve The Hudson Beanie kit, designed by Meghan Babin. this hat is a highly customizable beanie for everyone. the marl is created by holding two strands doubled of h&w Weld in contrasting colors, creating an eye-catching fabric. The kit includes two contrasting skeins of Weld, the pattern, one of our custom foldover labels, and an H+W project bag.
i’ve known sloane for years and years, and was so delighted when she and meghan created their stunning yarn line! they are so talented both as designers and everything that goes along with running a yarn company. i’ve loved working with them through the years!
about hudson & west co.
Hudson + West Co. is a yarn company dedicated to bringing innovative American-produced yarns to the handknitting market, paired with modern and wearable designs that highlight those yarns’ best qualities. Designer-driven and knitter-focused, Hudson + West Co. is about making fine yarns that you’ll want to return to over and over. We create yarns that support the ready-to-wear inspired garments and accessories that form the core of the modern knitter’s wardrobe. And we produce our yarns in the U.S., using a traceable, sustainable, and fair supply chain.


indigo dragonfly
&
Kim McBrien Evans
about indigo dragonfly
Indigodragonfly offers our individual and unique takes on traditional yarn dyeing, refusing to be a cog in the cookie-cutter yarn industry. We specialize in luxury yarns with an emphasis on finding the best yarns as well as developing custom yarns with our global-wide mill partners to bring you products no-one else has. We are also well-known for our humour – we could call that blue skein Dye Lot #346 but where’s the fun in that – one of our yarn clubs is the Smart-Ass Knitters for World Domination Club; ’nuff said?
about kim mcbrien evans
Kim believes all bodies are good bodies and deserve clothing that fits. She also believes that clothing should be dynamic and exciting to knit and to wear. Known for designs that turn abstract ideas into colour-filled hand knit reality while simultaneously fitting and honouring every body, Kim aims to revolutionize sweater fit, sizing, and how diverse bodies are represented in the yarn world through research, education, and collaborations with makers worldwide.
it’s a two-fer!
Kim is a designer & she’s also got an amazing yarn co. so, I’m listing both prizes together. one winner will receive an Impervious Shawl kit. Another winner will receive a one-on-one sweater fit consultation with kim. this is absolutely golden if you want to learn more about how to create sweaters that fit your body.
the Kit contains:
3 skeins of Cariboubaa Sock yarn in vibrant colours (you will choose the colourway you want!)
dice! (required to knit the shawl)
super yummy for any shawl lovers! I’ve seen this shawl in person and it is absolutely stunning.
Fit Consultation can be used to ask Kim anything you wish about Sweater Fit, for example:
how to choose the right size for your body
how to make simple length adjustments
how to modify a sleeve
why pattern x didn't fit well and how to adjust it in the future
how to ensure the sweater fits in the shoulders
if you know me, you know I am totally passionate about this particular subject (tailoring workshop) and I know that whomever wins this particular prize will truly get a priceless experience!


the katy lin boutique
&
kate oates
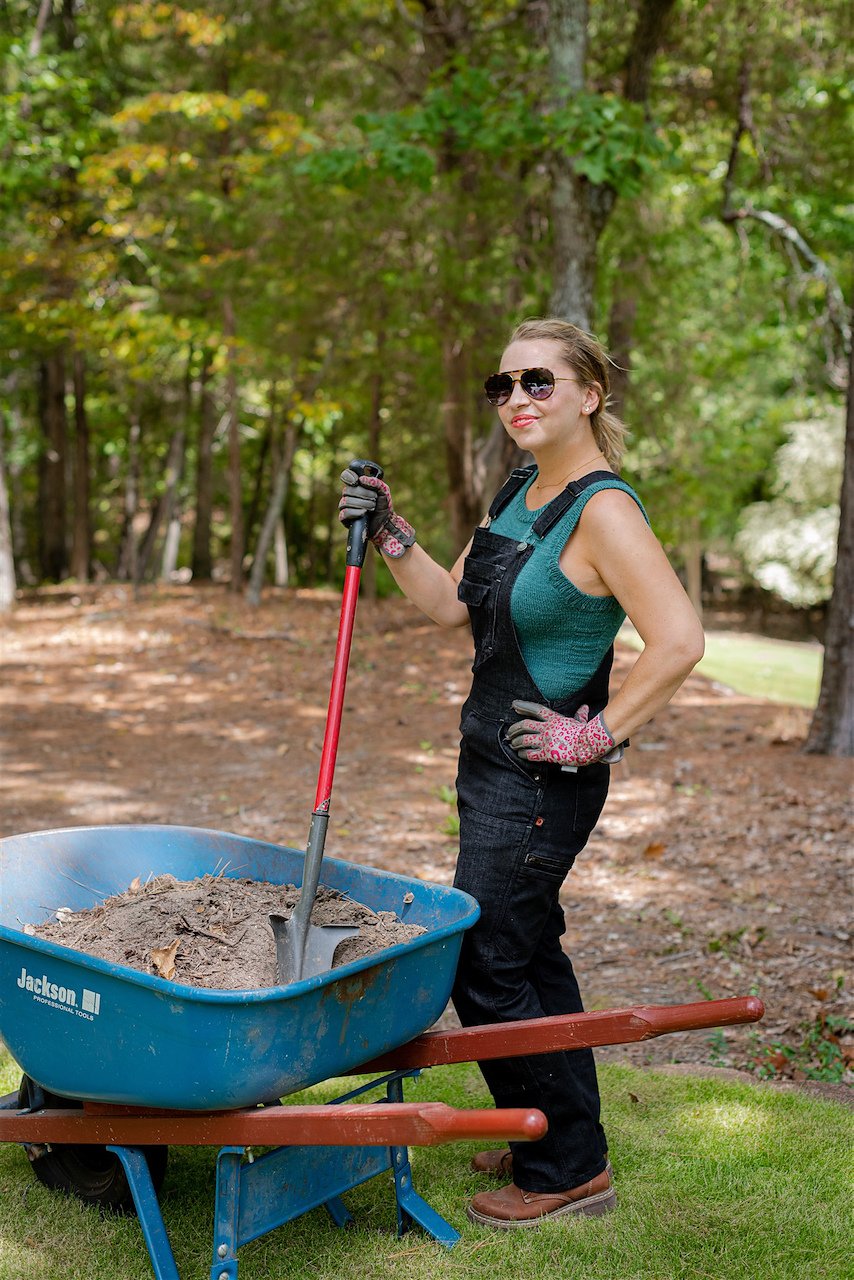
yup! it’s me! I have put together two prize packages and I hope you’ll love them. they are composed of the same products, however they also include a choice! each winner will receive:
a hard copy, book version of my 2025 stitch & beach capsule collection (instructions for 3 sweaters) along with a digital drop of all four patterns (stash & beach isn’t included in the book but it is in the collection & you’ll get it!) {$35}
the tank or tee of your choice from my pre-printed selection {$19}
(note: this does not include print on demand tanks, tees & dresses)a wooden tapestry needle case including 3 needles, from nnk press {$12}
“knit all day” coffee mug {$25}
goat milk soap from whitetail farms {$12}
“knit all day” coaster {$3}
“Tangled Mess” vinyl sticker {$3}
sun valley fibers wooden ruler & gauge
2 kniterella “just for you” project tags {$7.50}
3 cloth KO project tags {$6}
again there are two of these prize packages available and each are worth upwards of $165. if you see something in the photos that I’ve forgotten to list, it’s included too. 🤣 it was a lot to write out!
I won’t take more page space to describe myself, but if you’d like to learn a little bit about me, just click here.
As for my boutique, I adore curating selected knit-friendly & self-care products from independent makers.


this might just be the cutest prize this year! this winner will receive jam pdx’s classic pint berry basket with ladybugs {$40}. It's made from porcelain clay and decorated with tiny ladybugs crawling around the edges. It will be perfect for summer berries, or snacks of any kind!
about jampdx
JaMpdx is the collaboration of Jenn Gauer and Meghan Radick, two friends who have been making ceramics together since 2004. Jenn throws pots on the wheel and Meghan decorates them using cake decorating techniques. Clay frosting! We make a line of ceramics that inspire crafters to fully enjoy working with their yarn, from mugs with crafty themes to yarn bowls for holding your project in process.
junction fiber mill

this fortuitous winner will receive a fabulous kit that includes a little of me and a lot of JFM! this prize includes one full-size skein of Making Tracks LITE in a limited edition colorway, two minis of Making Tracks LITE Undyed, bundled up in our "We Will Rock Ewe" project bag in addition to my lovebirds hat pattern and a fabulously coordinating pom pom from my seriously legit collection, a value of $80+.
our live with jfm was SO much fun! despite technical difficulties, we totally won. check it out here to learn more about this incredibly conscientious company.
jfm’s Making Tracks yarn is a variegated blend of fine Merino, Targhee, and Corriedale wool from flocks in Idaho to western South Dakota. Scoured and combed at Chargeurs, it is hand-dyed, pin-drafted, spun, and finished at their mill. Proudly 100% American-grown and produced, this non-superwashed, non-mulesed yarn pairs beautifully with solid colors for stunning colorwork or can be used on its own for gradual color shifts.
about junction fiber mill
Junction Fiber Mill is a small batch wool processing mill started by two sheep farmers/friends, Amanda & Peggy. Nestled in the heart of White River Junction, Vermont, Junction Fiber Mill is more than just a mill – it's a community of fiber enthusiasts dedicated to creating high-quality, breed-specific yarns. Our journey began in 2021 when Amanda and Peggy came together over a shared passion for fiber. Today, we've grown into a talented team of people who share our love for crafting beautiful, sustainable yarns.\
At Junction Fiber Mill, we are committed to:
Supporting American Wool Growers: We source our wool both locally and domestically, ensuring that every skein of yarn is made with care and supports American wool growers.
Crafting Authentic Yarn: We work with real wool, avoiding superwash treatments to preserve the natural characteristics of the fibers.
Creating with Passion: Our hand-dyed yarns are the result of meticulous processes and a love for the craft, providing you with unique colorways that inspire creativity.

juni + si
one lucky winner will receive a Minipalooza pack! It includes a 6-skein set of 20g cakes for your pleasure be it colorwork, striping, smaller projects or whatever. I loved our live where we learned how Jean came up with her company’s name, and so much more. we may have gotten a bit off topic, but it was fuuuuuuuun stuff.
about juni + si
I'm Jean, the owner and dyer of Juni & Si yarns. I dye out of my home in beautiful Snoqualmie, Washington. I started dyeing in 2021 just to see how it worked. After getting the hang of it, I decided to see if anyone else would love what I was doing. Happily, they did and what started as a fun learning experience has turned into an amazing job.
My business name comes from my grandchildren, Juniper and Silas. The logo was designed by my oldest child and includes a sprig of Juniper and a rendering of Mt. Si, which graces the Snoqualmie skyline. My colorways are all names after songs that either have personal meaning or just make me and hopefully you, happy.

knot bad britt
what, you didn’t think my amazing partner was gonna put together an incredible prize? of course she did! a winner will receive a Prism Path Shawl Kit which can be knit or crocheted. that means Yarn + pattern. 🤘🏽
rock on, britt.
i introduced her in our initial bingo post, so click here to learn more about how utterly fabulous she is.


magpie fibers
those magpies always have the cutest goodies up their sleeves! a lucky player will win a coordinating mini set and mini notions zip pouch: Featuring a palette of coordinating colors with dreamy vibes, each skein is a unique colorway, perfect for standalone projects or combined for a larger masterpiece. Spun on our luxurious Swanky Sock base (80/20/20 Wool/Cashmere/Nylon), these skeins offer incredible drape and irresistible softness. As a bonus, we've included a handy mini notions pouch with a clear "window" – because who doesn't love tiny treasures?
we also got to go live with magpie, so if you want to see the goods in person, check us out!

about magpie fibers
Magpie Fibers is a small, women owned and operated business obsessed with helping you bring your next project to life with our rich selection of hand-dyed yarns. We take pride in ourselves, but never ourselves too seriously - because making should be fun! We hope you love using our yarns as much as we love creating them.

magpie and I go way way back and so many of my most popular designs were created with their fiber! in fact, my very first “kate oates” design was Dyad, featuring magpie. I have yarn in hand to give this awesome pattern a makeover.


miss babs
drumroll please…another lucky winner gets a $100 gift card to use at Miss babs yarn!

about miss babs
Babs and the Miss Babs Team have been dyeing beautiful yarns in our studio in the mountains of eastern Tennessee since 2005. Miss Babs offers a wide variety of yarn bases from lace to chunky in a stunning range of colorways. Between our semi-solids, repeatable variegated colors (Babettes), and one of a kind colors (Wild Irises) we hope to have the right color - or combination of colors - for your next project.


north bay fiber
from nbf, one lucky winner will receive a $50 gift card. not only does north bay make delicious yarn, jill is a dear friend of mine that has always been supportive of bingo. she was even a partner as a designer years ago and last year we collaborated on my Rhinebeck sweater and were roomies at the show!

about north bay fiber
North Bay Fiber is a women-owned yarn company founded in 2021 by knitwear designer Jill Zielinski, also known as Knitterella. Specializing in breed-specific, custom-milled, hand-dyed, non-superwash yarns, North Bay Fiber specializes in producing yarns that are 100% American-sourced and milled. Each skein showcases the natural beauty of wool, enhanced by rich, hand-dyed colorways designed to inspire makers and elevate their craft.
In 2023, North Bay Fiber expanded into a new facility, strengthening its dyeing operations and opening a brick-and-mortar yarn shop. This welcoming space has become a creative hub for the fiber arts community, offering a thoughtfully curated selection of yarns, kits, patterns, and classes for makers of all skill levels.
More than just a yarn company, North Bay Fiber is a celebration of craftsmanship, creativity, and connection. With a deep respect for the legacy of wool, it continues to inspire knitters, crocheters, and fiber enthusiasts to create pieces they’ll cherish for years to come.
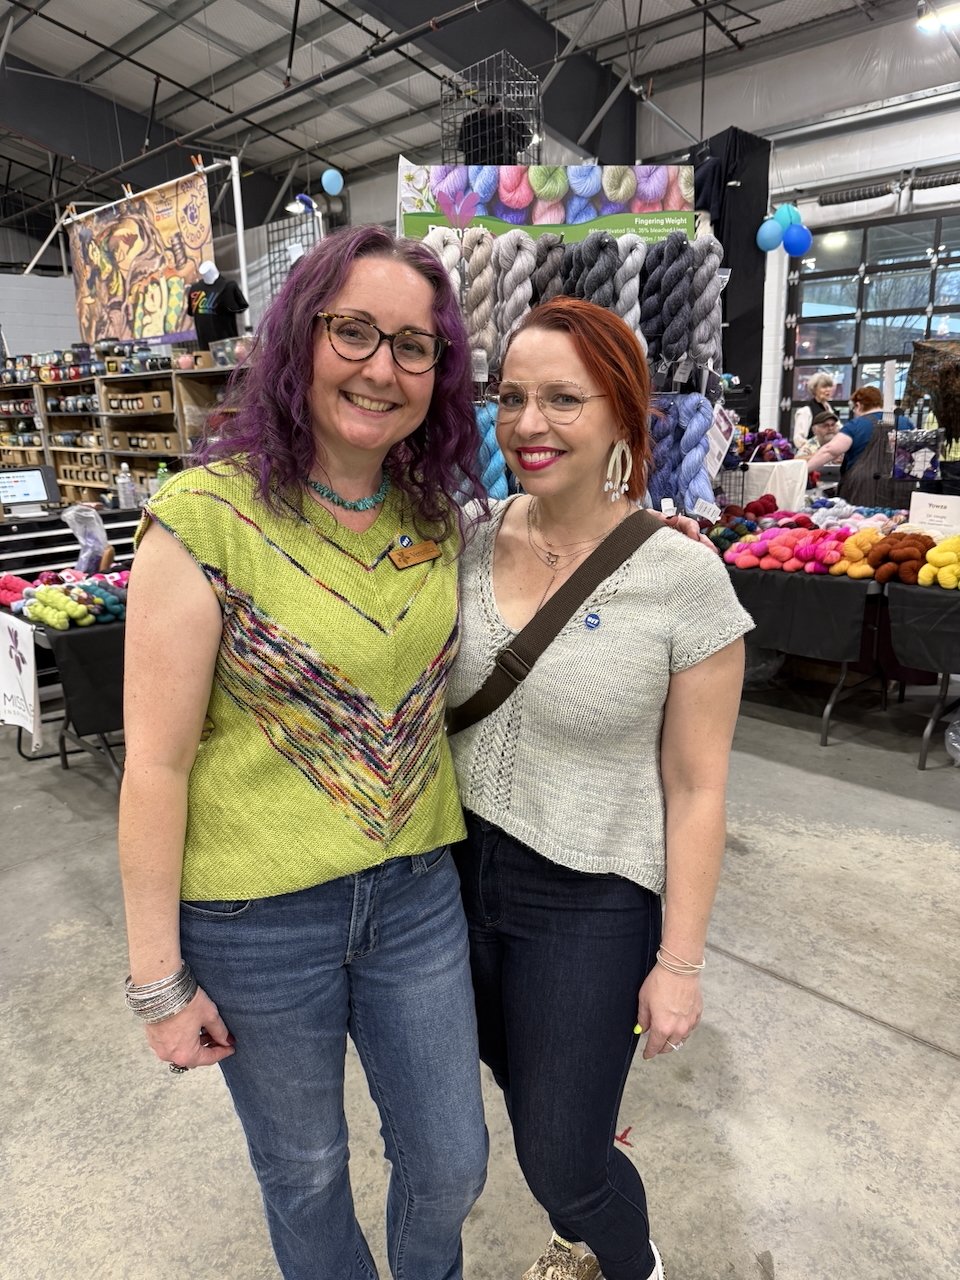
oak city fibers
this delightful yarn shop is awarding a winner 2 skeins of plied yarn along with a tote, and of course, i’m throwing in a pattern to go with! I’ve got a few suggestions, but I decided that this winner will get to choose whatever pattern they’d like (might I suggest you wait until after bingo is over to decide!) whether or not it goes with the yarn.
about oak city fibers
Oak City Fibers was created in the summer of 2023 and opened November 1, 2023. Glen founded the business based solely on building a diverse community of fiber enthusiasts along with an even more diverse offering of yarns for crochet and knitting. The business and community has grown beyond anything he ever thought it would be and continues to thrive based on a safe space, welcoming all people from all walks of life.
i’ve had the pleasure of being an instructor at oak city fibers and glen was such a wonderful host! it was one of those times where I didn’t take nearly enough photos (a common problem OF MINE) BUT I’LL ALWAYS TREASURE THE VISIT and i’m so glad I got a shot with glen in our fabulously colorful glasses.


JULIE ASSELIN
NOT ONE, NOT TWO, BUT THREE PRIZE PACKAGES ARE UP FOR GRABS FROM JULIE!
ONE WINNER WILL RECEIVE THE SUMMER CRUSH ISSUE OF POM POM MAGAZINE, A BUNDLE OF MINIS AND A HANDMADE SCRUNCHIE
ONE WINNER WILL RECEIVE LAINE MAGAZINE, A SINGLE SKEIN OF LEIZU FINGERING AND A HARD COPY VERSION OF THE TWISTY VIOLET CAP WHICH ALSO MEANS YOU GET THE DIGITAL VERSION OF MY NEW TWISTY LACE HAT WHICH IS ABSOLUTELY IDEAL FOR YOUR SINGLE SKEIN
ONE WINNER WILL RECEIVE LAINE MAGAZINE & 2 SKEINS OF LEIZU FINGERING
I HAD THE AWESOME PRIVILEGE OF ATTENDING NASH YARN FEST WITH JULIE & JEAN-FRANÇOIS, I GOT TO HELP IN THE BOOTH AND HELP MAKERS CHOOSE YARN (ONE OF MY FAVORITE PASTTIMES). JULIE IS ANOTHER LONG TIME FRIEND WHO HAS BEEN A CONSTANT SUPPORT & ENCOURAGEMENT and I’ve got another slideshow for ya below the prize images featuring her yarn on my designs.


about julie asselin
Behind Julie Asselin Yarns, foremost, is us, Julie and Jean-François, two craftspeople driven by the need to offer original yarns that will unleash your creativity.From the conception of our yarns—by perfecting our dyeing processes and promoting local and responsible production—to our vocation, which combines openness to the world and plurality—we want, above all, to reach, include and bring together all fibre-art enthusiasts. For us, a spirit of community and mutual support is of the essence.


yanihandmade
Yanihandmade’s prize is two skeins of Yani fingering Assigned Pooling yarn in the colorway “Give me Soul” & a stunning handmade ice-dyed notions pouch. You’ll have enough yarn to complete a larger version of the shawl “Soho Orchid” by Zuzana Skrabakova (pictured), or any other 2-sk assigned pooling project.

yani is one of the kindest souls i have ever had the pleasure of knowing! we met at black mountain yarn shop several years back and immediately made some trades! I’m obsessed with my ice-dyed sweatshirt, skirt & notions pouches. when I saw the photo of the pouch in her prize, I told her I was jealous of the winner and several days later, I received 2 pouches of my own! how incredibly sweet is that?
about yanihandmade
My name is Yani. YaniHandmade are the Yarns that I dye in my small studio in the south of Pittsburgh, PA and also in Asheville,NC. I find inspiration in the beautiful Asheville mountains, the colors and the light around me, and also the Pittsburgh sunsets and sharp-contrasting seasons. My inspiration from nature extends to my passion for ice dying, which produces such an unpredictable burst of colors that make me happy and that I hope will also bring you a little bit my joy.

sun valley fibers
one more two-fer
two winners will receive a $35 gift card to svf! Jeanette & george are incredibly creative and talented individuals that make the perfect team both professionally and personally ♥︎. sun valley fibers goal is “Bringing you all the colors of the rainbow” and having been an instructor at their retreat & seeing their studio I can honestly tell you that they do just that!

when I was in wisconsin for the svf retreat a few years ago, I got the privilege of visiting jeanette & george’s farm and they even let me drive the tractor. I left with both fabulous experiences and treasured goodies. george is an artist in his own right, an extraordinary woodworker. I purchased a cutting board that I use daily and they even gifted me a bowl before I headed to the airport. the fiber industry is packed with great people.
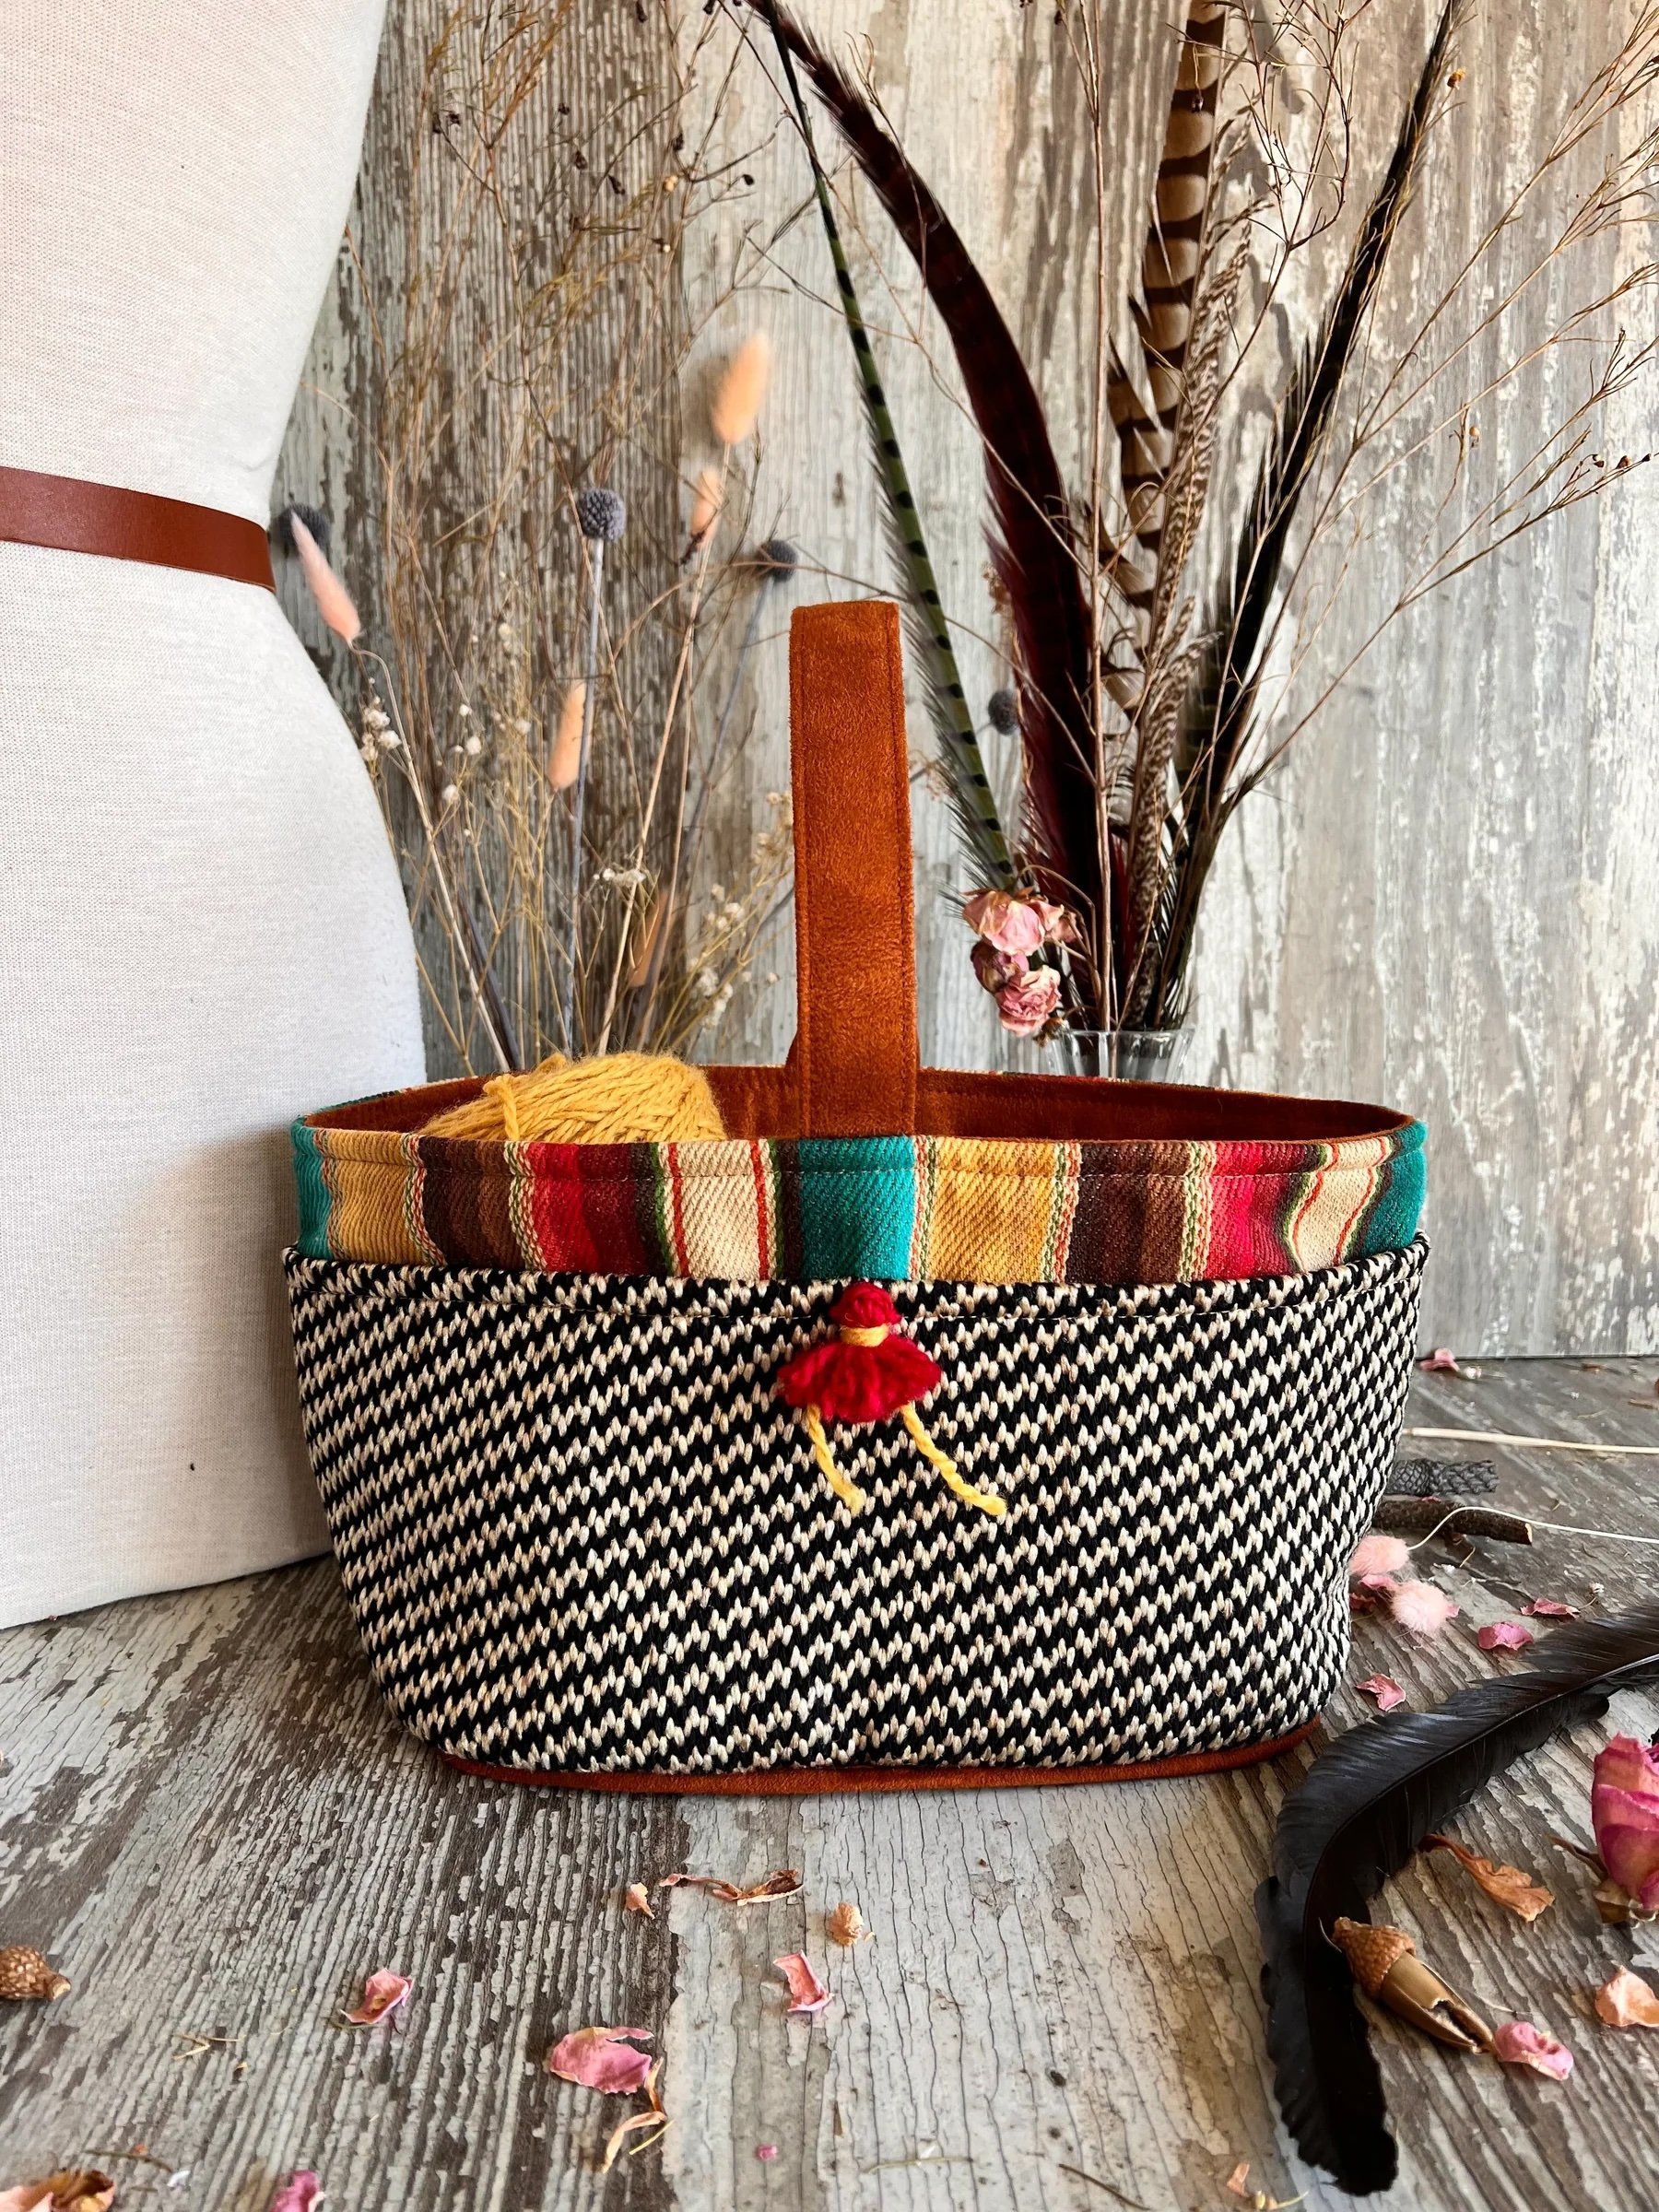
upstudio brooklyn
from upstudio, one lucky winner will receive their original Trug (bag): Perfect for a WIP, gathering flowers and vegetables from the garden, a trip to the Farmer's market, toting cheese, crackers and a bottle of wine, a dozen cupcakes or two pies worth of apples! The UpStudio Trug is designed to get your precious cargo from here to there and look fabulous when you get there! All Trugs are hand printed or painted on and lined with white cotton canvas with an inside pocket for your bits and pieces. The vegetable tanned leather handle will darken with age and use. Trug measures - 12" long, 5" wide and 5" high. Handle is 12" long. the Winner will choose from any in-stock patterns.

britt introduced me to upstudio & I was so thrilled when I saw their booth at nash yarn fest! we got to chat and I got to see the trug in person. let me tell you, if you win this prize you’re gonna adore it! and this is coming from a total bag lady ☺️
about upstudio brooklyn
UpStudio is jewelry and accessories for fiber lovers and the people who enable them. Many of my jewelry collections are inspired by the stitches that we fiber crafters love. My block printed and painted accessories are inspired by the wants and needs I've found as a passionate fiber crafter and maker.


utopia bath ltd.
this winner will receive unscented richly moisturizing lanolin lotion + an orange & clove scented 7 ounce candle. yummy! perfect for some self-care time! the candle has a 40 hour + burn time and a wooden wick, and the lotion is perfectly sized for on the go, whether in your purse or making it through tsa. when I opened my boutique, merilyn was the first person I reached out to. I had fallen in deep love with her best hand créme ever after purchasing it at the new york sheep & wool festival. now, it’s one of my best selling products and I can only imagine this hand lotion is going to be just as fabulous.


about utopia bath ltd., from the owner, Merilyn
This is my second career. I had my own design import business for 12 years until the economy dropped in 2008. I took some time off to try to figure out what I wanted to do next and in searching found this site called, Etsy!
I was inspired by a soap made by a lady in England. I ordered it and thought it was beautiful and then a light bulb went off in my head...HEY! I could do this!I researched, read, took courses all over the country. I was hooked! Soon after my initial batches, I got my first customer. My initial order was 1000 bars! In August 2010, I took a booth at the NY Int'l Gift Show and won as a finalist in the Bath & Body Section's 'New Products' category.
When I started I had a one bedroom apartment in NYC - but now I live on the south shore of Long Island...My rescue terrier, Julia, and I wake up each morning to the edge of a Wetland Preserve...bramble bunnies, fox, the occasional snapping turtle, tons of birds, geese, swans, hawks, racoons...we all co-exist like so many creatures in a fairy tale wonderland. Since my initial days of soap - I followed my heritage and now formulate lotions and creams that many, many customers buy time and again. Funny how life evolves - my great grandfather, grandfather and Dad were/are all chemists! And even now, after having crafted thousands of soaps - I get silly, giddy, crazy excited when I tear open a new bar, lather up and see the bubbles of my creation in my hands! I hope you enjoy my products as much as I did crafting them!
wooldreamers
do you like yarn? (rhetorical) this winner will receive a total of 500g wooldreamers Motiva or Cautiva.
from wooldreamers
Motiva and Cautiva are two collections very close to our hearts at Wool Dreamers! All of the fibers used for these lines are sourced from ranches within 150 km of our mill and are produced by dairy sheep.The wool from dairy sheep is commonly undervalued and ends up composted or burned. We developed these collections to show that these disregarded fibers are a valuable resource! All of Wool Dreamers’ yarns are woolen spun, producing a lightweight feel in even our heaviest yarns! Both Mota and Cautiva feature a “Z twist” construction which is especially great for crocheters who find that their yarn tends to over twist while working.
although I haven’t personally worked with these two yarns, I have worked with manchelopis (Mint Condition is shown below)! one of my favorite parts of our live with wooldreamers was learning how to pronounce it correctly 🤣 I also learned so much about how eco-friendly their processes are. definitely worth a watch & listen.
about wooldreamers

Wool Dreamers is a mill based yarn company from Mota del Cuervo, Spain. We source natural fibers cultivated throughout Spain to bring you uniquely beautiful and hearty materials for knitting, crochet, weaving and anything you can dream of!

yarn bar
this lovely prize is a fabulous collection. this winner will receive 2 skeins each of Retrosaria Vovo Rosa Pomar in 3 Marled colors including Dust Pink, Lisbon Blue, & Undyed for approx 900 yards total along with a beautiful bag designed & illustrated by blue rabbit house (based in belgium) & a project tag.
Yarn bar is yet another generous and wonderful local yarn shop that i’ve been blessed to visit and fall in love with both the shop and it’s owners. Sue & linda are such a fun pair and they have amazing taste! I found myself doing way too much shopping while I wasn’t teaching, and the dance party was probably my favorite minute 💃🏼
about yarn bar
We believe that the fiber world is an amazing place full of kind people and beautiful yarns just waiting to be made into something unique. We are passionate about the rich traditions of handwork, making things, color theory, learning, and sharing time and talent outside the shop walls. Our enthusiasm is evident in the curated yarns, tools, and ideas we have combined to encourage all levels to start from the beginning, enhance & expand current skills, and spark general “fiber creativity”.
We are also firm believers in the importance of independent retail shops within a community. The assortment of places to shop has always contributed to the feel of a town, whether drawing people in for their Saturday Marketing or creating Destination Shopping for visitors. We also love shopping! While anything and everything can be purchased from behind a computer screen, the internet does not care about whether you're studying for an exam, just got into a fender bender, Mom's having surgery, you're off to meet a friend for coffee, are planning some fun travel, or you're here on a work trip. These are the snippets of daily lives that are a part of what makes running a little shop important ~ face-to-face interactions, a little connection in the bigger community. And this is what we especially love about running our local yarn shop - the human connections.


suburban stitcher
a $30 gift card to suburban stitcher is also up for grabs! if ya don’t know how near & dear dianne is to me, you must be new here so thanks for visiting! dianne was recently the featured dyer at my stitch & beach retreat and we collaborated on a 4-piece capsule collection. she’s just as fabulous as her yarn and especially if you haven’t tried it before, this prize is a great opportunity to do just that.

about suburban stitcher
Suburban Stitcher is a hand-dyed yarn business owned and operated by Dianne brown. dianne specializes in fine merino and merino blends, with a focus on beautiful things, nature, and yarn fades. Dianne lives and creates in the suburbs of Houston, Texas.


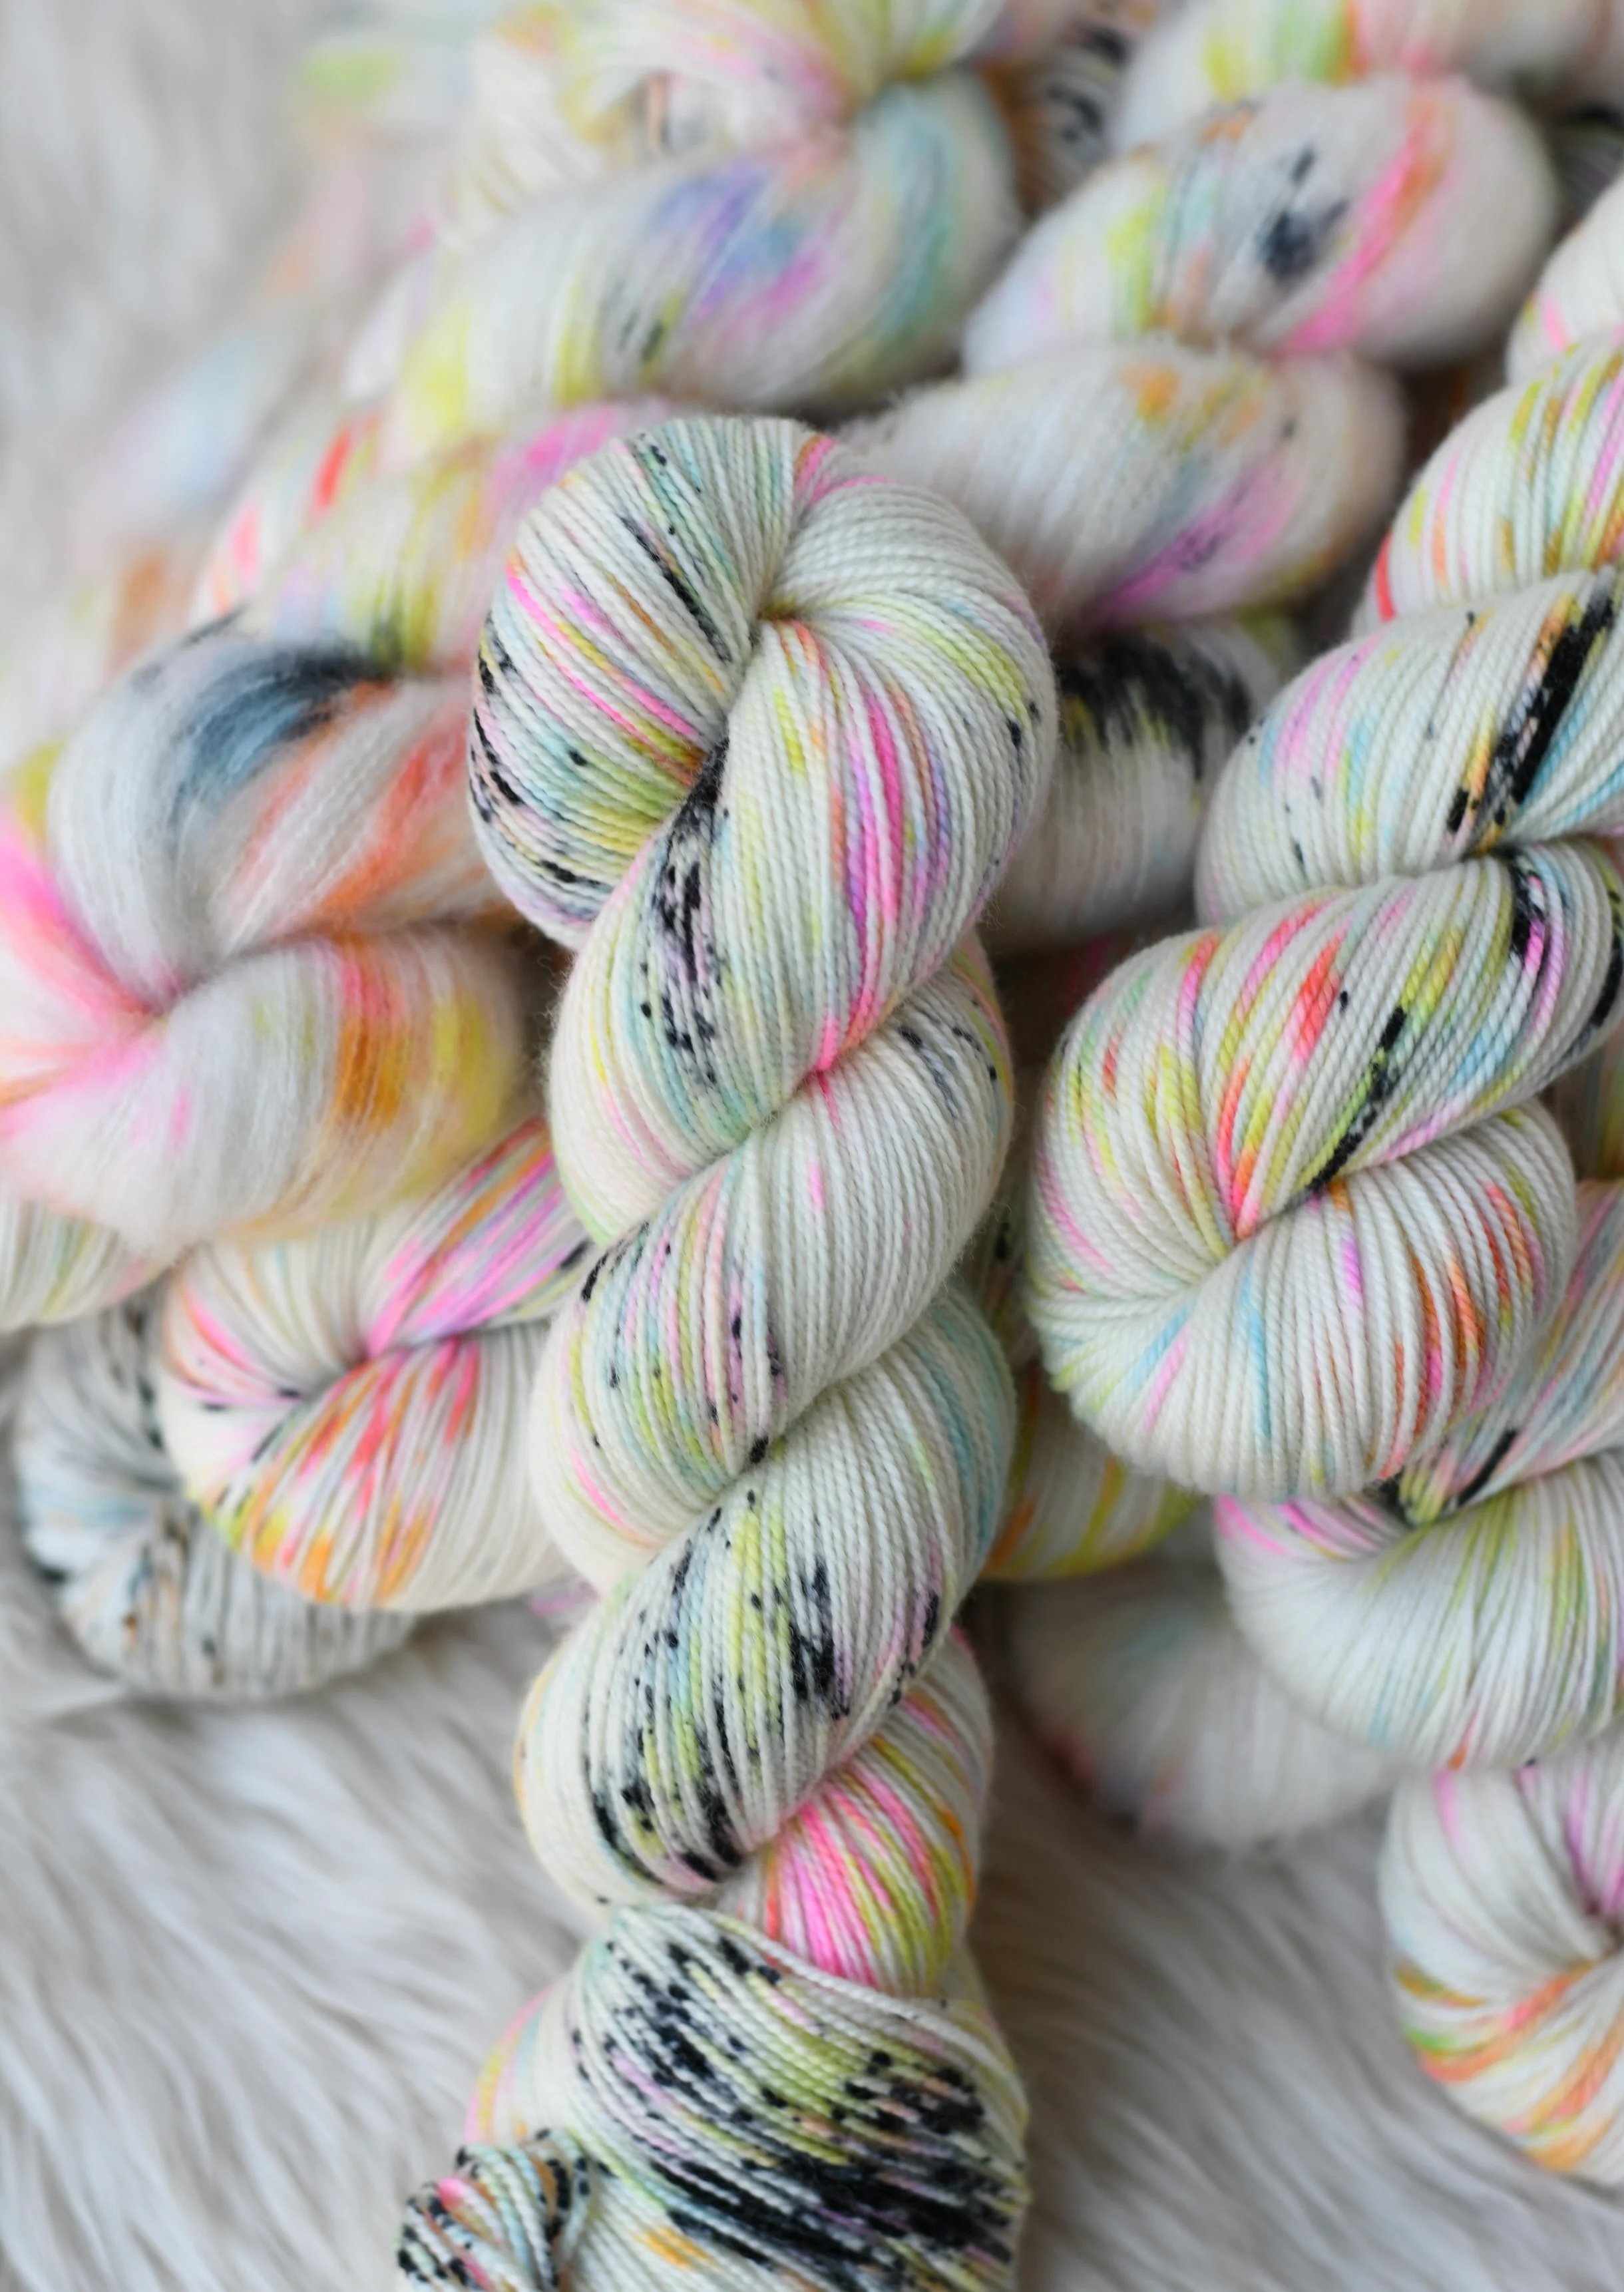
teal torch knits
this squishy yarny prize makes me so happy to look at! one lucky winner will receive a 7-Mini skein Marshmallow set from Teal torch knits. Each mini is composed of 90/10 extra fine superwash merino wool and nylon, approx 20 g & 89 yards. So that’s just about 625 yards of color to play with!
about teal torch knits
Teal Torch Knits is based in Portland, Oregon and owned and operated by indie dyer Christina. She has been knitting and crocheting since childhood and decided to try her hand at dyeing yarn. It started as a food coloring experiment in the kitchen and has grown into a full-time business. Christina pulls inspiration from pop culture, music, movies and tv. Her color palettes range from subtle speckles to bright pastel neons.

treehouse knits

how about $75 to spend with this delightful dyer? you can’t ever have enough yarn and thanks to lauren, another one of our players will get an opportunity to go shopping. although I haven’t met lauren in person, I have designed with her yarn! I created a springy duo when I was an instructor at the hill country weavers retreat several years ago.
from lauren mattinson, owner & dyer of treehouse knits
Hi everyone! My name is Lauren and I’m from Austin, TX. I’m a long time knitter and crocheter. I am lucky to be married John, a very helpful second hand, and together we share Luke, our two year old son. I started my dye journey about 2 years ago by working with another well known indie yarn dyer. I am eternally grateful for the time I had learning and growing as a yarn dyer, but I am bursting at the seams with ideas of my own! I hope you follow me along on this next phase of my hand dyeing career! I am so excited to be building a brand of my own and I hope it brings joy and happiness to many of you!


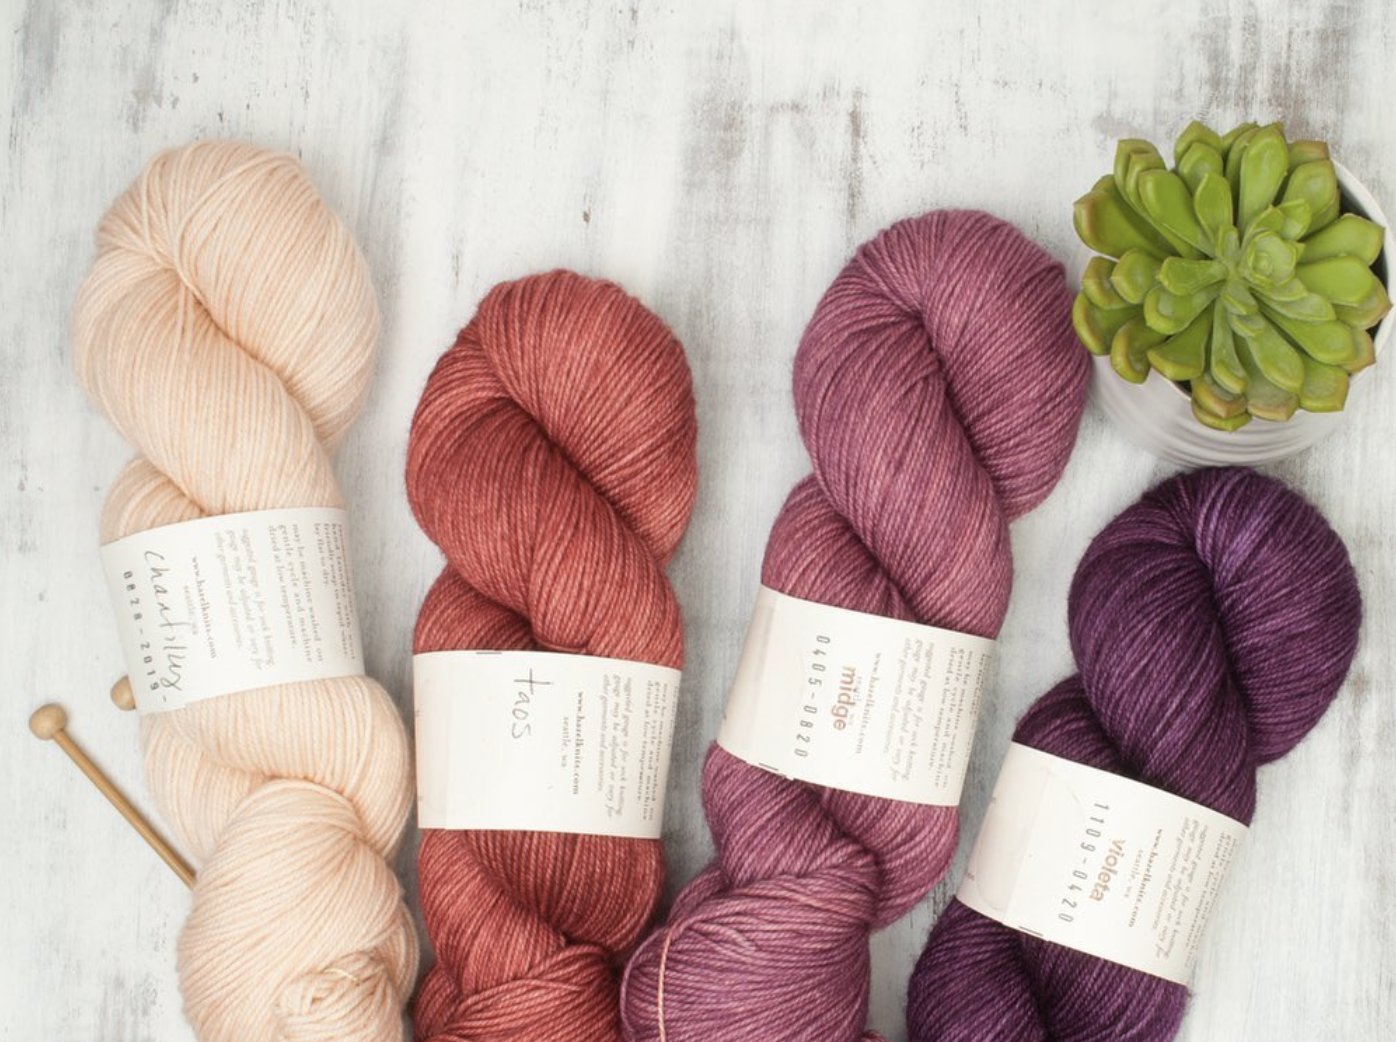
hazel knits
prize details coming soon
about hazel knits
We offer a selection of carefully chosen yarn bases - some custom-milled just for us - ranging from lace weight to worsted weight in a wide selection of spectacular colors. we offer the opportunity to dye-to-order most of our yarn bases to ensure that you can find just the right yarn for your project. Grab a cuppa, sit back and enjoy a relaxing browse through our yarns. The human eye can identify a million colors. Explore them with Hazel Knits.


scented stitches
prize details coming soon
about scented stitches
You know that lingering scent of perfume or cologne on a favorite scarf or sweater? What if it was intentional and not just an after-effect? How about adding a little bit of aromatherapy as you knit or crochet? That’s where Scented Stitches comes in. It’s a knitters’ balm with the extra ‘oomph’ of essential oils. Small batch, hand poured and lovingly blended, the scents are formulated for every day use.


that was a doozy right? But in the very best of ways!
I won’t keep you much longer, but here’s what you need to know:
register for bingo by 3.30.25 and you’ll receive your card before the first play.
register 3.31 - 4.5 and you’ll receive your card within 48 hours, and we will catch you up on patterns & any makealong clues you’ve missed.
registration closes for this year’s makers bingo on 4.5!
you know you want to do
play with us next year
🧶
play with us next year 🧶

Intarsia & colorwork
i’m an adventurous knitter who loves to mix methods & texture. my design, pebbles, is a prime example! you can simplify this design by using only 2 colors, and therefore eliminating the intarsia. but if you’re like me and you enjoy a color pop and a little challenge…this tutorial is here to help! you’ll learn about color dominance as well as how to set up for success when it comes to having multiple bobbins of yarn. no one likes a tangle!

maker’s bingo 2025
fabulous new additions
to the 7th annual game
registration is now closed for this year’s game… but you can still read this post so you know what to expect from BINGO! it’s an annual event and you can expect to starting hearing about bingo 2026 early next year.
2025 maker’s bingo includes:
15 knitting patterns by kate oates
14 crochet patterns by britt garber
a brand new knit and/or crochet collaborative design from britt & kate
30 patterns total, as per usual
a (totally optional) makealong of the new design; whether you participate in the makealong or not, you’ll still receive the pattern.
a discord group so that we can all enjoy each other in community: whether you’ll be showing your progress on your mmal project, chatting about how close you are to a bingo, or sharing what’s going on in your life, we are super excited to host this group so that we can get to know you. britt & I are both super community-oriented and we want to encourage you in whatever way we can.
registration is $57 and includes all of the above: providing you with 30 patterns, including the exclusive, brand new epic knit & crochet collaboration, for less than $2 each with a makealong & community experience.
note: I track each and every pattern that’s been featured in bingo every year and I never repeat them! it accidentally happened once, and so I sent out another pattern. for returning players, just know that you don’t need to worry about that.
are There are Bingo prizes to be won?
heck yes. i’m so happy to share that we have over 30 prizes this year. every year the bingo prize pool has grown. britt and i are so grateful for the support from our colleagues! the prize post is now linked below so that you can see what you’re playin’ for, aside from the patterns that is. For now, look at the amazing brands who have been so generous! check them out, show them 🖤, thank them, all the things. bingo wouldn’t be bingo without them.
this year’s event is sponsored by

in addition to the following generous brands

after I created this graphic, we were also blessed with an amazing prize from birdie parker designs!
Read on for all the game details
if you’re new to the game or need a refresher, you can find all the logistics at the bottom of this post, including images that will show you exactly how you’ll receive all your patterns and how you can either save them to your own device or add them to your ravelry library along with how you can make sure you’ll receive our emails.
but first, i’m going to share the fun stuff.
Bingo begins on april 1
as we announced in our instagram live, cards are on sale and as soon as you register, you’ll get the makealong info & be able to join the discord group to start chatting.
Each card is created manually as they are all unique, so when you register for bingo, you’ll receive an automatic download but not your bingo card. your card will be sent to you separately, closer to when the game starts.
your download will include the link to jump into the discord group and start chatting along with your bingo instructions and makealong information so that you are ready to begin as soon as the first set of instructions goes out.
all players who register for bingo by march 30
will receive their cards before play begins.
card orders placed between march 31-april 5 will be fulfilled within 48 hours. You’ll still receive the automated download, but we will need time to create your card and get you caught up with any patterns, clues & bingo numbers you’ve missed.
come one, come all
If you would like to participate in the game, but aren’t able to purchase a card due to financial constraints, e-mail knitbingo@gmail.com to request a card without pattern delivery. we will be delighted to have you play the game and be eligible for prizes. we want our game to be accessible to all.
registration for this year’s game is now closed
check out the LIVE britt & I did a few weeks ago to hear straight from us about how excited we are! if you’ve got any questions, email knitbingo@gmail.com
britt & kate

I reached out to britt aka knotbadbritt to see if she wanted to collaborate with me this year for a few spectacular reasons. first, I totally hit it off with her on threads ☺️ for whatever reason, I just liked the heck out of her and everything she was sharing! naturally, this led me to pattern stalking and of course I loved her work. next, I thought to myself, how amazing would it be to bring crocheters & knitters together for bingo and make it accessible for more makers! when britt said yes, I was over the moon. during our first zoom it was so obvious we both were on the same page about so many things. it wasn’t long after that when our plans for a collaborative, new pattern were born. both of us have been so in sync throughout the entire planning process and I can honestly say that our design is literally for everyone. you can work it with 1 or 2 colors, or 15 or more! britt is working hers in black & white and I (naturally) am using 7 colors in a vibrant, neon spectrum. the design itself couldn’t be perfect for a mal. I am stoked that britt and I get to meet in person in late march, she’s coming to south carolina so we can do our photos for this design together, and also film a video series for it as well as host a live in our discord group to answer any questions or just have fun chatting. as for my other project-based video series, this one is going to show each and every technique used in our design in both knit and crochet. britt’s gonna teach me crochet & I’m gonna teach her some knitting, we are gonna have a blast. our goal is to encourage makers to maybe try out the method they are less familiar with. I know I can’t wait! after I finish my knit version of our epic design, I plan to work up a combo knit & crochet version.
you may have noticed my sponsor note earlier
not only is la bien aimée donating a fabulous prize (you’ll have to wait to hear about that until our prize announcement post in early march), but they have been collaborating with us on our new design from the very beginning. this is no ordinary collab, with two designers working up their own pieces and we are so grateful for the support & trust that the lba crew has in us to produce a totally epically worth-it design. and yes, it is. I can honestly say i’ve never designed anything like this before and the versatility can’t be overstated. we cannot wait to show it to you.
are you ready already?
About your Designers
britt garber
I am a Black Tunisian crochet and crochet designer. I started crocheting in 2015 as an attempt to make a blanket while pregnant with my daughter. I bought a book, a hook & some thick yarn. But for the life of me, I couldn’t do it. Instead, I did a classic Britt move. I rage quit and declared myself unable to do anything artistic and moved on. Weeks later, I tried again and it just clicked! I have been crocheting nearly every day since.
Before becoming a crochet pattern designer, I was a serial crochet pattern tester and sample maker. Those experiences gave me the confidence to start publishing my crochet patterns. Since becoming a crochet designer in 2020, I have specialized in creating advanced crochet patterns that are easy to memorize and capture the joy of crochet. I am passionate about elevating the perception of crochet as an art form and creating drape that would make any knitter jealous.
My designs are often easy to memorize after the first few rows, making them perfect for crocheting in front of your favorite TV show.

kate oates
I am a knitting pattern designer, instructor, author, (online) boutique owner & now, retreat hostess! join me at oq farm in vermont this fall for a luxurious retreat surrounding the vermont sheep & wool festival with on-site workshops from local artisans (and yours truly) & a personal chef to treat you to delicious meals throughout the long weekend. In the past 15+ years as a full-time fiber artist, i have published well over 300 original patterns and authored several books: grown, knits for boys and knitting clothes kids love. I create modern, wearable and stylish knits for adults under my “kate oates” line. my patterns are known for attention to detail & fit, extensive size ranges, providing a multitude of option-sets along with thorough technical instructions that often link to video tutorials. my other line (and first one), tot toppers, features whimsically wearable garments and accessories for babies and children. as an instructor, I am passionate and organized, especially when it comes to enabling knitters to create garments that fit and flatter. with over 20 years of teaching experience, my classes are well known for their high quality, original content, thorough materials & detailed workbooks that allow knitters to soak in their class experience without scrambling to take notes. I’ve even got online .
I am a neurodivergent & under-abled chronic pain warrior who advocates for others while fighting my own personal battles and choosing JOY. I have endured through more than a dozen surgeries, primarily due to spinal fusions resulting from a childhood injury. you can listen to some of my personal story here.
Prior to my transition to knitwear design, I earned a b.s. at Clemson university, then my m.a & Ph.D from the University of Florida with concentrations in political science & methodology (aka= math!). i’ve always been driven, self-motivated and committed to performing at the highest level despite my limitations.
and now for those minute details…

game play
Hint: If you’ve played with me in the past, the process itself is pretty much the same, there are just some extras this year.
This post is filled with all the detailed information you could possibly want, but if you still have questions, e-mail us at knitbingo@gmail.com.
first: add these e-mails to your address book, favorite them, mark them safe, whatever options your server gives you, do it!
help@kateoatesdesign.com: your registration confirmation & download prep is sent via automated delivery from this address after purchase. If you haven’t received your confirmation within 15 minutes after you purchase your card, e-mail knitbingo@gmail.com.
knitbingo@GMAIL.COM: Your bingo card itself & daily e-mail with the pattern name & number, along with your makealong clues will come from this address. if you registered for the game prior to March 30 and have not received your card by april 1, e-mail knitbingo@gmail.com. aside from the obvious need for your card, if you don’t receive it, it’s likely that you won’t receive our other e-mails either.
downloads@ravelry.com: pattern delivery itself will come from this address. you do not need to use ravelry, more on that later! if you have not received your pattern delivery by 10pm EST on any particular day, e-mail knitbingo@gmail.com.
these days, spam filters love to spew hate 😜 so the very best way to avoid any issues is to manually add all of these addresses as safe. if you don’t receive your confirmation e-mail, be sure to e-mail us asap so we can figure things out before the game begins. we want to make sure you’re address is correct in our system so you don’t miss anything. the good news is that I am quite used to getting email issues sorted out! there are always a handful of players with either an email typo during registration or a server/spam issue but I have always been able to resolve it within the first few days.
Getting prepared. Click here to purchase your Bingo card. after purchase, look for your e-mail from help@kateoatesdesign.com which will include a link to download your confirmation PDF with further instructions. If you place your order prior to march 30, 2024, you’ll receive your randomized, individual card prior to the first pattern delivery. If you register after that time, you’ll receive your card within 48 hours. don’t worry if you miss a pattern or a few at the beginning as we will absolutely get you caught up. we close registration before bingo’s begin being scored 🧶. registration closes on april 5.
join our community. for the first time, bingo isn’t just a game, but it’s a community event! our discord community is rockin’ already and loads of fun. if you’ve never played around with this platform before, don’t be intimidated. It’s very user friendly and we will happily answer any questions you have. as for the makealong, our discord community is totally optional but we really hope that lots of you will join in so that we can get to know you, support & encourage you in any way you need. we will not be closing the discord group immediately after bingo is officially over for the year, not only because we want to give our makealong participants additional time to create & share, but also because if it becomes a supportive space for all, why close it? Perhaps it’ll stay open for an additional month or two, or perhaps it’ll be open-ended!
makealong with us. we are so confident that you are all going to love our collaborative design that we decided it would make a perfect makealong to work up during this year’s game. depending on your speed as a maker and amount of free time, you may or may not finish your project by the time the final clue is released and that is totally ok! the makealong is totally unrelated to prizes; create at your own pace.
Playtime. throughout april, you’ll be receiving a surprise pattern in your inbox each day! This is really what Bingo is all about, as these patterns are valued at well over $250 total, and you’re getting them for less than $2 each = win-win. Each pattern will have a corresponding number which you will cross out on your card each day. Patterns will be sent at randomized times each day. We serve a variety of time zones, so this allows us to adjust the timing so that no one knows exactly when to expect it. we don’t want those in earlier time zones to always have an advantage over those in later ones so the timing of your delivery will vary just like the patterns do! by all means, if you realize that you didn’t receive a pattern on the previous day, contact us so we can sort you out.
Winning. In our game, BINGO is 5 numbers crossed off in a row either vertically, horizontally or diagonally. As soon as you have a Bingo, e-mail us with the photo or screenshot of it! let me reiterate, You must include that photo or screenshot of your card showing your winning bingo. Because we award prizes in the order they are received, you are not declared a winner until we are able to verify that you do have a BINGO by cross checking our numbers with your card! We gave a lot of thought to this, but since we go by the order emails are received and it does take a moment to take the photo, attach and send, we feel it would be unfair to “count” emails that don’t include all the information needed right front the start. If you do send us a note without the photo, you aren’t disqualified, but you’ll want to resend ASAP with your image.
prizes. If you are one of the first 30+ knitters to share your Bingo with us, you are eligible for a prize! when you win, you will get to choose the prize that you are most excited about from our list. The list will get smaller as each prize is claimed. we aren’t going to say exactly how many prizes we have right now 🙃 but there are at least 30, way more than ever before!
patterns. Bingo will continue even after all prizes have been claimed because of course, you’re getting all your patterns! in your daily emails, we’ll keep you updated on how many prizes remain. once all prizes are claimed, we will let you know & there is no longer any need to send us any bingos. we hope that you will continue to enjoy our discord community, the makealong opportunity, the expansion of your pattern library and, hopefully, queue!
you may not always have a number to cross off on your card
You can skip this section if you wish as it is only explanatory, but for those of you that are curious about bingo methodology and why we do things the way we do, we don’t mind sharing at all! as bingo has gained momentum and participants, the prizes have been claimed more quickly so we have tried to increase the challenge a bit. there are more patterns included in the game than there are numbers on your card. Your card will be missing 5 numbers, so sometimes the daily pattern will not be on your card. there are also no free spaces, you’ll have to get all 5 in a row to win. The anticipation is so fun and we want there to be prizes to win for as long as possible.
pattern delivery
we know that ravelry does not work for everyone and is not always your preferred storage space but fortunately, ravelry does offer a gift delivery method. using this feature, individuals can choose whether they would like to download and store their pattern through their own system and/or add it to their library. as noted in above, you’ll want to be sure to have the e-mail address downloads@ravelry.com in your address book, unblocked and unfiltered, as this is how the daily pattern will arrive. We will be sending your pattern to the e-mail address provided from your Bingo card purchase through the Ravelry gift feature. All participants will receive their e-mail at the same time and then be able to decide where to store the pattern as best suits individual needs.
Put your Pattern where you want it.
When you receive your daily e-mail, it’ll look like this and you may save to your device or add it to your Ravelry Library, you do not need to use ravelry to retrieve your pattern. Either way, step 1 is to click the download button! Note: If you are not signed in to your Ravelry account before clicking the link in your e-mail, or you do not use Ravelry, you will see “sign in to store on Ravelry” in place of the checkbox shown at the upper top right.

After you click the button, you’ll arrive on a landing page. This page has a link for the actual file download, and a checkbox that refers to your Ravelry Library. The set-up below shows the set-up for saving the file to your device ONLY. Just click that link and you’re all set.

The exact same page is below, but this is what it looks like when storing to your library.

So there you go! A more detailed set of instructions than you could ever need for clicking a button!
prize shipping
tangible goodies are fabulous, don’t you agree? We want to include as many makers as possible and we love our international friends. This year we will be shipping internationally for up to $40.00 USD. If your shipping costs significantly exceed this amount, we may contact you to see if you would like to cover the additional cost or would rather switch to a digital prize.

Thanks a million!
To our generous sponsors! makers, you’ll never regret supporting them and we cannot wait to share the amazing prizes they are offering for this year’s game.

donate
I love enabling knitters by offering tutorials whenever I can! whether it’s a skill applicable to a specific one of my designs, or something more universal… nothing makes me happier than to help you expand your skillset. when I create a free tutorial, I expend just as much effort and time to make it fabulous and useful for you, as I do when I create an online workshop. if you’d like to help me keep making these tutorials, please consider donating to contribute to my work. i would APPRECIATE it so very much!

crocheting neckline edges
I’m a knitter, not a crocheter, I just never did learn! however, there are times in my knitting life where working with a crochet hook can really come in handy. Of course, the provisional cast-on comes straight to mind, but aside from that, I definitely enjoy crocheting edges when I’m looking for something really clean and simple. this video tutorial is geared towards knitters who are unfamiliar with crochet terminology (including myself!) and demonstrates the edging featured in both pink fluff pattern necklines. now, both of these patterns also include an alternate i-cord edging which does give a similar look so if you are just not into crochet hooks, period, or this method isn’t going well for you, by all means use that I-cord instead! for those that do know their crochet, i’ve been told (by an expert) that what I’m working on this neckline is a slip 1, chain 1, repeated around the entire neckline. so if those terms make sense to you, you probably don’t need this tutorial! if you do find this tutorial useful, there’s a donation button below!
the video tutorial includes all the audio you could want, most likely more repetitiveness than you need and even some written instructions that pos up on your screen from time to time, but I thought i’d really go deep in this blog post and explain in more depths each step of this process. if you’d rather jump straight into the video, the instruction itself begins at 1:45—feel free to skip my intro!
the big picture

the two main steps
there are two components of this neckline edging. the first is working into a stitch and the second part is chaining a stitch right afterward. both components are equally important. when you work into the stitch (whether it’s live from the provisional cast-on, or a stitch that you’d normally be picking up to knit), you’re joining your edging to your piece. when you chain a stitch, you’re adding a new stitch to create some elasticity so that the neckline will fit over your head. if you forget a chain a handful of times on your entire neckline, you probably won’t notice a difference, but if you’re not regularly working that second step, you’re gonna end up with a too-tight edging, as if you were just working a single crochet all the way around. also, do not, do not, do NOT pull each loop that you create tightly. You want to be creating loops that are stable and as consistent as possible, but you want them to be on the looser side—again, for elasticity. if you find that you are creating your loops too snugly, you can consider chaining a second stitch to help make up for it, but you’re better off if you can convince you fingers to not pull those loops too tight! another one of the nice things about this edging in general is that you’re always going to be wrapping your yarn around the crochet hook in the same way. you’re not ever going to be reversing the way you wrap, so once you’ve gotten the wrapping process down, it’ll just be on repeat.
workin’ it
i’m going to follow the instruction order as to how it’s shown in the video, so the first portion deals with live stitches on knitting needles and then we go to working into stitches that are on the edge of your garment and not on your needles. in the pink fluff patterns, you’ll be working with both types of stitches, but if you want to use this edging on another sweater (or another part of the garment other than the neckline) it is 100% fine to be working all the way around on live stitches or all the way around the edge of the garment without knitting needles at all. they do not need to be combined, that just happens to be the way I constructed these two sweaters.
section 1: working stitches on live needles
the nice part about using your crochet hook in combination with your knitting needles is that you’re really just replacing your right hand needle with a crochet hook instead. in fact, you could likely perform this edging with knitting needles only, but I think having the hook to grab the yarn really helps to facilitate and expedite the process, so that’s why i’m demonstrating it In this particular way. the first set of stitches you’re working with in pink fluff are those that were provisionally cast-on, so before you begin working the steps below, you should have removed that cast-on and placed your set of live stitches on working needles. go ahead and set those down as you’ll need to prepare your crochet hook with working yarn before continuing as follows: with the yarn you’ll be using for your edging, make a slip knot and place it onto your crochet hook. snug it up, but don’t make it super tight (see above!) hold your hook in your right hand and pick up your knitting needles with your left hand, ready to work the right side of those live stitches. here we go!
insert the crochet hook into the first live stitch as if to knit, creating an X just as you would if you were using two knitting needles. your crochet hook will be situated behind your left hand needle, angled to the left, and your left hand knitting needle will be angled to the right.
making sure not to use the tail from your slip knot, wrap the working yarn behind the hook, from right to left, and then over the top of the hook to create a counter clockwise loop—this is actually a yarnover on your crochet hook. i’m going to say this again, keep the loop on the looser side. you’ll now have two loops on your crochet hook: one at the bottom/right (closest to the handle) and then a second newly created loop sitting towards the hook end, above your left hand knitting needle.
using the hook to grab hold of your newly created loop while keeping just enough tension on the working yarn so that it does not fall off your hook, pull it through the stitch on your needle. you will still have two loops on your crochet hook and remember, you don’t want them to be too tight.
if you didn’t automatically do this in the previous step, slide the stitch from your left hand needle off of it, as it has now been worked. you’ve still got two loops on your crochet hook but now you don’t have a knitting needle in between them.
the next step can be done in two different ways, either by using the hook or your left hand needle, but the result will be the same. i’m writing the process out separately below, so only work it in the way that is most comfortable for you. my recommendation is to keep trying option 1 and only resort to option 2 if you really can’t get it. the more comfortable you become with your hook, the easier the entire process will be.
option 1: use the hook to grab your newly created top loop and draw it through the bottom loop
option 2: use your left hand needle to grab the bottom loop and slip it over top of the newly created loop
you are now down to having only one loop on your hook and you’ve completed the first component of this process! now we will move into the second, adding the chain stitch so that you’ll have enough of an edging to fit over your head.
section 2: chaining after working every. single. stitch.
now for the even easier part! working a single chain stitch. if you’ve ever worked a provisional cast-on with a crochet hook, you probably already know how to chain a stitch because typically you chain a few stitches, then start your cast-on—which Is essentially chaining with a knitting needle In the middle of the chain—then end your cast-on by chaining additional stitches once you have the correct number of stitches on your needles. You can even chain all of the stitches in your provisional cast-on and then insert your needle into each loop afterwards. i’ll still be very descriptive here and write this for anyone who has never worked a crochet chain. at this point in our process, we have worked steps 1-5 from above and are back down to having only a single loop on our crochet hook. I’ll refer to this loop as the bottom loop as I did above. and yes, these steps below are going to sound familiar.
work as for step 2 in section 1: wrap the working yarn behind the hook, from right to left, and then over the top of the hook to create a yarnover on your crochet hook. once again, you’ve got two loops.
work as for step 5 in section 1: once again you can feel free to use your knitting needle to help, but If you get the hang of using your hook it’ll be more efficient if you can use it alone to chain your stitch. use the hook to grab your newly created top loop and draw it through the bottom loop. if you’re not confident enough with your hook yet, refer to option 2. you are now back to a single loop on your needle and…
ta da! you’ve chained a stitch!
section 3: repeat, repeat, repeat
for the entire section of provisionally cast-on stitches, you’ll be working {steps 1-5, step 2, step 5} all the way until all of your live stitches are worked. just don’t forget that chain. if you have to pause mid-process, or you just forget whether you’ve chained or not, take a look at your work. if you’ve completed the chain, you’ll see an unattached loop/stitch sitting on “top” of the loop that’s connected to your neckline edge. whereas if you’ve not yet chained, the last loop you see will be incorporated into the actual neckline edge. once you’ve worked all of your live stitches, it’s time to move onto the remainder of the edging.
section 4: working stitches along your edging
this process is almost the same as working with live stitches, only it Is a bit easier because you don’t have a knitting needle involved, therefore you don’t need to remember to slide the stitch you just worked off your needle (step 4 from the very first section). when you get to this section of edging in both pink fluff patterns, you will already have a loop on your crochet hook because you’ll have just completed working each stitch involved in the provisional cast-on, so you don’t need to create a slip knot. however if you are using this edging for something else where all your stitches were cast-on in standard fashion, or have been bound off, you will need a loop on the hook to begin, so only if you do not already have a loop on your crochet hook, create a slip knot, place it on your hook, snug it up, but not too tightly, just as I described in the set-up for working from live sts. bottom line, you will always need a single loop on your crochet hook prior to working into a stitch whether it is live or on an existing edge.
before beginning your work, examine your edging to determine a consistent location into which you’ll be inserting your crochet hook. If you are used to picking up stitches, the point of insertion for the crochet hook is exactly the same as where you would be inserting your right hand needle if you were to pick up and knit that stitch instead. In the video, my demonstration shows a bound off edge so it’s easy to see the loops into which I am working. I recommend using only one of those loops and it is the one that is closest to you when you’re looking at your work. It will be easy to see this loop along your front cable cast-on edge as well, but the diagonals are a little trickier to see. the most important thing is not necessarily where you insert your hook but that you maintain consistency (same goes for picking up and knitting!). I recommend using either the second or third leg along vertical or diagonal edges: Each knit stitch consists of two legs, so when I say the second leg, I am referring to the interior leg of the first stitch (from the edge of your work), where the third leg is referring to the exterior leg of the second stitch. once you’ve taken a good look at your fabric and have a plan of insertion, you’re ready to roll. you should have a single loop on your crochet hook and know where it’s going to go.
insert crochet hook into the leg of your chosen stitch or the loop of your cast-on edge as if you were going to pick up and knit a stitch.
work as for step 2 in section 1: but i’ll write it out again for you, wrap the working yarn behind the hook, from right to left, and then over the top of the hook to create a counter clockwise loop. your pre-existing loop is at the bottom/right (closest to the handle) of the hook and your second newly created loop is sitting towards the hook end with the leg/loop of your project edge in between the two loops on your hook.
work as for step 3 in section 1: are you starting to see that even though your stitches are coming from different places, they are all being worked in virtually the same way? the only difference between step 3 in section 1 here is that you won’t have the knitting needle in between: using the hook to grab hold of your newly created loop, pull it through the stitch into which your hook is inserted. your two loops on your crochet hook are now situated on “top” of your project fabric.
work as for step 5 in section 1: since we don’t have to slide a stitch off a needle, you’ll go straight to step 5. once again, you can either pick up a knitting needle to help you pull the bottom loop over the top loop, or you can use your crochet hook to pull the top loop through the bottom loop. at this point, since you no longer have knitting needles in hand, it will be much more efficient to use only the crochet hook.
And that’s how you work into your fabric edging. It’s hardly different from working into live stitches at all.
section 5: it’s time to chain again
this time I’m not going to rewrite it, but after going through steps 1-4 in section 4, you will work the steps from section 2, exactly the same as you did after each stitch in section 1.
section 6: repeat, repeat, repeat
yup, every time you insert your hook into an edging leg/loop, you’ll work the entirety of sections 4 & 5. continue until you get all the way around to where you began with your live stitches along the provisionally cast on edge and then, move on to finishing up.
finishingd
nothing fancy is happening here! once you’ve worked each stitch (and the chain that follows) you’ll be back to where it all began. break your yarn with a 6”/15 cm or so tail. Go ahead and stretch your final loop on the crochet hook large enough that it’s easy to thread your tail through and pull it snugly to secure. with a tapestry needle, use your tail to connect the end of your edging to the beginning, doing your best to mimic the way the strands look in the rest of the edging.
that’s all folks!
I hope that this tutorial gives you a great edging option! although I’ve written it in the order that follows the instructions in ruffle fluff & lacey fluff, remember that it doesn’t matter whether you’re working from live stitches or from existing edges. this is a beautifully neat & clean way to finish off a project, especially when you don’t want to detract from other detailing that deserves to shine. if you’ve enjoyed this content and found it useful, there’s a donation button below!

bingo 2024: the big prize reveal
Did you hear? we are gearing up for the 6th annual knit bingo and my co-host this year, tif neilan, and I have some incredible sponsors and prizes to share with you! I want to start off by giving a huge thank you to every single one of these awesome businesses for sponsoring our game. we have a record number of prizes up for grabs this year (24! double last year’s prize offerings) and it’s all thanks to their generosity. it can be a bit solitary as a designer sometimes, so having the support of these folks not only makes for a more fun game, but it is also so encouraging to know that the people we work with support us! if you haven’t already, you can click the button below to get your bingo card for the year. (sorry, this year’s game is now underway and cards are no longer available). a few links for you before we dive in to all these great prizes: last week, I wrote a post going through every little detailed step of the game. click here to read all about it if this is your first time playing! and lastly, to view our instagram live where we chatted about many of these prizes, you can click here!
and now, let’s dig in to why you’re really here:
get to know the prizes
north bay fibers
both tif & kate have designed (or are designing) with this stunning yarn! Jill is both a master with graphics & color and is a knitwear designer herself along with being a yarn line owner. She’s even been a previous bingo co-host! nbf is offering a $50 gift card to one lucky winner.
North Bay Fiber designs and produces high quality custom-milled yarns created from breed-specific wool that is 100% sourced, spun, and hand-dyed in the U.S.A.

yarn bar
yarn bar is a local yarn shop in billings, mt. kate had the pleasure of teaching and visiting the shop last fall and we are so grateful for the very generous prize the shop is offering. one winner will receive A BUNDLE OF CHIC BLEND FROM LANIVENDOLE, AND my very favorite candle ever: it’s called montana 406 and ever since I purchased it directly from yarn bar, i’ve been buying it over and over directly from the maker! The prize is VALUED AT $162 USD. hello gorgeous!

sun valley fibers
5 winners, that’s right…FIVE winners!!! will receive $50 gift cards to this amazing yarn company! kate had the pleasure of teaching at svf’s retreat last fall and owners jeanette & george are such gracious, kind people.
We are a small family business, located in Beautiful Southwest Wisconsin, happily dyeing all of the colors of the Rainbow since 2007! We love what we do, and thank you for your support of our dream!
the farmers daughter fibers
this incredibly generous yarn company, led by founder candice, has offered a winner a $100 gift card. good luck deciding what to use it on, as your choices are aplenty! to learn more about fdf and their process, check out the video below!
walcot yarns
our lucky winner will get their choice of 3 skeins of walcot yarns opus, dreamy soft yarn with a huge variety of color options!
Originating from the heart of the Artisan Quarter in the beautiful city of Bath, UK, our brand took its name from the place where our story began, Walcot Street. What happens when you want a workhorse yarn, but need it to feel gentle and buttery against the skin? Can a yarn even be both soft and strong at the same time and last? Here at Walcot Yarns we have answered these questions with luxurious yarns and fabulous patterns for knitters and crocheters alike to make, wear and love.

black mountain yarn shop
BMYs is located in the north carolina mountains and a frequent favorite stop of kate’s! owner’s danni & jason have hosted kate in person on more than one occasion, and are always generous when it comes to supporting bingo! this year, one winner will receive a skein of spincycle yarns dream state in Bmys’s exclusive colorway, first light and a $25 gift card to the shop! this prize is valued at over $50 and you’ll have no trouble at all spending that $25… just sayin’.

spun right round
oooooh aren’t you drooling already? one winner will get a tough sock set, provided by SRR! even better? you’ll get to be surprised at what you receive.
Spun Right Round specializes in speckled yarn that is vibrant with pops of unexpected color. Hand dyed in small batches so each skein will vary in speckle and saturation. This uniqueness in what makes hand dyed yarn so special. Established by Renee in 2009, operating out of Rochester, NY as an independent dyer for fifteen years strong.

nature’s luxury
I told you these prizes weren’t in any particular order didn’t I? well here’s proof. Cause 4 of our bingo winners will each get their own set of nature’s luxury’s signature yarn kit: On Stage - Long Métrage which includes 3 stunning mini-skeins. nature’s luxury is a fave of tif’s; she’s worked with their yarn time and again and can attest that these skeins are just as fabulous as they appear.
Nature’s Luxury is a yarn company located in Germany, specializing in luxurious natural-fibres and exclusively custom-spun yarns, lovingly and expertly hand-dyed in our studio. Our focus lies on precious and rare fibres, such as baby camel, cashmere goat, silk, baby alpaca and qiviut to name a few. NL-yarns range from silky-fine, next-to-skin softness to hearty, more rustic wool, spun from local merino sheep fleece and other unusual sheep breeds. In the dyeing process, we meticulously pay attention to an environmental-friendly and sustainable production. We work with the lowest possible use of water, keep the energy consumption at a minimum and precisely calculate the amount of dye pigments needed to create our exquisite colour palette. The origin of the fibres we use for our yarns is very important to us. Not only do we look at the quality of the material, we also lay special emphasis on the wellbeing of our fibres-providing friends. The merino in our yarns is mulesing-free.

emma’s yarn
oh what a lavish set this one is! one of our winners will induge in this 10-pack called “Dream come true” (aptly named!). Each mini skein includes 81 yards/20 grams for you to play with. this yarn is hard to come by, as it is available only at select retailers and not online. I just love picturing emma at 15 starting this company!
Emma’s Yarn was started by Emma, a (then) 15 year-old homeschooled student with an amazing eye for color! She fell in love with dyeing yarn when learning ratios in a (creative) math lesson. Emma was soon joined by her sister to build a business out of her talent and together, along with their family and friends, they create crazy beautiful, hand-dyed colorways out of their dye studio in sunny Florida.

a verb for keeping warm
a verb for keeping warm is giving us a double treat! they have two distinct prizes for two winners. one perennial garden shawl bundle, in the color of the winner’s choice (a jaw-dropping shawl designed by tif!) and a second winner will receive 3 skeins of bread and butter everyday, also in winners-choice colors.
Verb bio: Spinning, dyeing, knitting, felting, weaving, and sewing are all verbs to describe how communities create cloth, garments, and other fiber-based goods. Such acts embody love and creativity. Such objects provide protection from the elements and keep us warm. A Verb for Keeping Warm honors these traditions and specializes in using flowers, bark, and leaves to dye high-quality yarn, fiber, threads, and fabrics. All materials are designed and dyed in Oakland, California.

ritual dyes
ritual dyes is both a yarn shop and a dye studio located in portland, oregon. we are delighted to provide a winner with a $25 gift certificate to RD!

Ritual Dyes is a brick & mortar shop and dye studio in SE Portland, Oregon. Ritual Dyes focuses on smaller brands and carries a curated selection of makers tools, accessories and supplies. Drawing inspiration from nature, the great Pacific Northwest, nostalgia and the occult.
YANI HANDMADE
i met yani at an event and she’s just the sweetest! I have several of her ice-dyed pieces that are now a staple in my wardrobe and one lucky winner will get a stunning sweatshirt as well!
Yanihandmade is a mother-daughter team based in Pittsburgh, PA and Asheville, NC. They love to dye and to manipulate fabric and garments and find great joy in changing the state of a medium through color and stitching, taking immense pride in the uncommon pieces that they create. Yanihandmade started in the fall of 2017 with indigo-shibori dyeing and now also have a line of ready-to-wear pieces treated with the ice-dyeing technique that are just amazing. Since Yanira is a long time knitter it was only natural to follow suit dying yarn, specially the fun assigned pooling yarn.

the katy lin boutique
yeah, this one is my baby! last year I started this lil’ boutique of curated knitterly-friendly goodies and I’ve come up with a prize pack to send out for our game! this winner will receive a tee or tank of their choice, a “knit all day” ceramic mug, a multi-colored 4-pack of faux leather garment labels, a ko pin along with an “it’ll block out” journal.

robin’s promise yarn co.

last year at one of the rhinebeck events, I walked into a booth and saw a gorgeous version of my lovebirds sweater knit up, and it was in Susan’s booth! we have planned a collaboration that will be released right before the New York sheep & wool festival this year, so stay tuned there! on truly lucky winner will receive 6 skeins of Robin’s promise songbird in the colorway “Serendipity”. Each 100 gram fingering weight skein contains 463 yards/423 meters of 4ply 75% Superwash Merino/25% Nylon. this is a sweater quantity and more y’all! a total of 2778 yards! this winner will be set to knit at least one of the patterns in our bingo game this year.
Robin’s Promise Yarn Co., a hand-dyed yarn company in Williamsburg, Va., is the result Susan Dickerson’s bird-watching and owning a yarn shop. Susan believes there is no greater palette than nature’s, which is why all of her colors are named after birds and nature. The name of her business comes from her belief that robins are harbingers of hope and good things to come. With a palette of more than 200 yarn colors, Robin’s Promise Yarn Co. also has a monthly yarn subscription and a 25 Days of Yarn at the end of the year.
utopia bath ltd
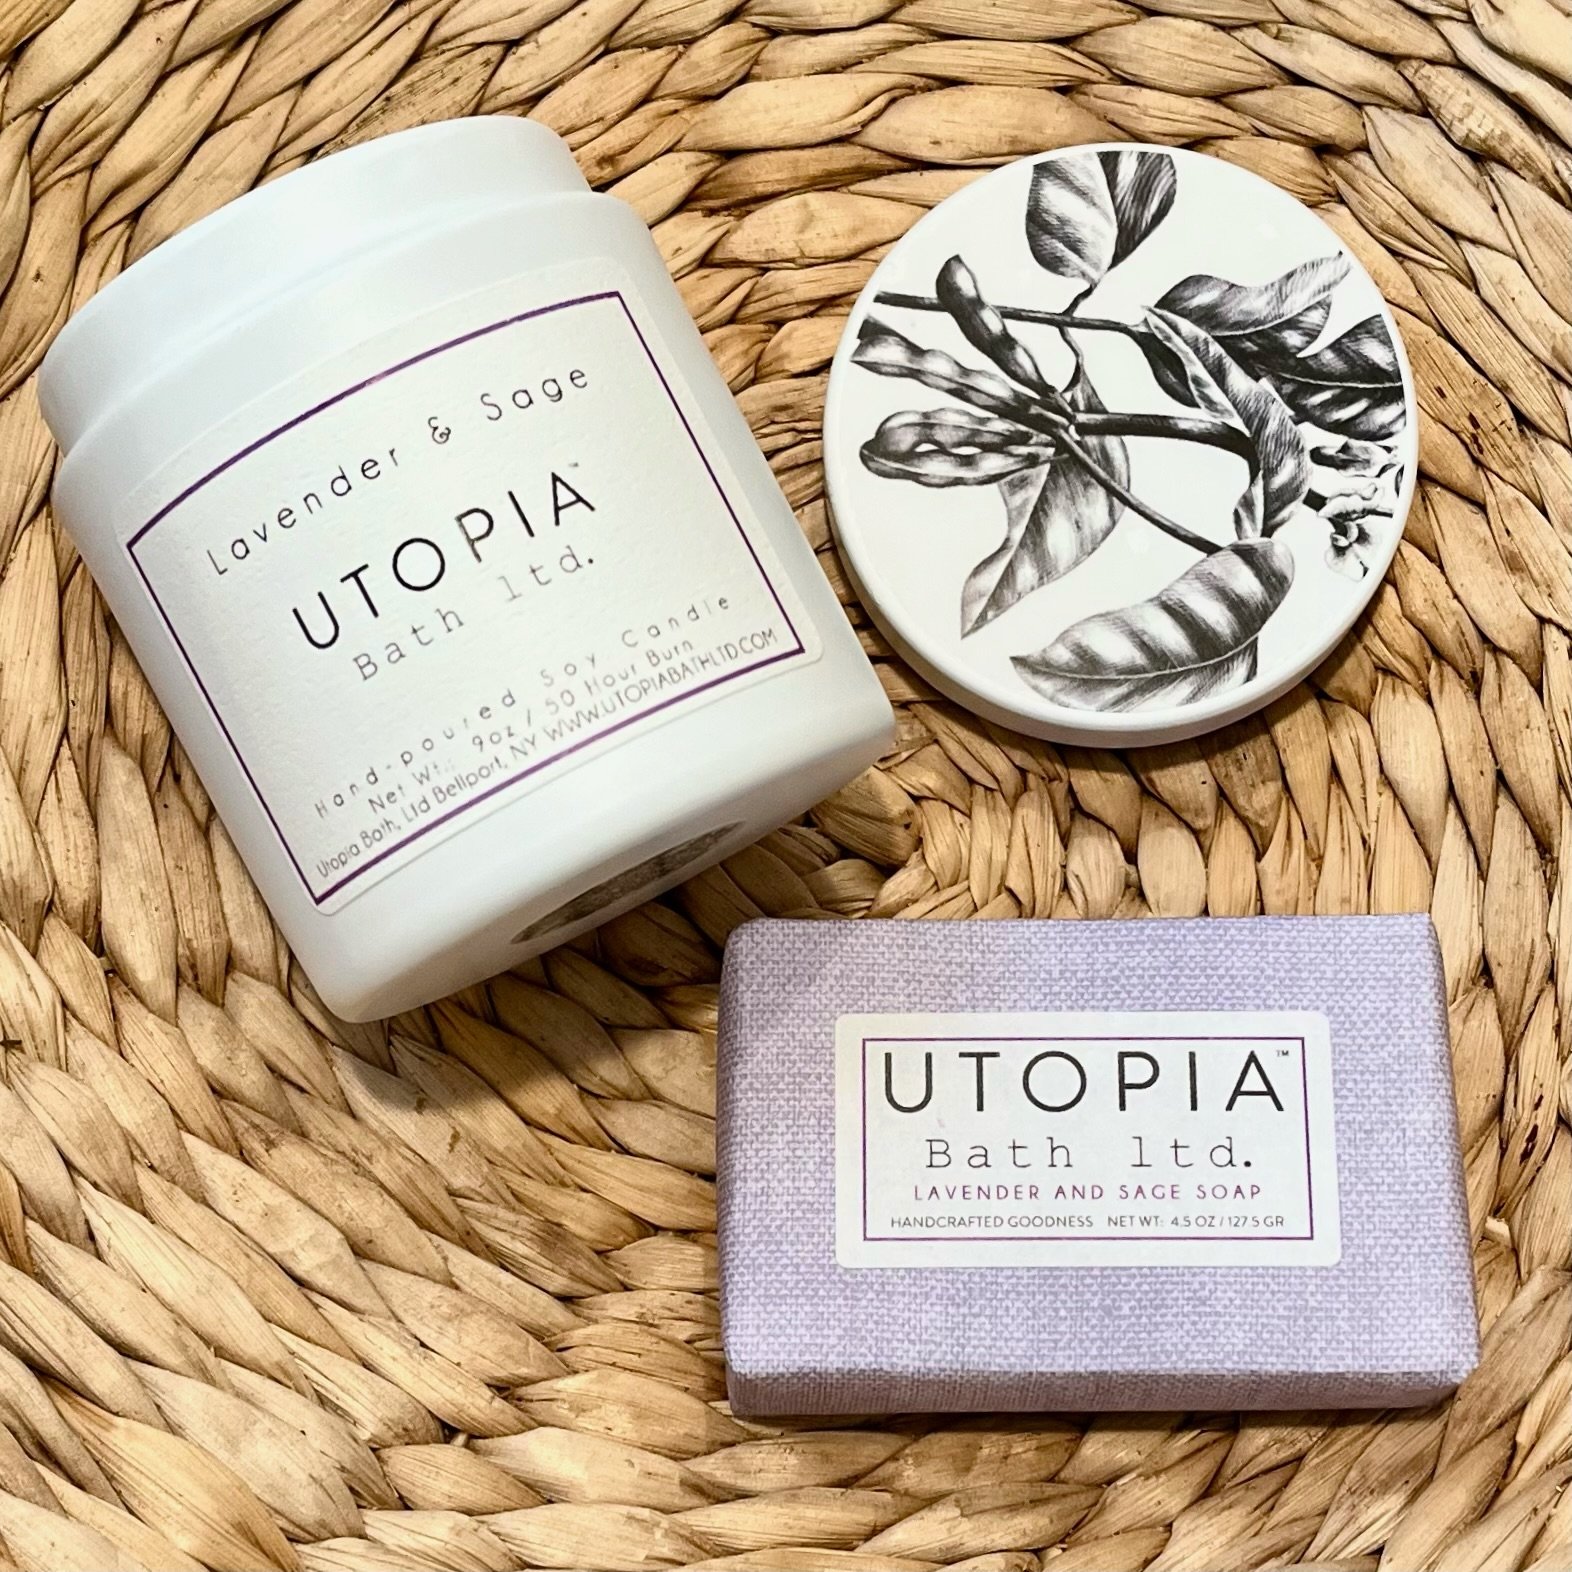
you might know this already, but I am fully in love with this company! in my shop, I carry three of her products and one of them, her hand creme, is my best seller. utopia bath is offering a winner a $50 prize pack that includes a lavender & sage (one of my very favorite of her scents) scented candle & a bar of soap. All of melanie’s products are handcrafted in her studio on the south shore of Long Island.
from melanie:
I put these two items together because I always light a candle in the morning for when I shower.
It’s a beautiful ritual with which to start the day!
do ewe knit
I had one of the most lovely teaching trips to do ewe knit this past march 🌟 this beautiful shop is offering 1 winner a $75 gift card to use as they wish. do ewe knit is known for their luxurious yarn options + has some super duper cute bags too! they have tons and tons of spincycle yarns and 2 custom colorways, one of which I featured in my design, me & ewe, which was a collaboration with the shop 🐑. thank you so much to do ewe knit for rounding out our prizes this year, which officially double the prizes we were able to offer last year!
from do ewe knit:
Do Ewe Knit is New Jersey’s premier luxury yarn boutique.
We stock prestige yarns and notions for every budget and project. Our owner Karen Posniak and the entire Do Ewe Knit team are avid and professional knitters who are delighted to assist you with your knit and crochet pieces. Our spacious location has ample room and we encourage you to sit, knit (or crochet!) and enjoy your visit. We have just one question for you – Do Ewe Knit?

there’s always next year!
this year’s game is underway and cards are no longer available! be sure to subscribe to my newsletter so you don’t miss out on next year’s game.

the best of inset side pockets
who doesn’t love great pockets?
whether they are in your pants, skirt, dress or sweater, in my opinion pockets are most welcome! last year, when I designed warmth, I played around with side pockets and developed a construction method that provides exceptionally sturdy pockets and now I’ve used them again in my new design, harriet cardigan. in your pattern you’ll have instructions to create linings that are worked with short rows on each front of your sweater and also on each side of the back. this provides 2 layers that are then seamlessly attached at the bottom to your sweater! In this tutorial. I’ll give a little overview of the construction and conclude with a video demonstrating the join. it’s not difficult, just a bit finicky, so be patient with yourself when you get to the joining row. in your patterns, you won’t need any of the set-up information provided here, as it’ll be included and already worked out for you. but, if you’re trying to add pockets to an existing sweater I hope this general overview will get you going! this overview is written for top down sweaters. if you’ve got either harriet or warmth already, you can skip down to step 4 of this post.

step 1: pocket placement
For great side pockets, you want the location of the opening to be located a couple of inches towards the front of the center side of your sweater. depending on how wide you want your pockets to be, you’ll have to play around with the exact placement but generally you need at least an inch or two in order to place your hands comfortably in the pockets. If you have an existing sweater with a side opening that you like, it’s a great idea to lay it out flat and actually measure the distance from center side to opening and use that to help you determine where you will place your pocket. You’ll use your stitch gauge to determine how many stitches this translates to and this will be where you separate your fronts & back + extra stitches to create your pocket opening.
for the pocket height, again this will depend on both gauge and personal preference. how tall will your pocket be? what distance do you want the top of it to be from the bottom of your sweater and the underarm? once you plan these numbers out in inches/cm you’ll use your row gauge to determine exactly where you will begin working your short rows either from the top of your sweater or from the separation of sleeves from body.
additionally, you’ll need to plan where you’d like your pocket to close in the front, which will be on the wrong side of your sweater. do you want it to go all the way to the buttonband or center front? or do you want to work a few stitches first? it’s all about how wide you want your pocket to be. we will come back to this number at the end, but it’ll be relevant for the width of your linings and when you begin your joining process. once you decide how wide your pocket will be, once again, use your gauge to determine the total number of stitches that will be included on the front of your sweater when you join your linings to your sweater front.
at the end of this step you should have determined the locations of the top and bottom of your pocket opening, as well as the total number of stitches that will be the pocket width.

step 2: calculate lining stitches
I know, you just determined the number of stitches in the width of your sweater front so shouldn’t this number match up? well, it depends on the stitch patterns used in your sweater and lining. in both of my patterns, i’ve chosen to use a linen stitch for my linings which does not share the same gauge in stitches or rows per inch/cm with the stockinette that is featured on the front of both of these garments. you may choose to simply work stockinette linings and therefore not need to do any additional math here. or perhaps you are working with a cabled fabric that equates to a similar gauge as your lining stitch. but, if your lining will be in a separate stitch pattern than your sweater garment, you’ll need to determine the equivalent number of stitches to cover the width you desire in your lining. Don’t worry if you need to increase or decrease stitches, this can all be done in a single row prior to joining your linings with your sweater.
row gauge matters here too. as I mentioned, I use linen stitch for a nice snug fabric with great hold. in both warmth & harriet, this translated to needing more rows in the pocket linings than in the sweater worked alongside it. if you’re starting to be flustered by the math, try out one of my patterns so you can see this pocket in action! but if you’re still with me, if you need more rows in your pocket linings, you’ll simply work what I call “sub short rows” over the linings only every few rows to accommodate those extra rows needed. if you don’t work these extra rows, you’ll find that your lining will pucker your sweater on the front because it won’t be the same height as your opening. to work the sub short rows, simply use a w&t (or your preferred style of short row method) where your lining meets your sweater to work in those extra rows only over the lining section.
use the stitch gauge of your pocket lining width to calculate the total number of lining stitches you’ll need to cast on for your lining. then, determine the difference between your sweater front pocket stitches and your lining stitches and decrease this number of stitches evenly during the final row of your lining.
step 3: create those pocket linings
once you’ve made your calculations, this is the easy part! once you get to the location of the top of your pocket, you’ll separate your sweater into three separate pieces as I mentioned above. each front-which totals the stitches in that will be worked over your pocket plus any extra stitches at the center front of your garment and your back will be the total number of back stitches plus the stitches between center underarm and the pocket opening.
work each section separately. for the fronts, you’ll work to the opening, cast on the total number of lining stitches, work back and forth (including those sub short rows if/when needed) until you get to your total pocket depth. for the back, you’re going to cast on the same number of stitches on both sides of the back panel and do the same work. don’t forget that if your linings are a different total number of stitches than your pocket width, you’ll make that decrease/increase adjustment during the final row of your lining work, working the shaping only over the lining section, not your front or back. on additional tip, in my patterns I work the final stitch before the lining through the back loop to help things look nice and clean. you could probably also do this with the first stitch in the lining section instead (something I might try in the future!)

step 4: join them up
the video tutorial below will show you exactly how to work the join for these amazing, sturdy layers you’ve created. all you’ll be doing is working k3tog’s across both layers of the pocket linings and the front stitches of your sweater that are part of your pocket. the video below shows this process along with more step-by-step written instructions as it goes along.
step 5: finishing
your pocket linings are now seamlessly joined to the bottom of your sweater. hooray! now all that’s left to do is whipstitch your linings closed while simultaneously sewing them to the wrong side of your sweater. don’t go crazy in this step. you don’t need to work your whipstitch stitch-for-stitch, it’s ok for it to be a bit looser than your stitches themselves. be careful not to let your yarn go through to the right side of your sweater. as a final, optional step, in harriet I added cute little X’s at the top corner of each pocket in a contrasting color.
so there you go
are these not just the best? you’ll be absolutely amazed at just how much you can actually put into your pockets (try your phone!) and they won’t sink down and show underneath your hem. I love function, especially when I can make it pretty, too.
I haven’t yet experimented with a single layered lining but theoretically, it should work similarly, just won’t hold quite the same level of sturdiness. I will definitely be trying this on a lighter garment. for single linings, you’ll want to only work the linings next to the back, and skip the linings that are attached to the front. the join will be similar, but it will be with k2tog’s instead of k3tog’s.
Bingo 2024: It’s the 6th Annual

2024 Knit bingo featuring patterns by tif neilan & kate oates
Bingo begins on april 1 & cards go on sale march 7!
Purchase your Knit Bingo card between march 7-30, 2024 to be ready for the first play and receive your card before the first pattern goes out. Each card is created manually, so purchases made after the deadline will be fulfilled within 24 hours. for any questions, email knitbingo@gmail.com

tif & Kate
I am so delighted to have tif neilan of tif handknits joining me this year. i love her style, all her patterns and she is just so gracious and lovely all around! through all the bingo prep she’s been a rockstar. I had the pleasure of meeting tif in person at rhinebeck last year and i won’t say what event we were attending…just that managing to get this shot without being squished was a major accomplishment 🤣 if you know, you know.
are There are Bingo prizes ready to be won? DUH, of course! 😜 We like to build anticipation, so when cards go on sale march 7, we will reveal all the prizes.
going live
on march 7 at 1 pm EST, I will be going live with tif to talk all things bingo! we will reveal all the fabulous prizes, talk about how bingo works, and answer any questions you may have. please join us!
About the Designers
tif neilan
Hi, I’m Tif! I am a knitwear designer & Interior Designer based in New England. I live in CT with my husband, two daughters and two labrador retrievers :)
When I am not knitting, I am most often horseback riding or at the barn loving on Lola (my heart-horse). I come from an Interior Design background (studied Interior Design in college - Bachelor of Science from Drexel University in Philadelphia) and although designing interior spaces is notably different from apparel design, there are also so many similarities! I think that my approach to knitwear design mimics how I also approach designing an interior space in regard to distribution of color / pattern / texture. I love the visual interest from textural stitch patterns (such as herringbone - my favorite) and enjoy intermixing those details with something simplistic, to balance the visual. I strive to design patterns that can keep the knitter engaged from start to end, without necessarily being difficult. My favorite colors are definitely grey and green, but I also really love pinks, rust-orange, yellows and navy blue. I view hand-knitting much like painting. The pattern is your canvas and you are given the opportunity to create the art piece you want! Handknitting allows us to express ourselves without words and I think that’s a beautiful thing. i also recently started my own interior design business! you can find me on instagram @tifneilan_handknits or check out my work on ravelry here.
kate oates
I am a knitting pattern designer and author with over 300 individual designs and several books: grown, knits for boys and knitting clothes kids love. under the Kate oates line, i create modern and stylish knits for adults. her other line, tot toppers, features whimsically wearable garments and accessories for babies and children. I think I am primarily known for her attention to detail & fit, extensive size ranges and providing a multitude of options within her patterns. I am also a passionate, organized teacher especially when it comes to to enabling knitters to create garments that fit and flatter. i also opened a boutique last year with tons of knitting goodies, samples, kits and self-care items. Click here to visit the katy lin boutique. You can check me out on instagram: @kateoatesdesign for my work on adult garments and accessories, @tottoppers for my kid-stuff and more family-oriented posts and @rosyknitter for my gardening obsession. in my non-knitting life, i earned a phd in political science from the university of florida—while it doesn’t seem directly related to knitwear design, I like to think that the drive, determination and math required to achieve my degree is something I practice every day running a small business. i live with my family in south carolina, which includes hubby ryan (we just celebrated our 19th anniversary on February 26!), boys jesse, charlie, oliver & eliot (4 very handsome tot toppers models) & sweet doggie hazel. you might also see the oates crew at a clemson football game. go tigers! visit my ravelry designer page here.
How to Play the Game
Hint: If you’ve played with me in the past, the process is pretty much the same! reminder: cards go on sale March 7
This post is filled with all the detailed information you could possibly want, but if you still have questions, e-mail us at knitbingo@gmail.com.
critically important: If you do not receive your confirmation PDF after checkout, something happened and we want to fix it sooner rather than later as no confirmation = no pattern delivery! your spam filter might have decided to spew hate on us, or you might have accidentally mistyped your e-mail address. e-mail us asap so we can figure it out before the game begins.
Getting prepared. Click here starting March 7 to purchase your Bingo card and receive daily pattern deliveries. after purchase, look for an e-mail from help@kateoatesdesign.com which will include a link to download your confirmation PDF with further instructions. If you place your order prior to march 30, 2024, you’ll receive your randomized, individual card prior to the first pattern delivery. If you register after that time, you’ll receive your card within 24 hours. don’t worry if you miss a pattern or two at the beginning as we will absolutely get you caught up and no one can score a bingo in 2 days 🧶. If you would like to participate in the game, but aren’t able to purchase a card at this time, you can e-mail us to request a card without pattern delivery. we will be delighted to have you play the game and be eligible for prizes, Don’t be shy about asking, ok? we want our game to be accessible to all.
Playtime. From april 1- 25, you’ll be receiving a surprise knitting pattern (or two) in your inbox! This is really what Knit Bingo is all about, as these patterns are valued at over $250 total, and you’re getting them for less than $2 each = win-win. Each pattern will have a corresponding number which you will cross out on your card each day. Patterns will be sent by 5pm EDT/2pm PDT. We serve a variety of time zones, so this allows us to adjust the timing so that no one knows exactly when to expect it. we don’t want our east coasters to always have an advantage over those in later zones so the timing of your delivery will vary just like the patterns do! by all means, if you have not received your daily pattern by the deadline, contact us so we can sort you out.
Winning. In our game, BINGO is 5 numbers crossed off in a row either vertically, horizontally or diagonally. As soon as you have a Bingo, e-mail us with the photo or screenshot of it! You must include that photo or screenshot of your card showing your winning line. Because we award prizes in the order they are received, you are not declared a winner until we are able to verify that you do have a BINGO by cross checking our numbers with your card! We gave a lot of thought to this, but since we go by the order emails are received and it does take a moment to take the photo, attach and send, we feel it would be unfair to “count” emails that don’t include all the information needed right front the start. If you do send us a note without the photo, you aren’t disqualified, but you’ll want to resend ASAP with your proof.
If you are one of the first 15 knitters to share your Bingo with us, you are eligible for a prize! when you win, you will get to choose the prize that you are most excited about from our list. The list will get smaller as each prize is claimed. we aren’t going to say exactly how many prizes we have right now 🙃 but there are at least 15, more than ever before!
Bingo will continue through april 25, even if/when all prizes have been claimed. once all prizes are claimed, our note will remind you that there is no longer any need to e-mail us about your Bingo and we hope that you will continue to enjoy the expansion of your library and, hopefully, queue!
and here’s why!
You can skip this section if you wish as it is only explanatory, but for those of you that are curious about bingo methodology and why we do things the way we do, we don’t mind sharing at all! as bingo has gained momentum and participants, the prizes have been claimed more quickly so we have tried to increase the challenge a bit. there are more patterns included in the game than there are numbers on your card. Your card will be missing 5 numbers, so sometimes the daily pattern will not be on your card. there are also no free spaces, you’ll have to get all 5 in a row to win. The anticipation is so fun and we want to hang on to our prizes as long as we can.
the first couple of game years, we were able to offer multiple daily delivery methods. there were separate player lists depending on where each knitter wanted to store their pattern. you can imagine that this caused some issues— certain groups would receive their patterns/numbers before others, more lists = more errors, it was very labor intensive for your designers, and so on. we know that ravelry does not work for everyone and is not always your preferred storage space but fortunately, ravelry does offer a gift delivery method. using this feature, individuals can choose whether they would like to download and store their pattern through their own system and/or add it to their library. as noted in your confirmation PDF, you’ll want to be sure to have the e-mail address downloads@ravelry.com in your address book, unblocked and unfiltered, as this is how the daily pattern will arrive. We will be sending your pattern to the e-mail address provided from your Bingo card purchase through the Ravelry gift feature. All participants will receive their e-mail at the same time and then be able to decide where to store the pattern as best suits individual needs.
Put your Pattern where you want it.
When you receive your daily e-mail, it’ll look like this and you may save to your device or add to Ravelry Library, you do not need to use ravelry to retrieve your pattern. Either way, step 1 is to click the download button! Note: If you are not signed in to your Ravelry account before clicking the link in your e-mail, or you do not use Ravelry, you will see “sign in to store on Ravelry” in place of the checkbox shown at the upper top right.
After you click the button, you’ll arrive on a landing page. This page has a link for the actual file download, and a checkbox that refers to your Ravelry Library. The set-up below shows the set-up for saving the file to your device ONLY. Just click that link and you’re all set.
The exact same page is below, but this is what it looks like when storing to your library.
So there you go! A more detailed set of instructions than you could ever need for clicking a button!
prize shipping
each year, We have been inching more towards physical prizes because everything is just more fun with tangible goodies, don’t you agree? We want to include as many knitters as possible. This year we will be shipping internationally for up to $30.00 USD. If your shipping costs exceed this amount, we may contact you to see if you would like to cover the additional cost or would rather switch to a digital award.

Thanks a million!
To our generous sponsors this year! Knitters, you’ll never regret supporting them and we cannot wait to share them all with you next week.

Wearing those cute cropped sweaters
look, I get it. You aren’t into cropped sweaters. that is Totally ok! but, if the reason is because you’re just not sure how to pull them off, check out my styling tips. in this video, i’ll show you loads of different ways to wear cropped sweaters. the featured sweater in this video is just nicole.
whether you are willing to crop or not, just nicole is an amazing sweater choice as it offers instruction for both a cropped and a longer sweater!
Measuring your Body for the Best-Fitting Knits
I love teaching my Tailoring Workshop because it enables knitters to make better choices about what size they should knit but more importantly, where and how they should modify garments for a better fit! Before you can learn to modify a garment, it’s essential that you have accurate body measurements. Use this video series to record your own body measurements so that you always have them on hand when choosing a size, and when looking at a schematic to see how it compares to you and your beautiful self! Embrace your body—it’s the only one you’ve got and being accurate when you take these measurements will absolutely reflect in your projects going forward.
Before you Begin
Grab a sheet of paper so that you can record each measurements. Go ahead and make it a “pretty” sheet, because you’ll want to save these measurements for reference each time you’re about to start working a new project.
For the most accurate measurements, dress as follows: wear the style of undergarments that you’d typically wear for your sweater with a thin/lightweight top or tank and fitted, thin pants if possible for the hip measuring section.
Know what “ease” means: I won’t go into much detail about ease in this post because it’s very full already but I do want you to know what it is. Ease is the difference between your actual body measurement and the measurement of the garment itself in any given area. Ease applies to circumference measurements only. Positive ease means that the garment is larger than your body and negative ease means it’s smaller. No ease means that the garment is meant to match your actual measurements. Actual body measurements are what we are taking here. Ease is something that is considered when choosing your size and your pattern should indicate suggested ease.
You don’t need a partner to take these measurements, I’ll show you how to take them all by yourself but if you do have someone around to help, it certainly doesn’t hurt! So here we go, let’s roll!
Armhole & Yoke Depth
You may notice that I didn’t mention Yoke Depth in this video, and that’s because Yoke Depth in a pattern is based on Armhole Depth. There’s not a separate measurement responsible. In general, both depths are calculated using the total number of rows in the top section of your sweater divided by the pattern’s row gauge. For a top-down sweater, this is the length before sleeve separation; for a bottom-up sweater, it’s the length worked after joining body and sleeves. If your row gauge is significantly different than the pattern’s row gauge, you may end up with a different depth in this section. Usually, a small row gauge difference won’t affect your Yoke or Armhole Depth enough to be a bother. It’s easier to “fix” shorter rows (more rows per inches than the pattern gauge), because you can knit for extra length at the bottom of the Yoke or Armhole section. For longer rows, there’s not much you can do to shorten your depth unless you are very comfortable with pattern math and know how to adjust the spacing of your increasing or decreasing over this section. You might notice Yoke Depth measurements being slightly shorter than Armhole Depths for a similar fit—this is because the actual spacing created in a raglan or circular yoke design is on the diagonal, which results in a slightly longer line. If you don’t remember the Pythagorean Theorem (the explanation for the difference in the diagonal) that’s totally ok, just know that it’s normal to see a Yoke Depth in a raglan or circular construction that’s closer to your actual Armhole Depth versus a set-in sleeve or drop shoulder design.
Back Neck-to-Cuff & Wrist Measurements
You won’t find the Back Neck-to Cuff measurement reported on a schematic, because most knitters aren’t familiar with it. However, a good designer will have used this set of standard measurements to determine the underarm sleeve length. In this post, I’ve not shown you how to take your underarm sleeve length measurement and that’s because I highly recommend that you never compare underarm sleeve length directly. Think of a sweater as a pile of puzzle pieces that all fit together. Your desired sleeve length will be based on the amount of ease you’ve chosen to knit along with the length or width of the sweater’s Back Neck, Shoulder + Yoke or Armhole Depth. But don’t worry! I’ve got a tutorial that I recommend you utilize before beginning any long sleeve sweater that will allow you to directly compare Back Neck-to-Cuff in the pattern to your own measurement. Click the button below and use this tutorial if you’re interested in calculating your perfect sleeve length while taking into account all the puzzle pieces I mentioned!
I’ve also included Wrist Circumference in the above video because you’ll want to measure your wrist at the same location where you’ve chosen your sleeve to end. Take both of these measurements as many times as needed to have the details that will allow you to modify your sleeve length or wrist circumference for 3/4, bracelet, long or extra long sleeve length. Sleeve length is one of the most common modifications knitters need to make, and that’s because Bust/Chest measurements have nothing to do with our height and therefore, very little relation to sleeve length, either. The easiest place to modify your sleeve length is at the very top, before shaping begins. You can make this section shorter or longer to suit your modification. If you need significant length modification, you’ll have better results by adjusting the spacing of your sleeve shaping rounds (closer together for shorter sleeves and further apart for longer ones) but that’s a lesson for the Tailoring Workshop!
Upper Bust(or upper chest)
Is this the first time you’re hearing that you should take your Upper Bust/Upper Chest measurement? If so, you’re not alone. Most of the time, it’s better (and easier) to choose a size based on the fullest part of your bust. However, I recommend using your Upper Bust to choose a size in the following situations:
Tailored, set-in sleeve designs: you’ll likely have better fitting shoulders if you use this upper measurement when choosing a size. If the design features a-line shaping below the bust, you’re good to go and likely won’t have to modify anything. If the sweater is fitted all the way, and you’re blessed in the chest (that is, you have a significant difference between your upper and full bust), you may need to add short rows after sleeve separation (top down) or before sleeve join (bottom up) in order to get enough fabric for the girls to be comfortable. It’ll be well worth it for a sweater that sits perfectly on your shoulders and isn’t falling off to one side. If you need to add short rows, you can add them in dart form (click here for a great resource on this technique), or, they can go all the way across your chest with the shortest row being on the side-boob area (sorry for not coming up with more ladylike terminology here) and the longest row going across the entire front from the center of one underarm to the other. In September 2023, look for the Perfect Tee design from me, as it features this style of short row and the worksheets included in the pattern will be invaluable assets that can be utilized in other patterns going forward. For either bust short-row situation, I recommend using either the German or Japanese methods, as they are less visible than a standard wrap & turn and this is one area where you most likely don’t want to draw extra attention.
Designs with a lot of ease: if a design already has significant ease built in, that means that you can safely use your upper bust measurement to choose your size and still have enough room in your chest for the ladies. The reasoning for using the upper measurement is the same as above, you’re likely to get a much better fit at the shoulders and neckline if you’re able to use your upper bust as the decision-maker.
If you are often finding that your sweaters are too large at the shoulders, it’s (again) worth your while to use the upper bust to choose your size and learn how to modify at the full bust, which can be done in a variety of ways. You can use either of the short row methods noted above, add extra increases to the pattern itself in the front & back sections or increase the stitch count at the underarm. Just be mindful that if you increase the stitch count at the underarm, you will also increase the stitch count in your upper arm, which could be a good thing or a bad thing, depending on your desired upper arm measurement.
Full Bust (or full chest) & Length
This combination begins a series of paired measurements. The pairings are important because they allow for consistency in where your measurements are taken, and in this particular case, your Full Bust/Chest Length can be very useful to know if you’re working waist shaping in a pattern. Bust and Chest are synonymous, so I’ll stop repeating myself now and only use one term, just know that they refer to the same area!
Full Bust Circumference
If you’ve been knitting for any time at all, you probably know that the Full Bust Circumference is the measurement that a designer uses in determining all the other measurements for the pattern. I’ve mentioned “standards”, which are simply averages that we use in designing because it’s the best we’ve got and takes the maximum number of individuals into account. Here’s a look at the Yarn Council standards for women, which are just one example of a set of these standard measurements. Find your full bust measurement on the first line and look at the corresponding measurements below it; you might get an idea of why you have particular areas that you commonly need to modify! For me, I have a small bust and the upper arm circumference that goes with my bust size doesn’t work for me. Therefore, when I knit for myself, I almost always need extra room added on the top of my sleeve. If the situations I mentioned above in the upper bust section don’t describe the sweater you’re planning for, you should choose what size to knit based on your full bust circumference.
Full Bust Length
This might be a measurement you’ve never taken before! If you’re working a pattern that includes waist shaping, or you’re adding waist shaping to a pattern that doesn’t include it at all, this measurement is very important. You always want to have your full stitch count over your full bust so that you have enough fabric for good coverage. Therefore, if you’re working from the top down, you don’t want to start decreasing for your waist until you’ve passed your Full Bust Length. Conversely, if you’re working from the bottom up, make sure that all increasing is completed prior to hitting that length. It’s ok if a pattern doesn’t begin or end the shaping exactly at your full bust length, you just want to make sure that the shaping doesn’t interfere with it. If you’re adding shaping to a pattern, a great place to have your first decrease (top down)or final increase (bottom up) is about .5-1”/1.5-2.5 cm below this length measurement.
Waist Length & Circumference
This paired measurement is the most critical for waist shaping and it can also be useful if you love knitting cropped sweaters! A cropped sweater may be shorter than your Waist Length depending on the design, but if the total length is longer than your waist length, you’ll want to shorten the body of the sweater or else it won’t be cropped on you at all. Knowing the circumference at the waist will allow you to be sure that once your waist shaping is completed, you’ll have a similar level of ease at the waist as you do on the chest. If you find that there are too many or not enough shaping rounds for your Waist Circumference, modify! Be sure that the small of the waist on your sweater is at or slightly above the small of your actual waist. If it hits anywhere below, your waist shaping will not be flattering, as it will not mimic the shape of your body and instead will be snug as you get closer to your hips. To determine the amount of spacing over which you can safely work waist shaping, work the following super-easy calculation:
Waist Length - Full Bust Length = maximum length over shaping
Use this calculation to determine if the pattern’s set-up is going to work for you or not. If it doesn’t, go one step further and divide the length over shaping by the total number of shaping rounds you want to work (especially if you’ve decided to modify the total number of rounds). Then you’ll know how often to work your shaping and still have the small of the waist sit in the appropriate place on your body.
Upper Hip or “Favorite” Sweater Length and Circumference
Just like the paired shapings that came before, these two measurements correspond in order to make sure that you’ll have enough fabric at the bottom of your sweater for your Upper Hip Circumference. In the video, I called these measurements “favorites” because everyone has their own preferences about exactly where they want a sweater to hit on their hips. The longer the sweater, generally the more fabric needed around the bottom. If a sweater has a straight body, you’ll simply compare the full bust circumference to your upper hip circumference. As long as the full bust is larger than the upper hip, you’re good to go. If it’s not, you’ll want to think about modifying your sweater with some gentle increasing (top down) or decreasing (bottom up), in the area between your waist length and you Upper Hip Length in order to accommodate your hips. If a sweater includes waist shaping, it’s usually even easier to increase this total area because you’ll already have shaping markers set up and can add extra shaping rounds overall. If you are working your sweater from the bottom up and encounter this issue, you will need to cast on more stitches than the pattern calls for and make sure you get rid of the extra stitches before you get to your waist length, regardless of whether or not the pattern includes shaping.
Full Hip Length and Circumference
I won’t go on and on in this section because it’s really the same concept as in the previous one. If you are working a sweater that is this long, the bottom of it needs to accommodate your Full Hip Circumference. If you are working knit bottoms of some type, you’ll probably have chosen a size based on this measurement. If you do need extra fabric for your full hips, shape the are between your Full Hip Length and waist length as you would have between the upper hip and waist length for a shorter sweater.
Upper Arm Circumference: 4 ways
In this video, I explain a couple of very common upper arm scenarios. First, most of us have a different Upper Arm Circumference around our right and left arms. It doesn’t necessarily correspond to whether you are right or left handed, either, as that’s something I’ve asked my students regularly. Secondly, not all of us have the largest part of our arm at the very top. So, taking the four suggested measurements will allow you to determine which of the four is the largest and that’s the one you want to go with when you’re comparing your actual upper arm measurement to a schematic. It’s normal to have less ease (in terms of inches or centimeters) in your upper arm when compared to the ease in your chest, because ease is proportional and your chest is larger than your arm. However, in most cases you do want to make sure that the upper arm in your sweater is at least slightly larger than your largest actual upper arm measurement. If it’s not, you’ll want to modify by either adding extra stitches during your sleeve increases (whether they are on the sleeve itself for bottom up, or on the yoke/armhole section for top down) or by adding stitches to the underarm section. As for the full bust section, remember that adding underarm stitches will also increase the stitch count in the chest so don’t do this unless you know you want more stitches in both the chest and the upper arm.
Crossback, Back Neck Width & Shoulders
We’re at the final set of measurements! Whew! As for Back Neck-to-Cuff, you won’t typically see Crossback on a schematic, but you should see either Back Neck or Neck Circumference. Unless the design is a boatneck or features an intentionally wide neckline, neck circumference should be smaller than your head circumference. Back neck is a component of your crossback, but I’m going to briefly discuss the two separately.
crossback
Crossback measurements are most important in set-in sleeve designs. You want the crossback of the design to be smaller than your actual crossback in order for the sweater to sit nicely on your shoulders and for the sleeves to be at the top of your shoulder, instead of beginning further down your arm. You can calculate the pattern’s crossback by adding together the Back Neck and both Shoulders, the reverse of the formula shown in the video to calculate back neck using the other two measurements. But taking your crossback measurement isn’t just important for set-in sleeve designs, it can also help you determine if your back neck is set up nicely.
back neck
Although the total crossback should be smaller than your actual measurement, the back neck measurement in the pattern should be wider than your actual measurement so that you don’t get choked by your sweater but not so wide that its encompassing your shoulders. A common neckline issue occurs when a designer increases the width of the neckline by the same rate as they increase the chest. An actual neckline increases at a much smaller rate, and therefore if you’re knitting a larger size than is modeled, you really want to be confident that the back neck width is in a sweet spot and isn’t overly wide. If your pattern does not include a back neck measurement on the schematic and is a drop shoulder, raglan, or set-in sleeve design, you can easily calculate it yourself by looking at either the set-up row (top down patterns) or the final row before bind-off (bottom up patterns). Find the smallest stitch count in the back section and divided it by the pattern’s stitch gauge (over 1”2.5 cm). Voila! The number that you get after this simple act of division is your back neck measurement! Now you can compare it to your own. This is also where your actual crossback measurement comes back into play. If your back neck is more than half of your crossback, you might consider modifying it so that it has fewer stitches.
Now What?
I created these videos before I wrote the text to go along with them, and as usual, I ended up going into much more detail than I had planned! What can I say, I’m long winded and sometimes I just can’t help myself! However, I hope that even though this post wasn’t meant to teach you how to perform each potential modification, you know how to take your measurement and you know how it is supposed to compare to the schematic. You should also have a good idea of when and where modifications might be needed. There’s so much that goes into designing a single sweater, and then extended it to cover a wide range of sizes is a whole other thing! As a knitter, you should never feel constrained by a pattern. From suggested needle size to featured yarn to stitch counts, don’t be afraid to make modifications whenever you need to so that your sweater fits and flatters YOU! That’s what it’s all about.
Enjoyed this tutorial? Consider a donation to help me continue to create awesome tutorials for knitters.
Katy Lin Boutique - meet the products!
I consider myself to be a pretty picky shopper that loves to shop. Earlier this year, I decided that it was time to use my love of shopping as inspiration for my own little boutique. My goals were to provide you with goodies that are kinda like my patterns—special AND so useful! Every single product you see in the shop is one that I personally use and love. I chose to work with small businesses whenever possible because what could be better than small businesses supporting one another! Through my travels, I met each company’s owner, well before I knew I was going to create my shop. They have all been wonderful to work with and I can’t wait to sell out so I can get even more goodies. I was able to be so hands-on throughout the entire process; you can know that these offerings are truly “me”! I hope they hit a sweet spot for you and make your knitting even more pleasurable. But my goodies aren’t “just” for knitters, I’ve got some awesome stuff for non-knitters, too. So, share my boutique with your friends after you check it out yourself! I wanted to give you an overview of what you can find in the shop, all in one spot. So, this post will be a long one but you can also check out the video below for a quicker overview!
The Products
It all started with a conversation between me and a very dear friend, Kari of Urban Smirk. Kari was my next door neighbor for not NEARLY long enough, but our bond has covered long distances and she’s an incredible graphic designer. I came to her with the most basic of ideas and she developed my new sheepersona, Katy Lin. Katy Lin has loads of plans, she’s just getting started! Since you’ll see Katy Lin throughout the boutique, I wanted to introduce her right off the bat!


relaxation package
The ultimate pampering package for knitters and non-knitters alike! This package includes everything you need for a cozy night at home: a soy wax vegan candle, body oil, hand creme, potpourri satchet, and turkish towel. Spoil yourself, or spoil a friend: this package is such a treat!
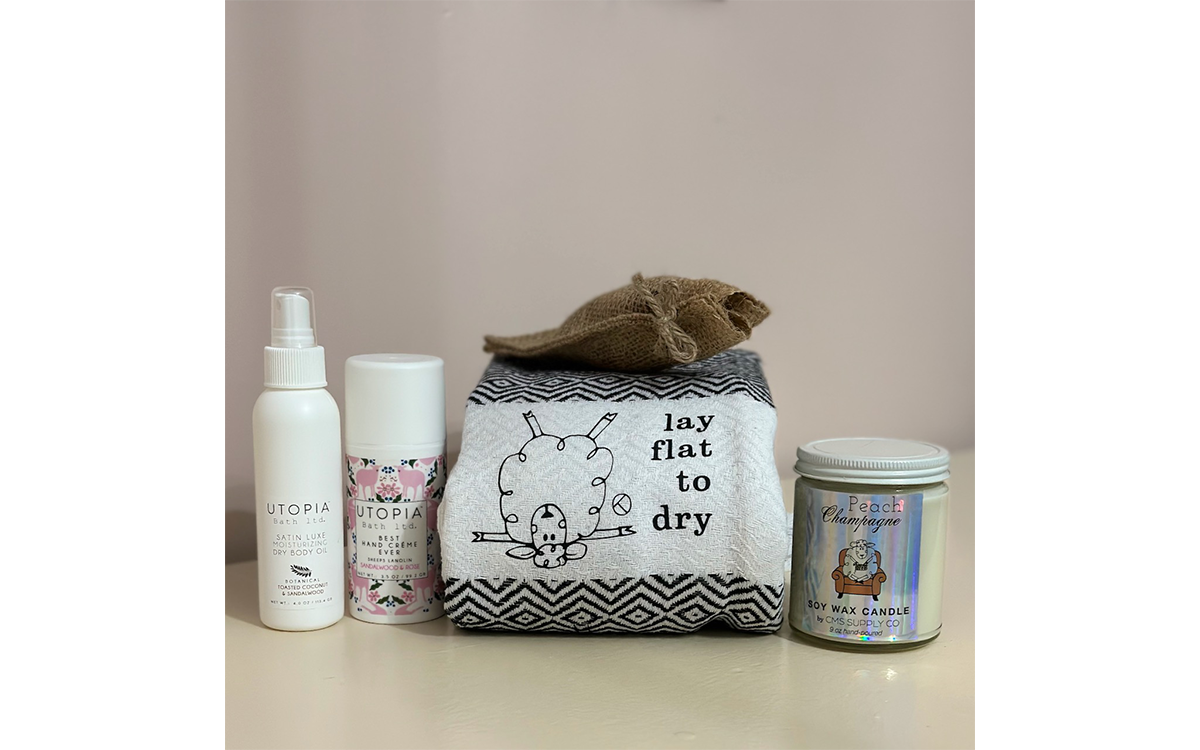
Turkish {blocking} Towel
These blocking towels are life changing, I tell ya! If you’ve ever wanted to up your blocking game (and style), you’ve got to give these Turkish blocking towels a try. Made from 100% cotton, these oversized towels will help your knits dry quickly by absorbing tons of water and keep them safe on a variety of surfaces. I love to use one towel to remove as much water as possible, and a second towel to lay my knits on as they fully dry. And of course I have Katy Lin - my spokesheep - with her witty sayings on each towel, courtesy of Kari who not only designed the towels but also printed them!

Katy lin Acrylic Pins
Funny story, my pins arrived and I was ecstatic. THEY ARE ADORABLE and so well made. Then I realized that they were even better because they have a protective coating that prevents them from getting scratched or beat up in any way during shipping. I took the photographs before I even realized this so just know that your pin is as clear as glass and they come in 4 different options: 3 of Katy Lin’s situations and 1 branded KO logo option!

katy lin tees & Tanks
What’s an online shop without cute tops! You’ll find Katy Lin’s sassy wisdom on all my shirts with four different saying options:
”Lay Flat to Dry”
”It’ll Block Out”
”Stop looking at me like I’m a ball of yarn”
”You can’t knit all day if you don’t start in the morning”
In each listing, you’ll find detailed sizing information including charts and direct links to the shirt manufacturer’s size diagrams. There’s nothing worse than getting something that doesn’t fit! I’ve chosen to use Next Level (tees) and Bella + Canvas (tanks) tops for their softness. You’re going to love your top.

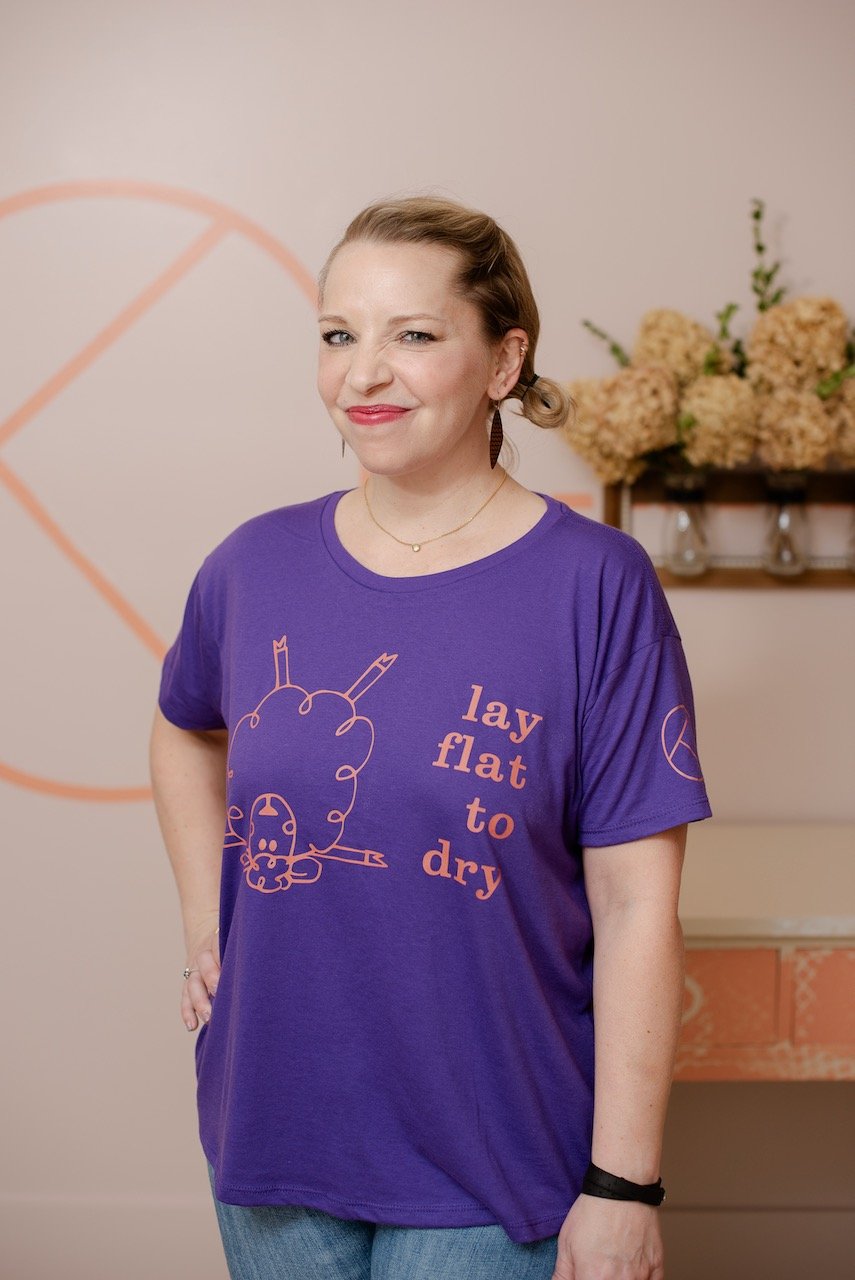
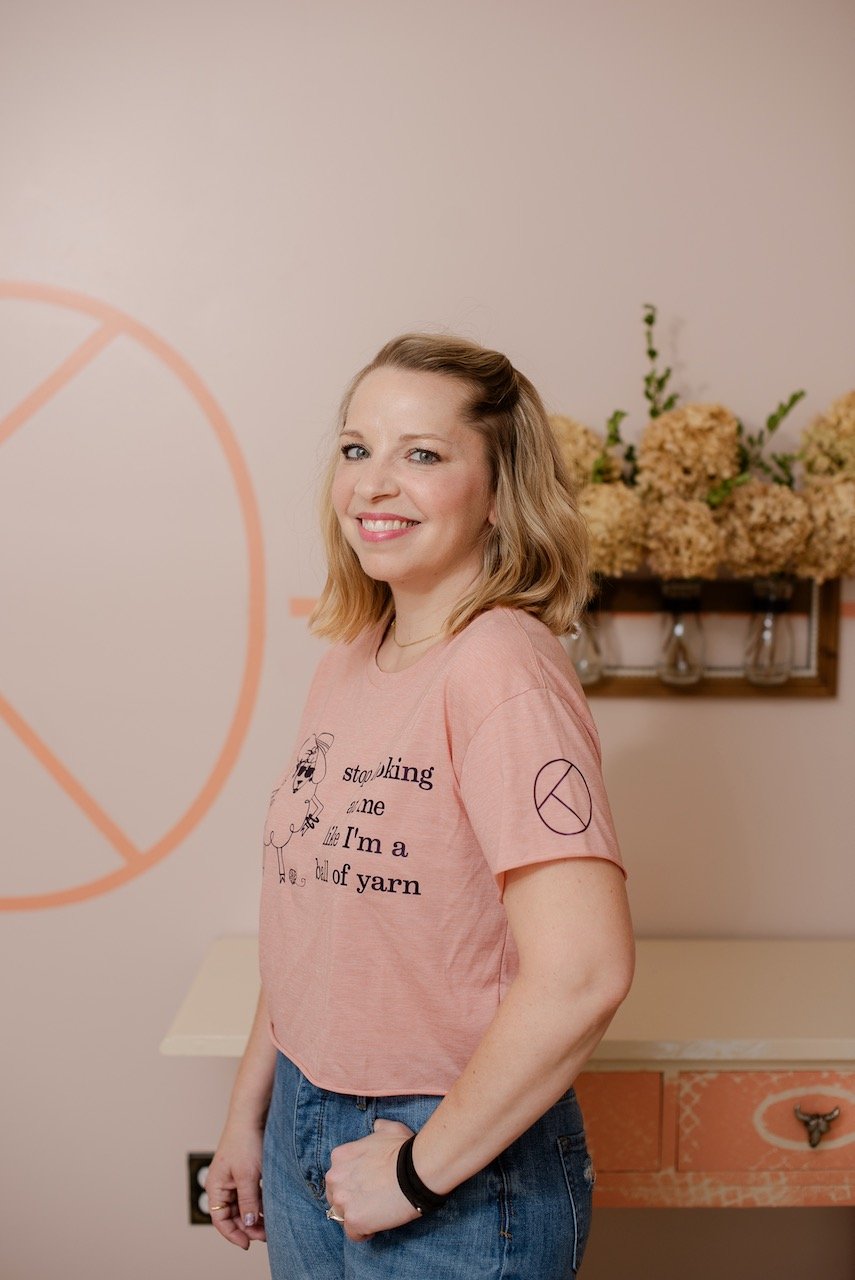
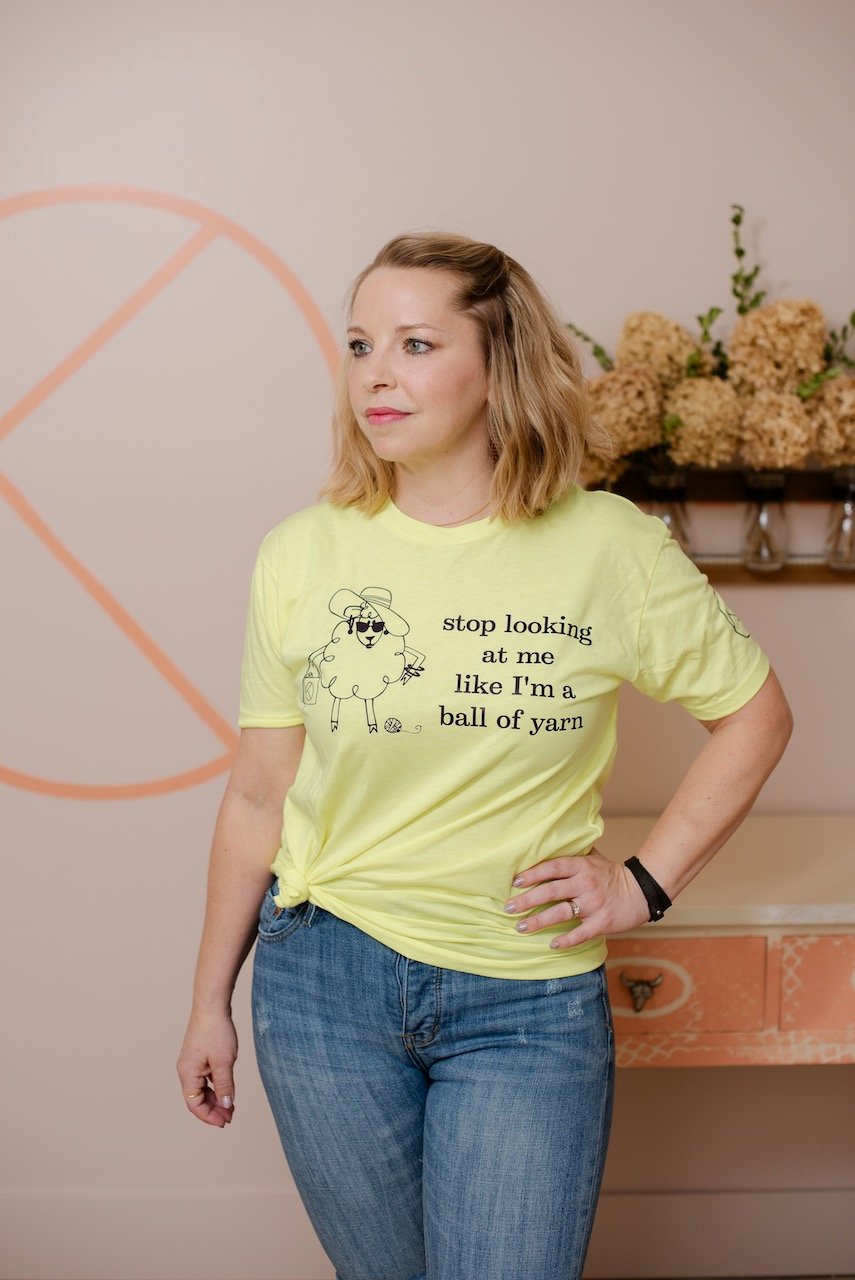
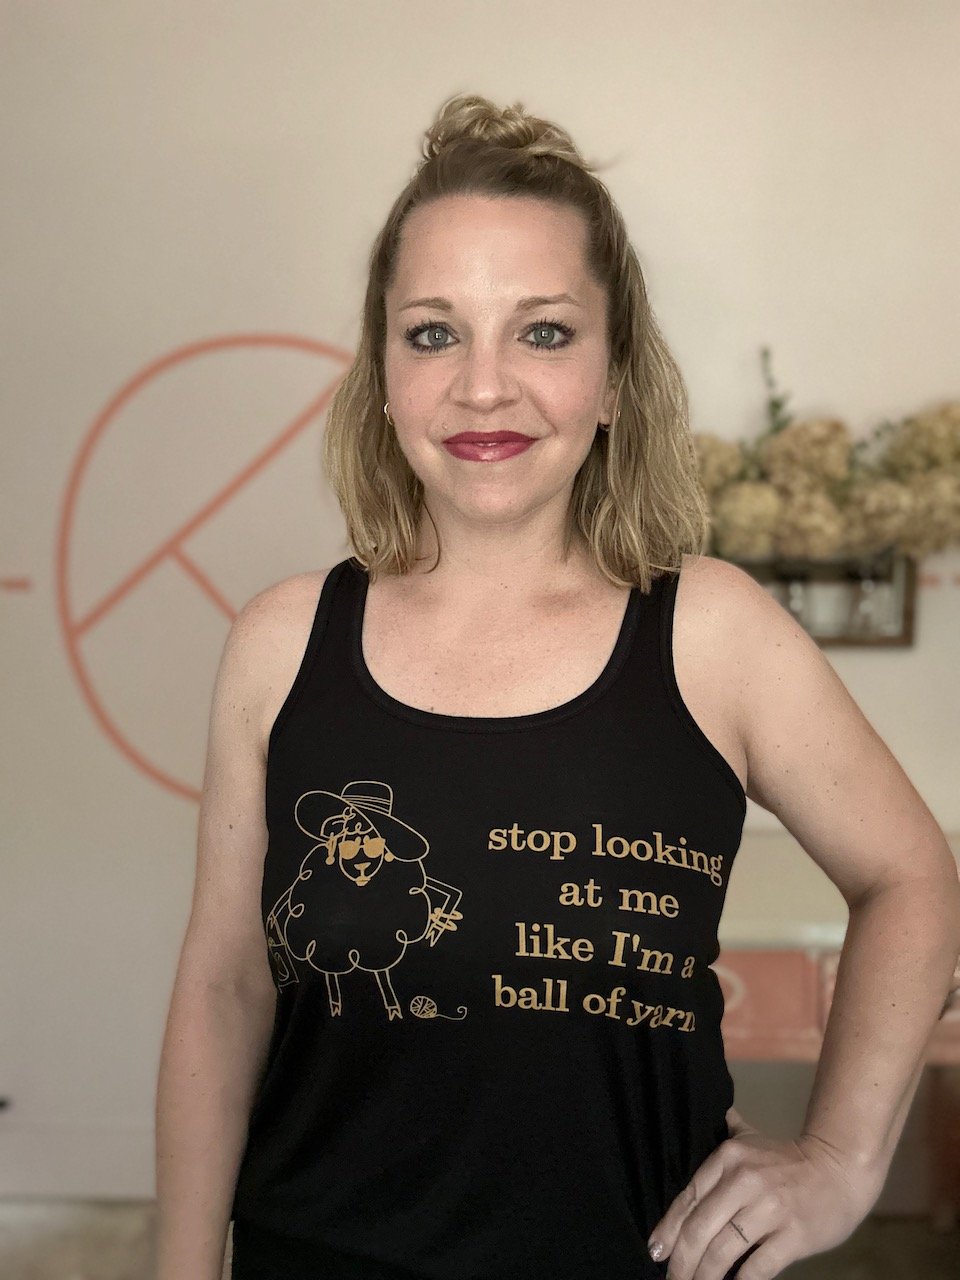

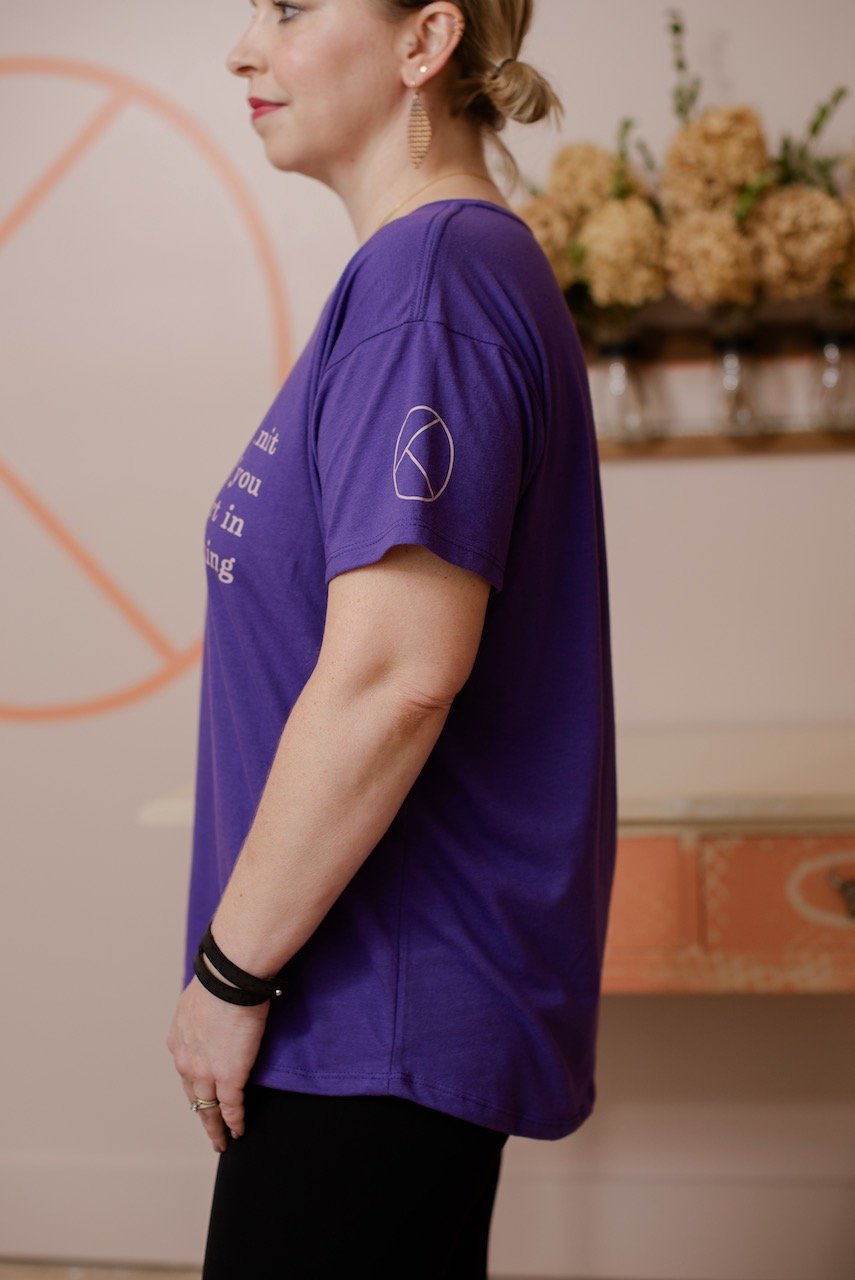

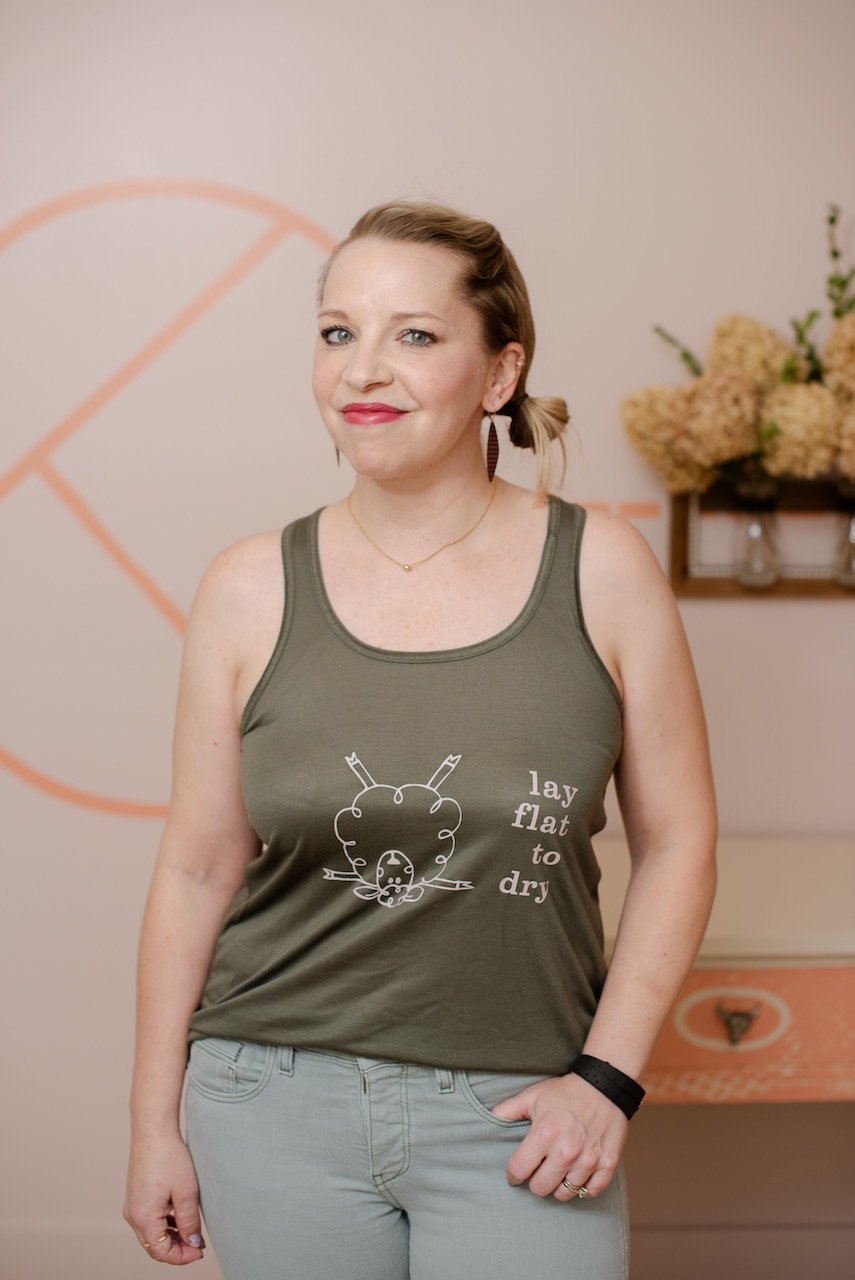

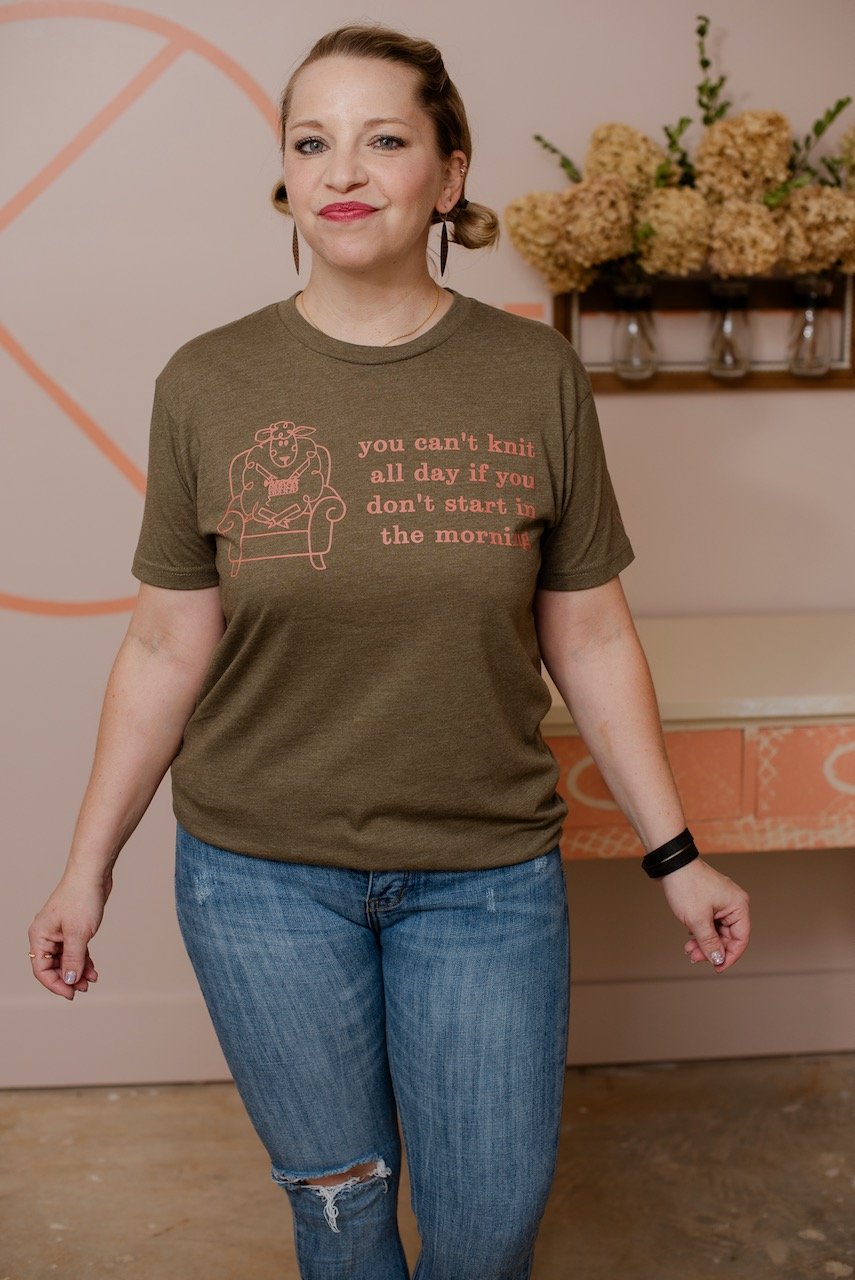
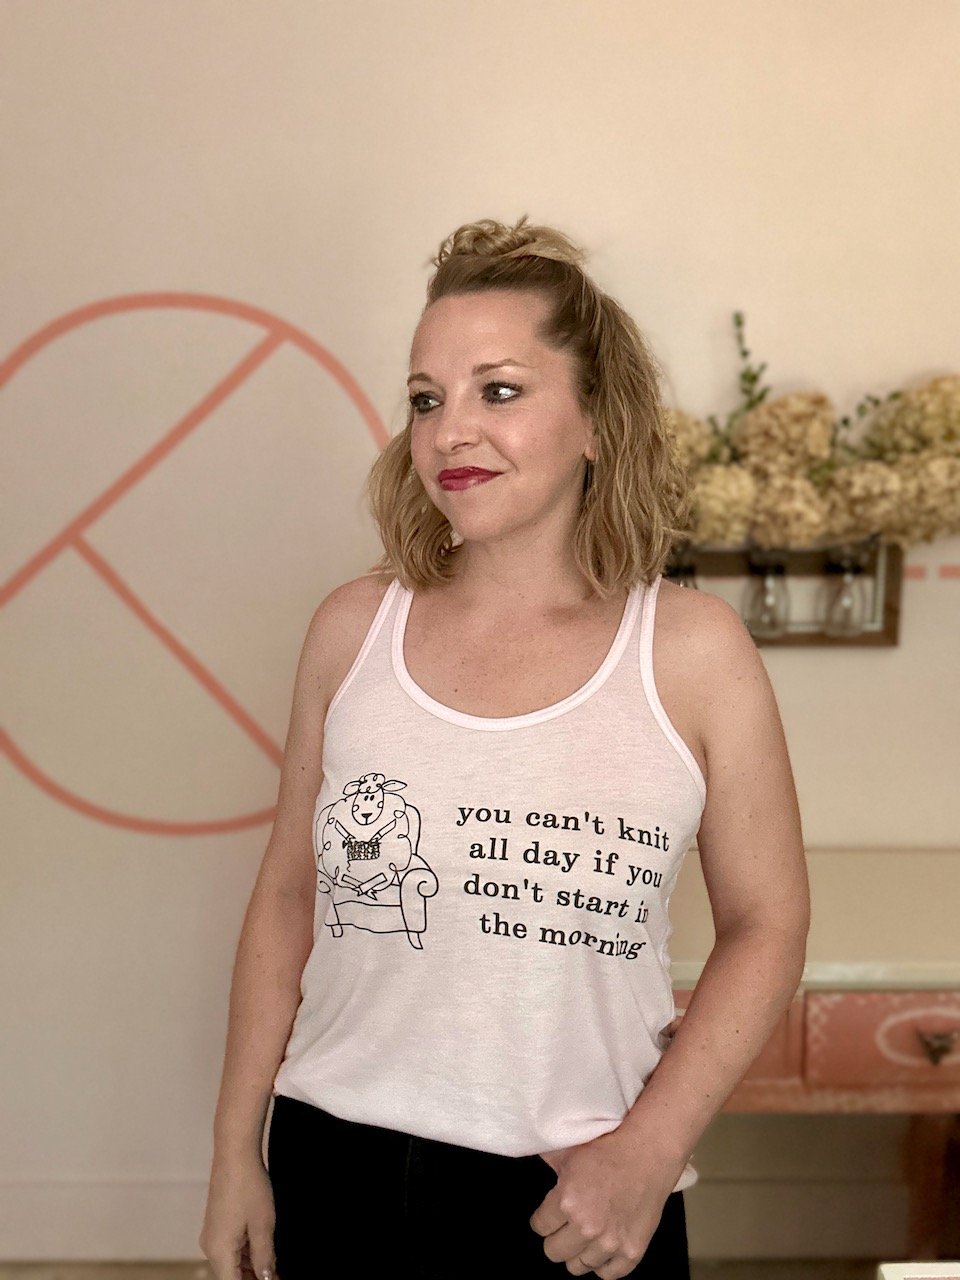
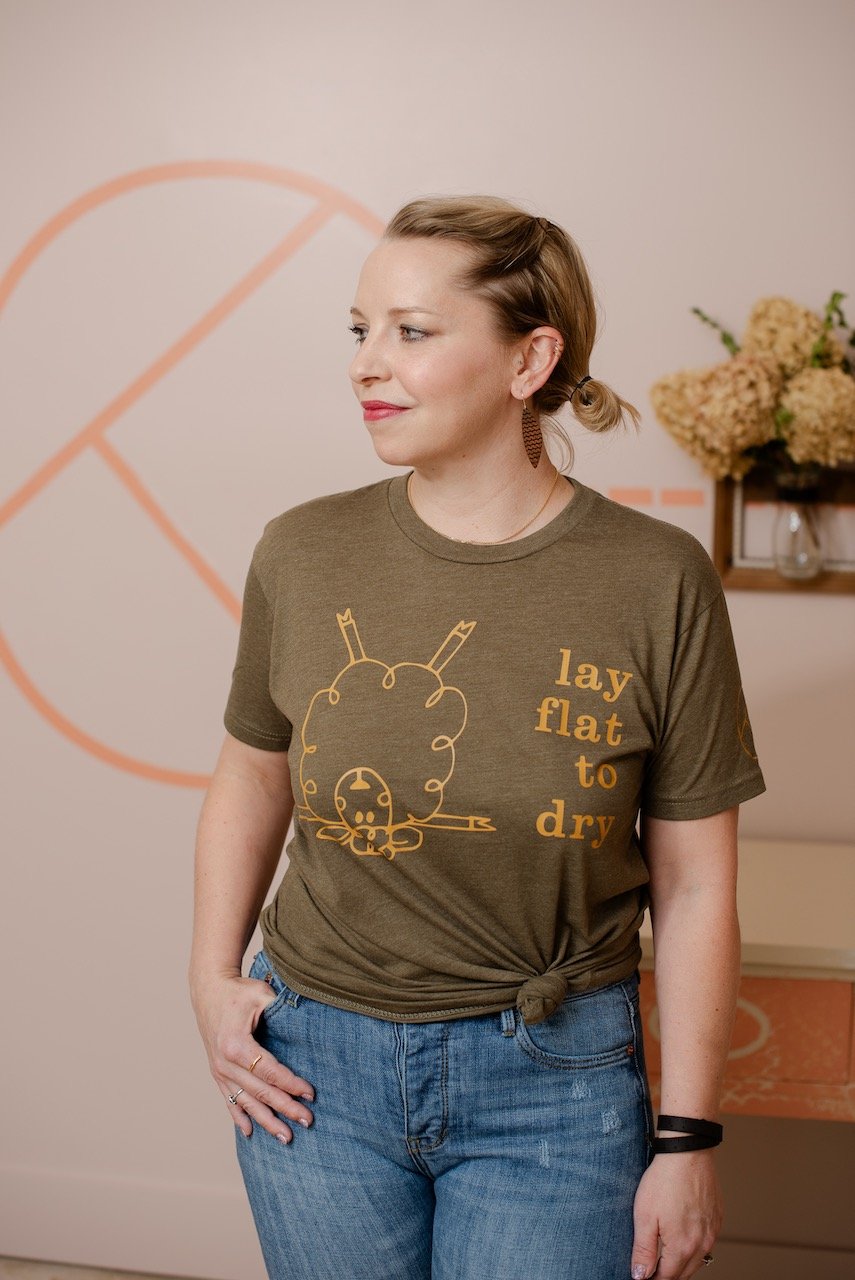
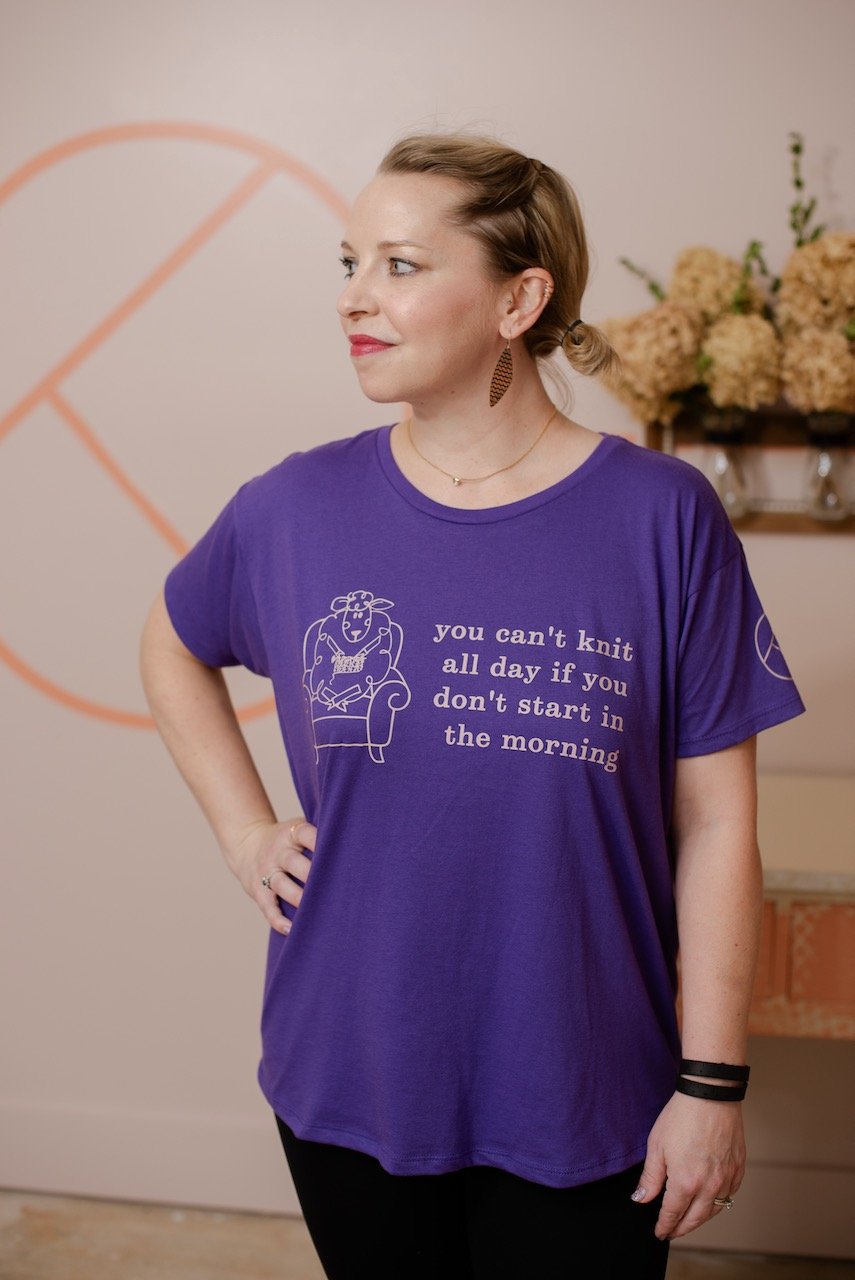
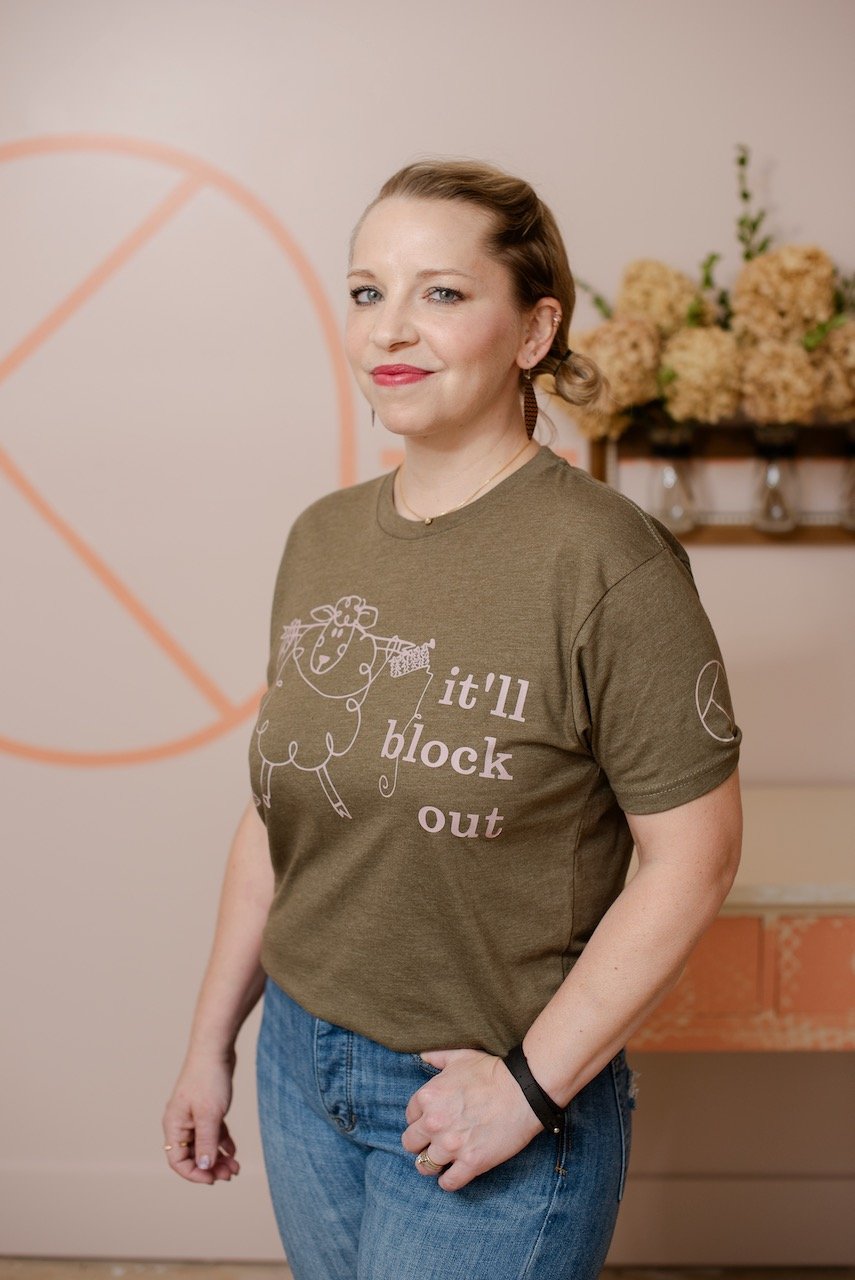
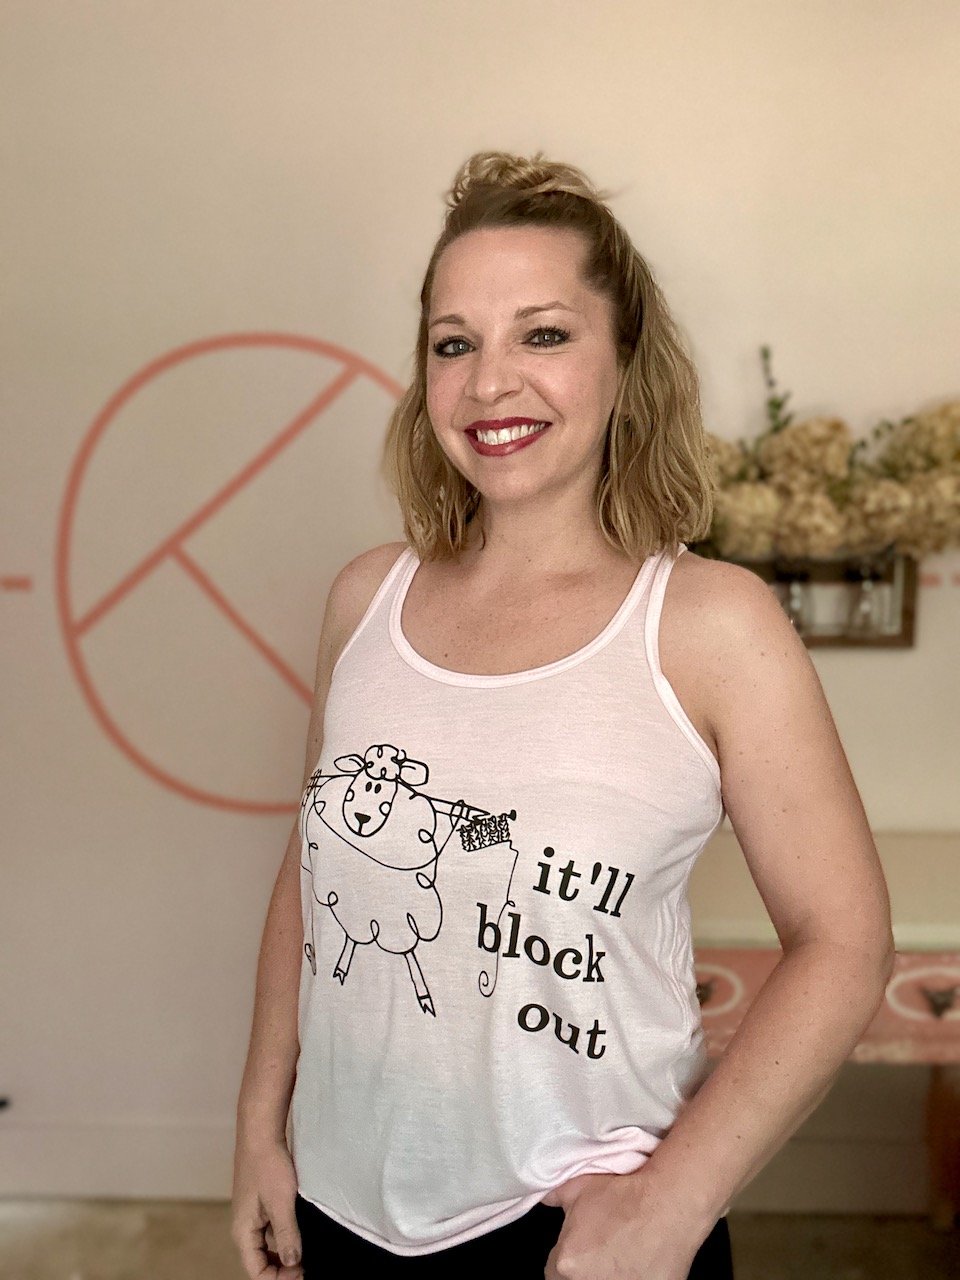

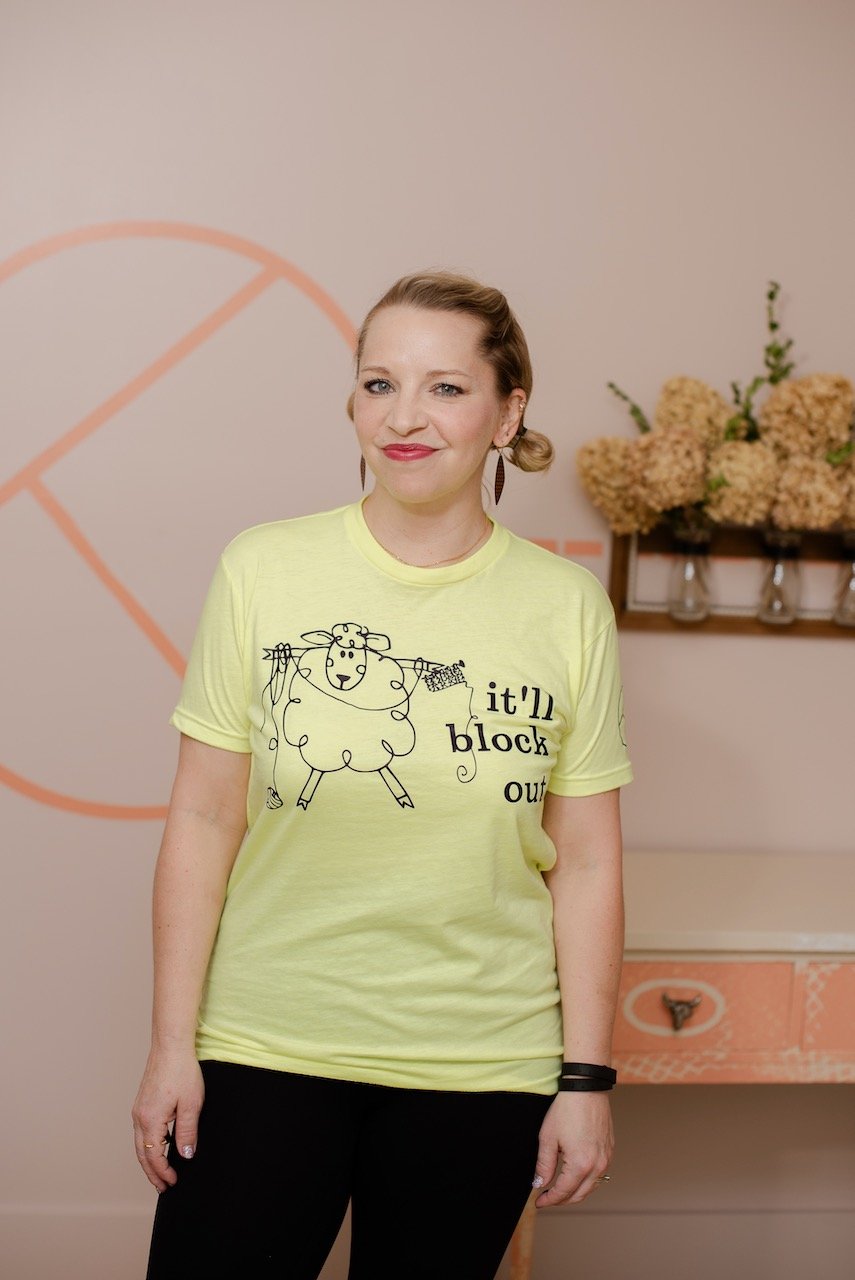
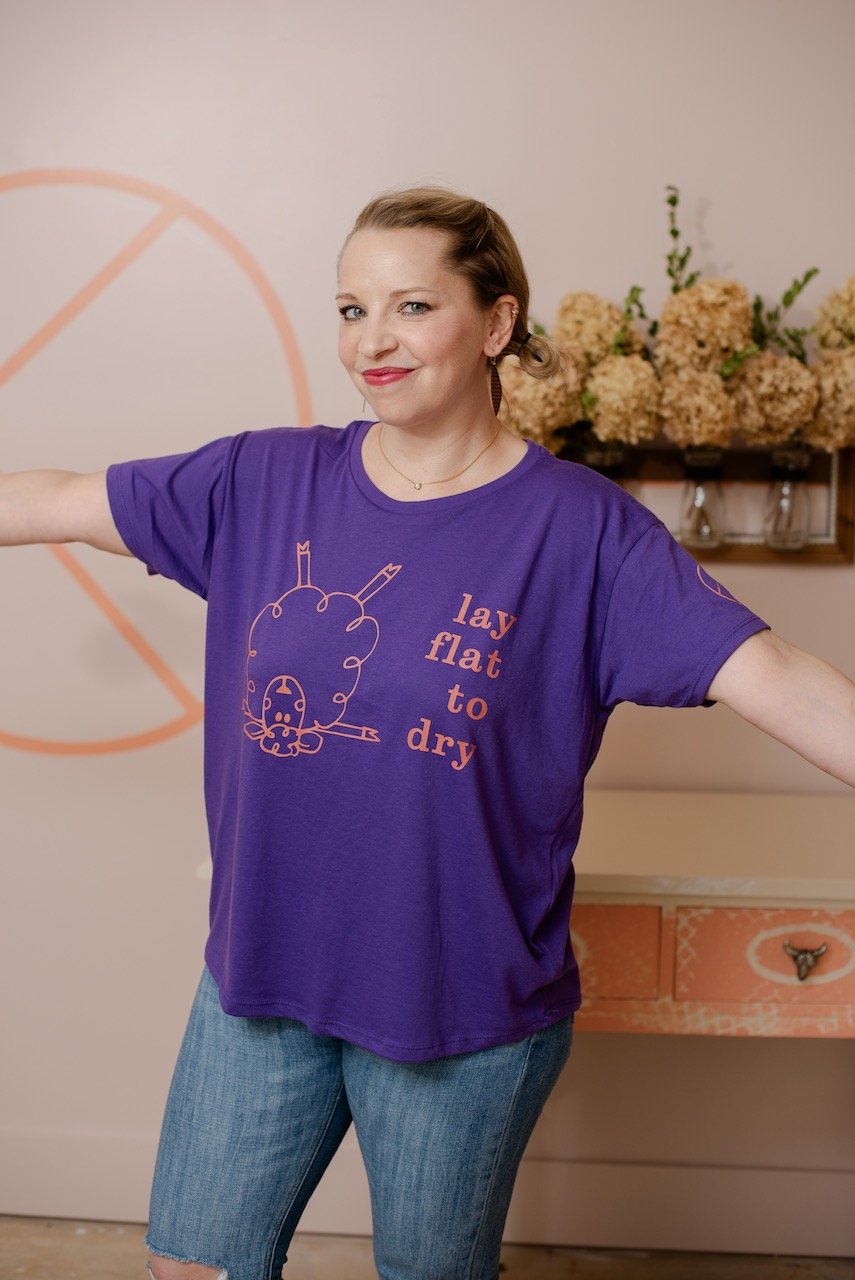
lip balm
My lip balm has history! Way back when I used to haul patterns and merch to floor shows, I started making vegan lip balm. It’s been years since I did it but I knew I wanted to bring it back for the boutique. You can even find my recipe right here online if you’d like to try to make some on your own or just to see all the ingredients (they are also listed on your balm label, of course). I plan to update my balm seasonally (pumpkin spice this fall anyone?) and right now I have Peach Champagne and Peppermint Eucalyptus + Vitamin E. My balm sold out regularly the first time around, it feels amazing on your lips and it’s wonderful to know that only natural ingredients are going on your body.

ko rose & lavender potpourri
Speaking of making and mentioning roses for the first (of many) times today… I’ve also learned the art of making potpourri! My potpourri is created from rose petals, lavender, sage and a little eucalpytus—all of which come straight out of my home garden. After drying each plant, the potpourri is created by adding a bit of essential oil. After early experimentation, I settled on a citrus accent. Your potpourri can be delivered in a jar or sachet, depending on how you intend to use it. I recommend jars if you want to be able to pop the lid and set it somewhere or a sachet if you plan to use it in drawers or closets.
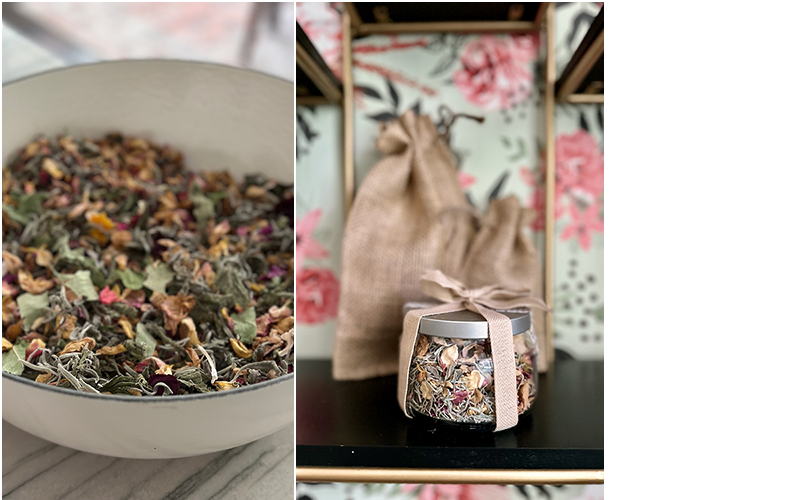
Smells so good!
Roses + Lavender = YUM.
ko washi tape
I’ve become recently obsessed with this tape. It really started during lockdown, as I used it to track my sourdough starter growth but when I was designing Fierce, it really, really came in handy for my knitting. Did you know that you can even use Washi tape on your tablet or computer screen and it still won’t leave any residue? If you’re working from paper, I recommend using a sheet protector so that you can easily peel your tape off after completing each row and move it up your chart.
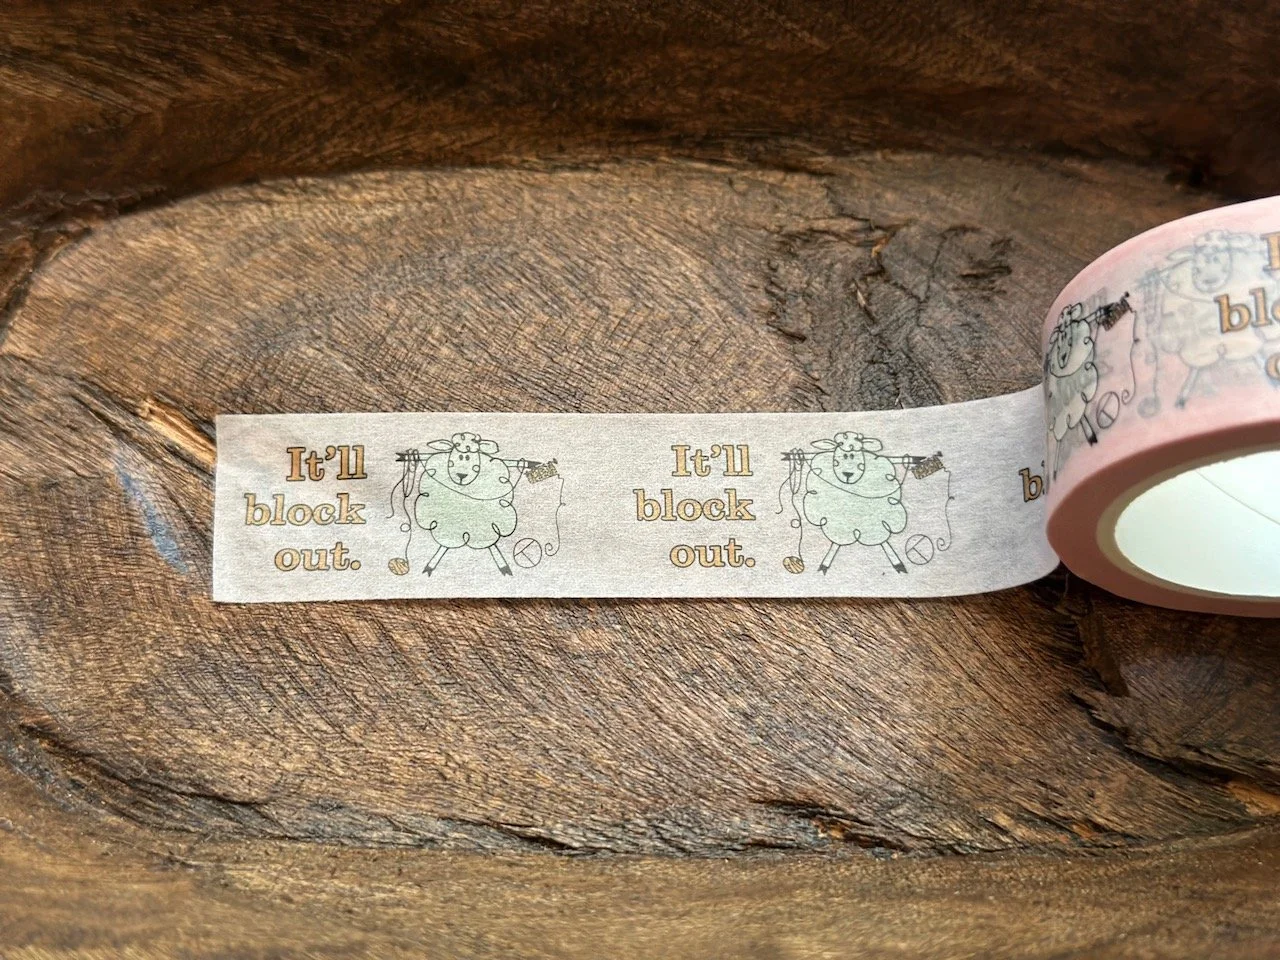
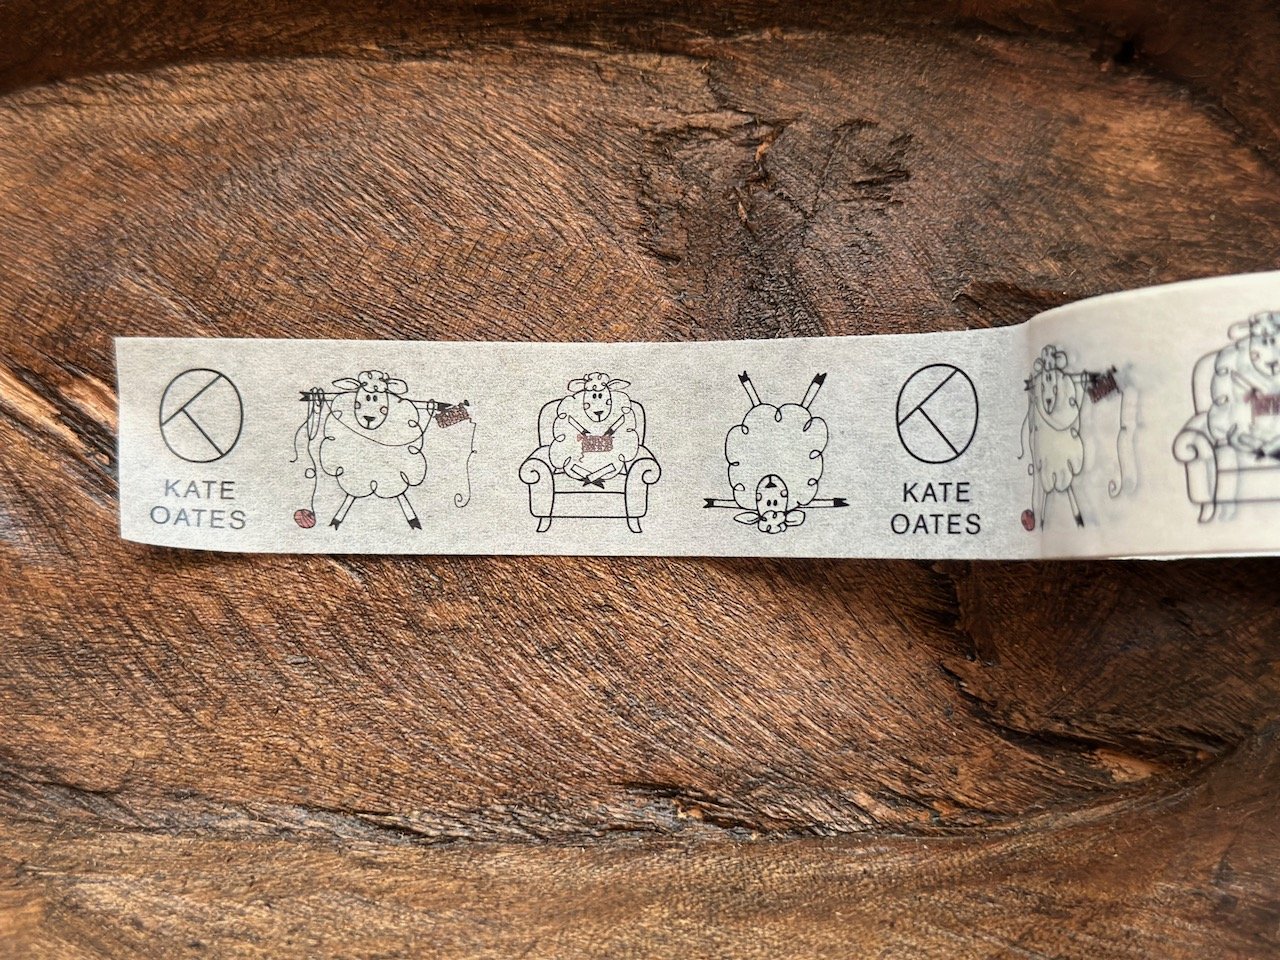


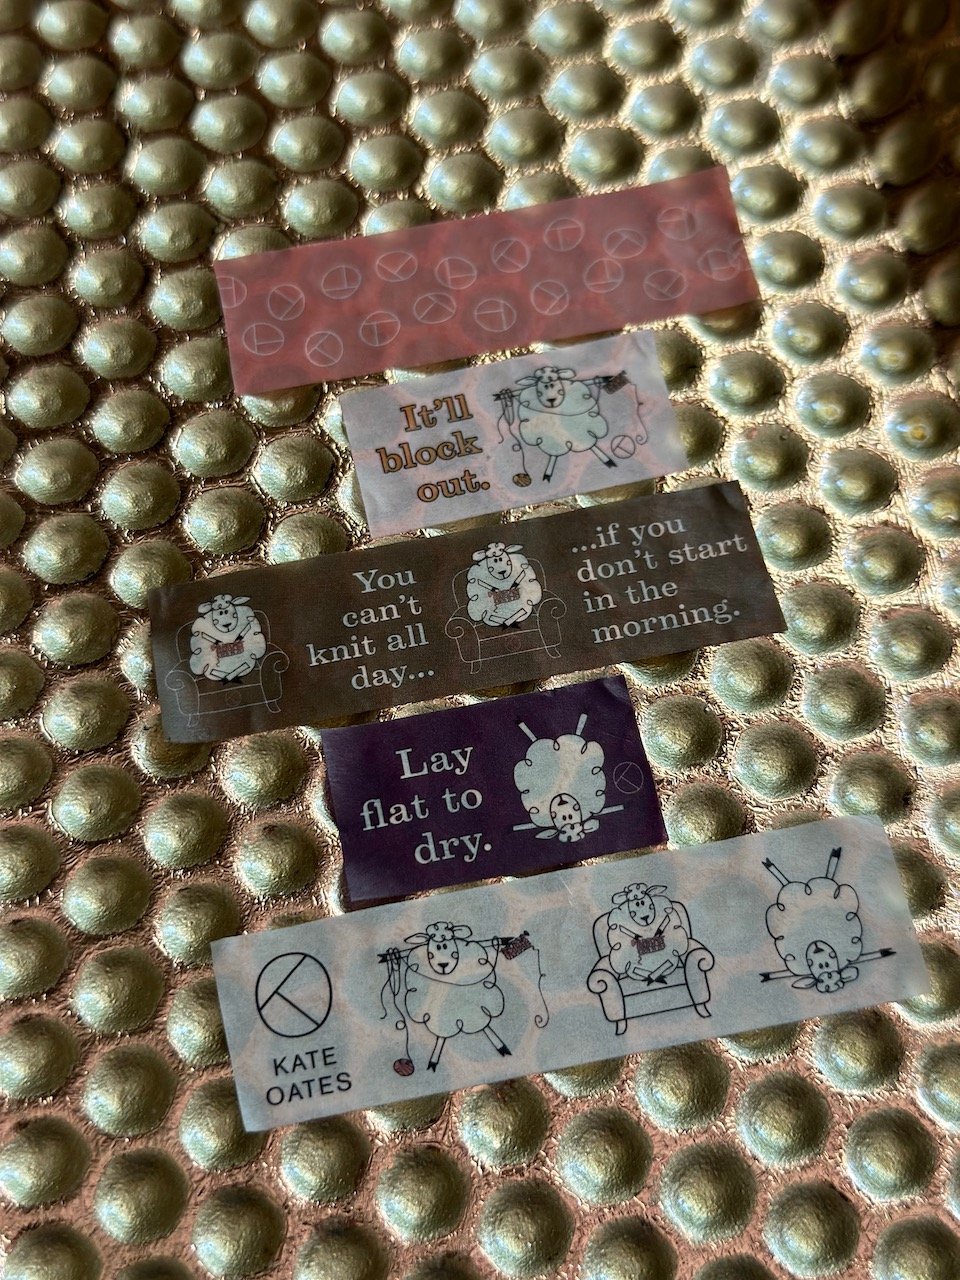
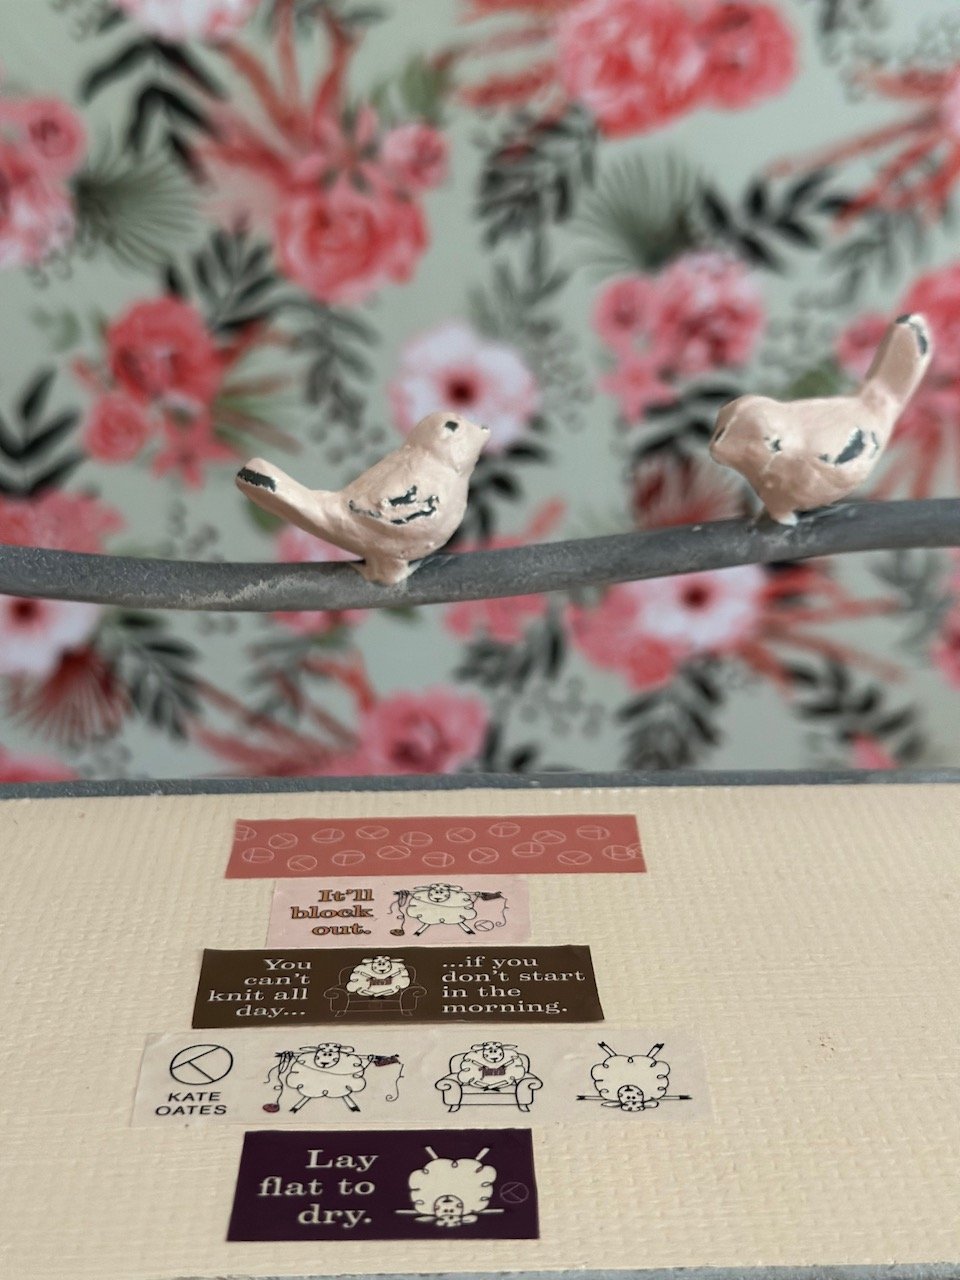

cms supply co.goodies: Wool Wash & Vegan Candles.
I met Cady of CMS Supply Co. last fall and just about went broke in her booth at Black Mountain Yarn Shop’s Indie Extravaganza. She is SO GOOD at yummy scents and her wool wash will really soften your knits. The two of us created a new candle scent, Peach Champagne, because I wanted something that said “South Carolina” (which is where I live!). Did you know that SC is the largest producer of peaches in the US? In both the wool wash and candles, four scents are available. I’ll also mention that you can find Rose scents in both products because we all know I can’t resist anything with roses.
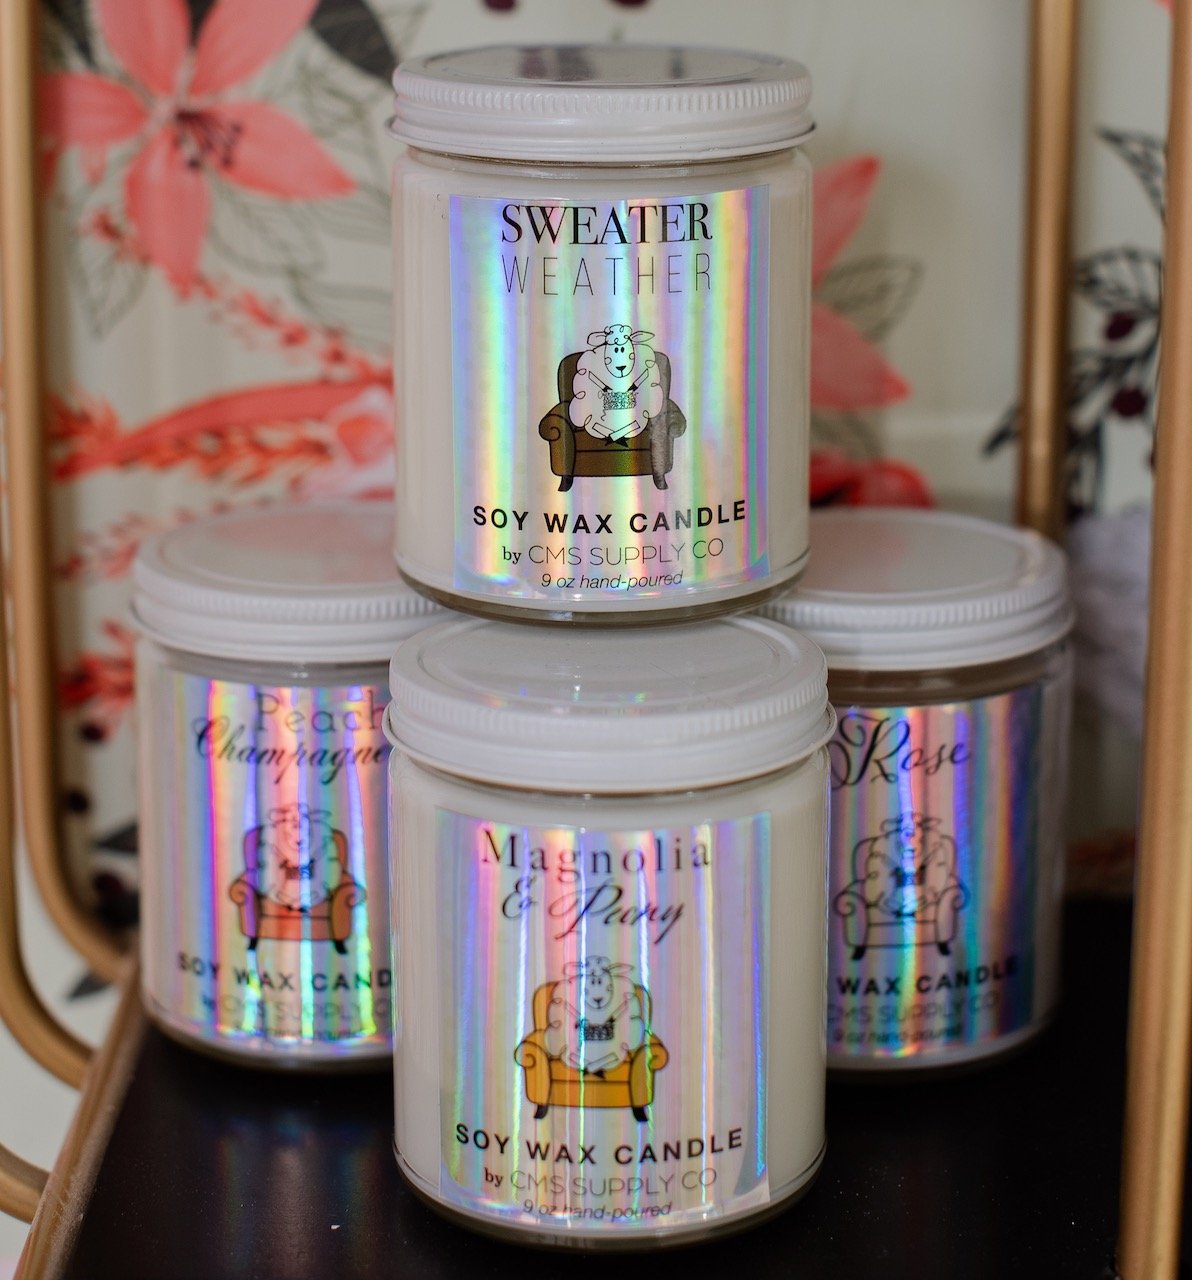
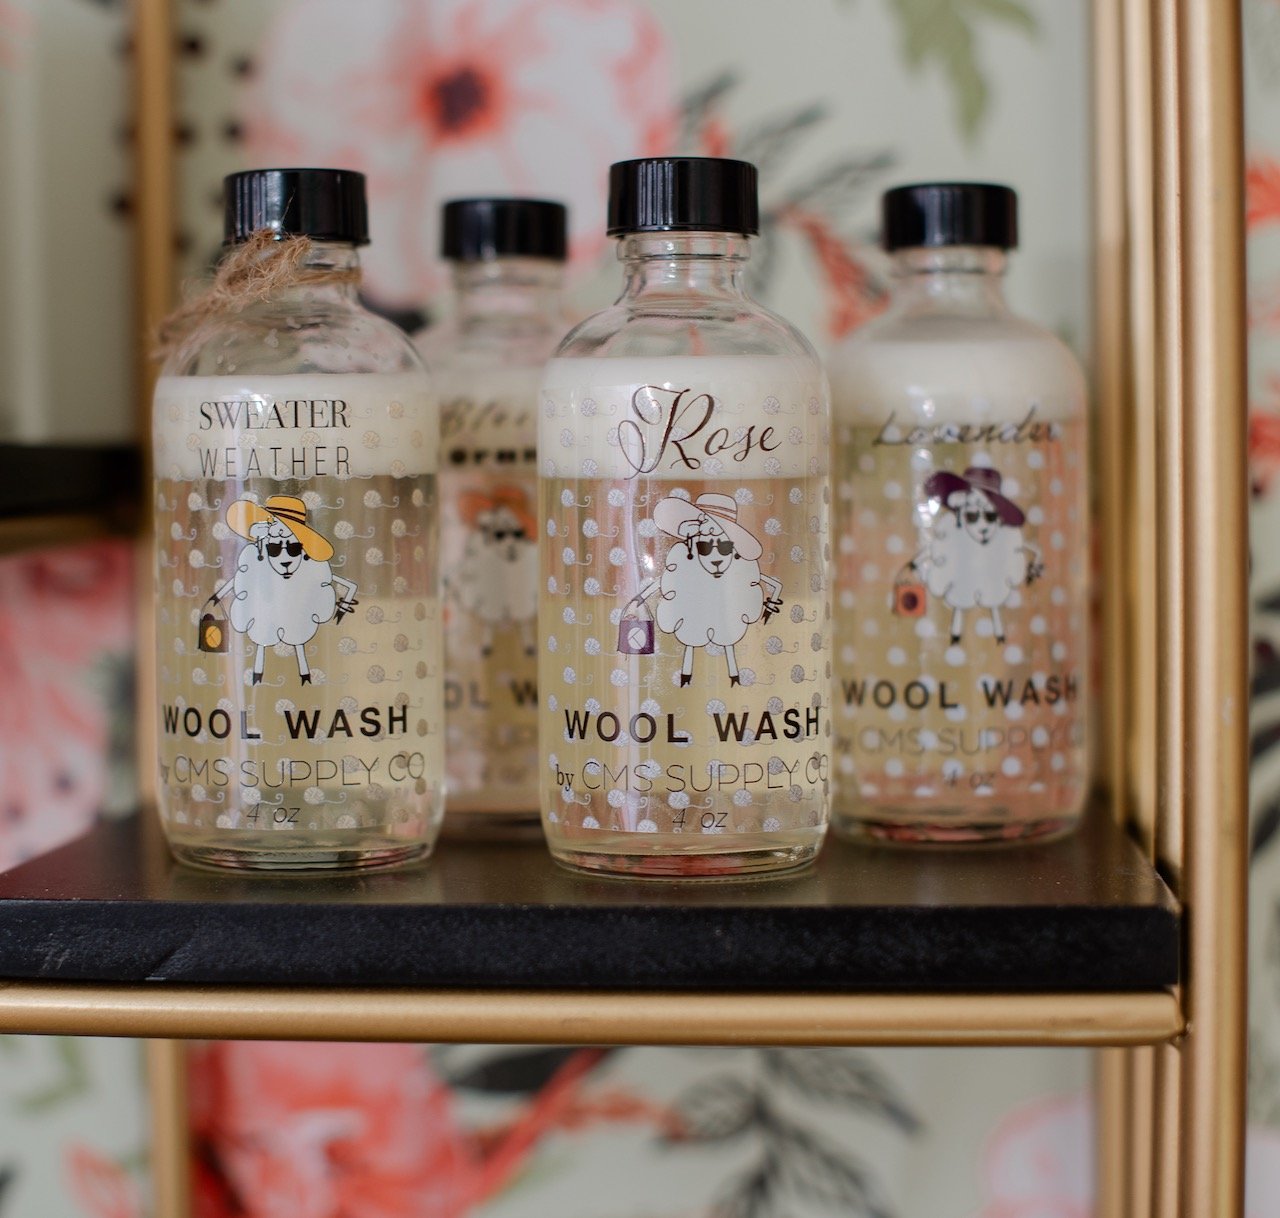
Utopia Bath LTD
New York Sheep & Wool never disappoints, and even though the fiber is amazing, this past year my game-changer was meeting Melanie of Utopia Bath. She let me try product after product and I walked away with plenty of them. Some were for me, and some were planned gifts! Utopia boasts the “Best Hand Créme Ever” and I have to agree. I’m obsessed with it and my shop carries 3 scents. I also stock Melanie’s Body Oil. If you’ve got dry elbows or knees or are looking for glowing skin, you WANT this amazing body oil (4 scents available).
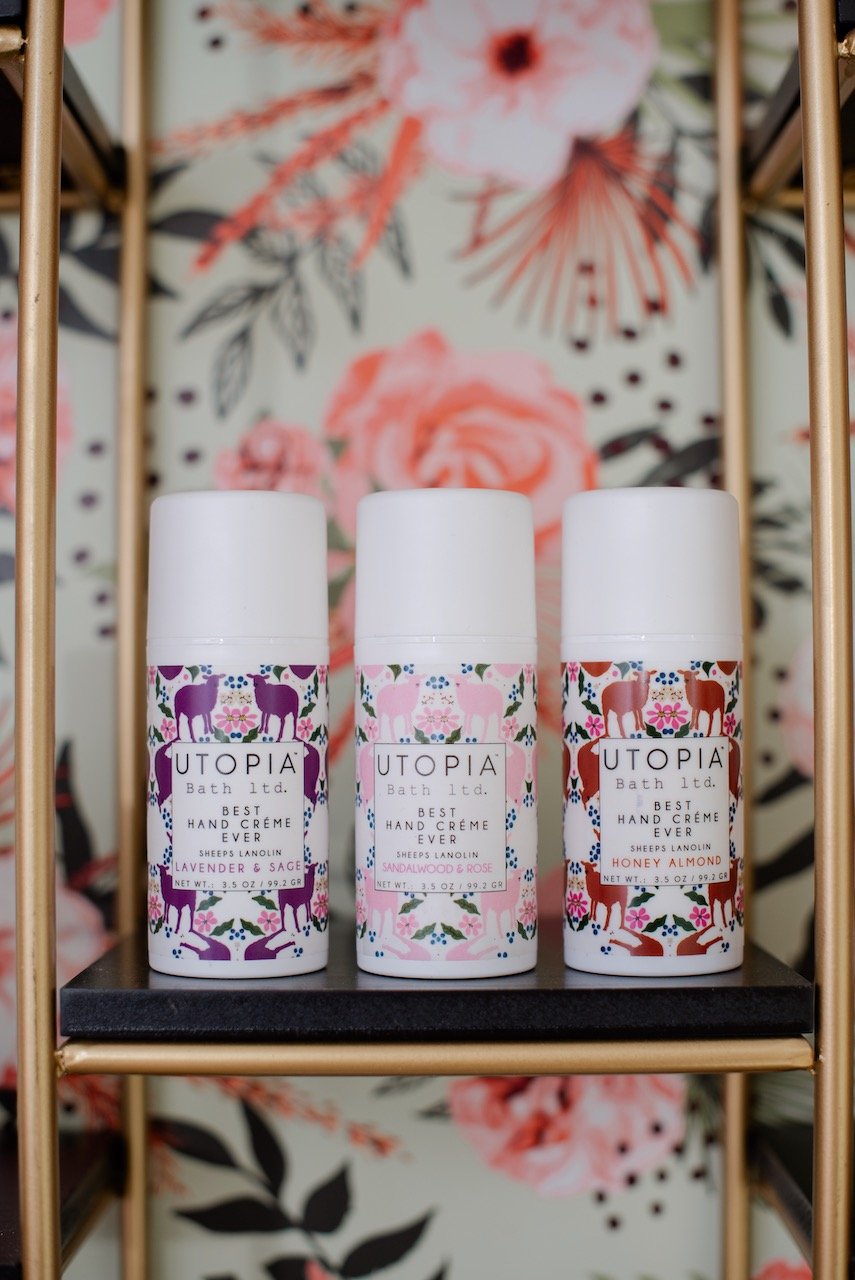

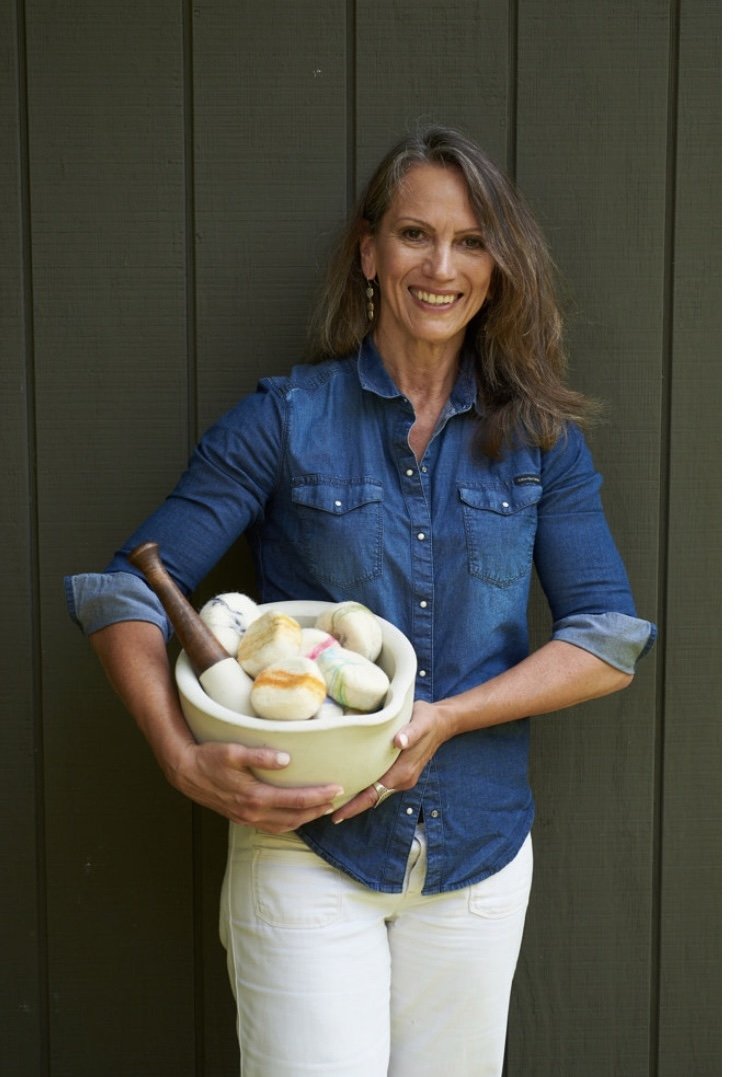
clothespin {swatch hanger} wall decor
I absolutely love finding useful things to put on my walls. For me, it typically comes in the form of cute hooks or even hanging folders so when I found these giant clothespins my instant thought was HANG DRYING A SWATCH. These babies are cute on the wall AND are fully functional. Hang your swatch to dry, hang artwork, or just hang the clothespin. Either way, it looks great and you can use it for whatever you desire.

merch
I’m a knitwear designer and so I just couldn’t help myself, I GOT MERCH! I have more stickers on the way but here’s a look at my stitch markers (by THE SEXY KNITTER), and Merch Packages. I put together these packages as a way to give you a great price (saving over 10% of retail) on a variety of items. Each knitter’s merch package includes the shirt of your choice and other goodies so that you can get a little taste of what’s in the shop in a budget-friendly manner.

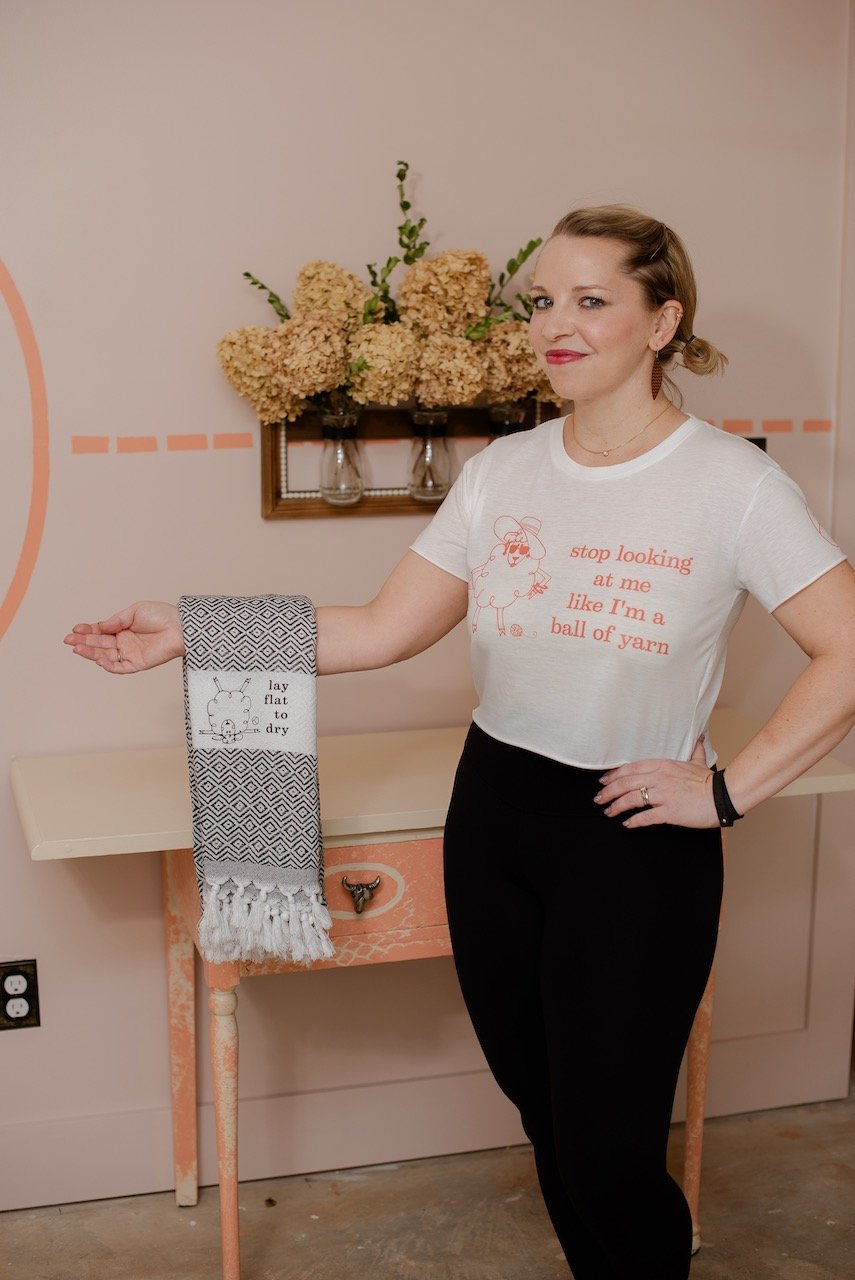
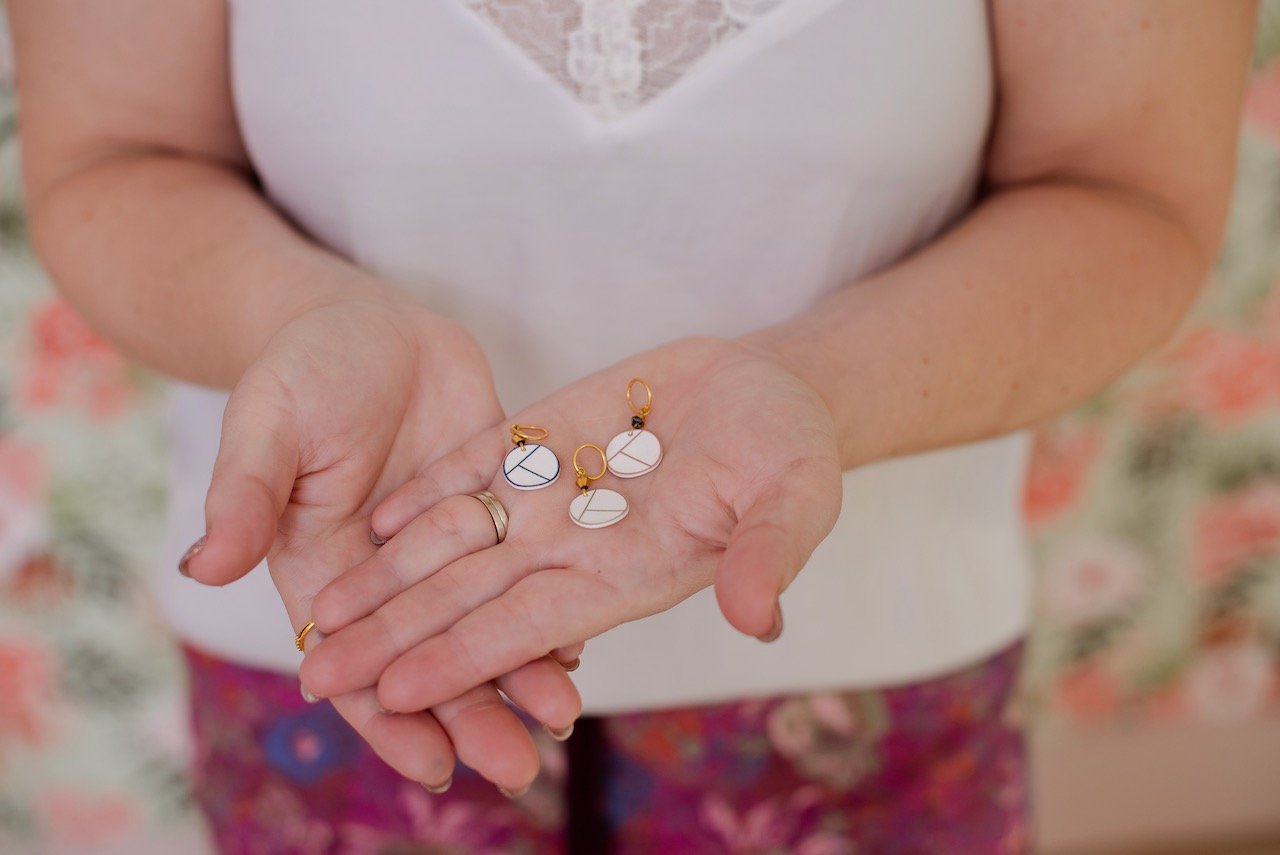
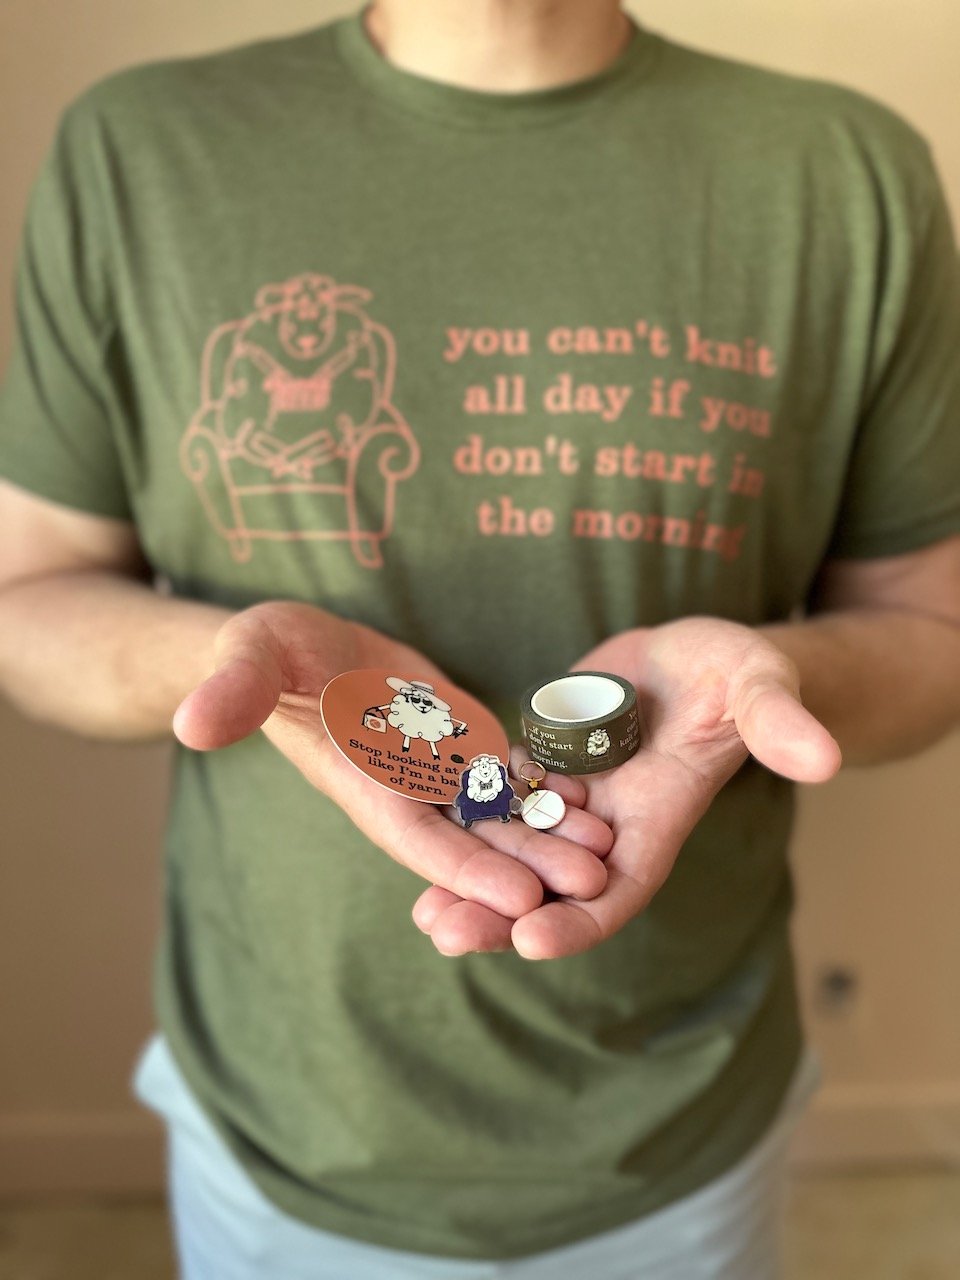


shop kO
〰️
shop kO 〰️
It’s been such a blast shipping out packages this week, normally I would consider that particular task not-so-fun but right now every order is feeling so special! I am so proud of the work that I and all the small businesses I’m partnering with have put in! I can’t forget to note my local printing company, Black Rock Branding, who printed all my shirts and helped me narrow down colors, choose the “right” number of sizes, etc. Thank you Tiffany for ALL your help, and as we continue on this adventure, too! And to all of you just remember, you’re awesome!

Lastly, I just hope you LOVE how your packages arrive! When goodies arrive on my doorstep… I love seeing brands represented and that’s why I chose to use Sticker Mule (https://www.stickermule.com/) for my shipping bags, stickers and packaging tape! It’s really nice stuff, y’all. So if you’re a small biz thinking about your own branding, I highly recommend them! I love getting to see the proofs and then having an opportunity to tweak my own design before approving. It’s really been excellent customer service all around.

If you haven’t checked out my shop yet, get on it! It will just make my day if you place an order ✌🏽❤️🧶 + 🌹.
XOXO,


Bingo: The 2023 Great Prize Reveal
Truly, they are better than ever.

If you’ve been holding out on purchasing a bingo card because you wanna see if those prizes are worth it, well, the answer is yes! I am so delighted to present the 2023 Bingo Sponsors and share the prizes they have donated for our game. Cards are no longer available for this year’s game, but be sure to keep your eyes open next spring for this superfun annual tradition.
I am going to be writing more detailed blog posts throughout the event to highlight these sponsors because these artists deserve time to shine and I really want to introduce (or reconnect) you with each and every one of them. If you enjoy playing BINGO, support these sponsors so that we can keep those prizes coming year after year. Clicking any of their logos will take you directly to their website so you can shop shop shop 💕🧶💕
Are you ready? Here it FINALLY is! These prizes are numbered only in order to make them identifiable because there’s definitely no order of amazingness, these are all GREAT prizes. I do want to send a special shout out to Joji & Co as our grand prize sponsor and the very first to jump in and support our summer fun.
Note: Strikethrough’s indicate that the prize has been claimed! I can’t promise that this section will stay up to date through the entire game but I’ll do my best!
$100 gift card from Joji & Co
$75 gift card to Mont Tricot Yarn Shop
$50 gift card to Yarnaceous Fibers
$50 gift card to Mountaintop Yarn Shop
Autographed, signed copy of JI Robbins debut novel! (ok, I just have to insert a short brag here. This woman is a rock star who was every kid’s favorite former administrator at our middle school and so many times I have thought to myself that I want to make her be my best friend but its hard because she has all girls and I have all boys).
Fangirl Fibers: 2 skeins of yarn, your choice!
Burnt Creations gift certificate for a “burned” image on wood! Elton created an image for me and I can’t wait for it to arrive because based on the photo he sent its amazing!
Lumos & Lumos Knitting Light (and yes, its really, really good)
Maverick Esthetics Gift Package including: adorable tote, yummy candle, mask, lip balm, bath bomb
Black Mountain Yarn Shop Gift Package including: logo t-shirt in the size of your choice and a few notion - ish items. These ladies have such good taste I didn’t even ask for details up front.
Hill Country Weavers: Knitter’s who were part of our BINGO game get 20% off their yarn purchase from HCW! Everyone wins this prize!
Boyland Knitworks Pattern Pack: 5 patterns of your choice from Caitlin Hunter
Kate Oates Pattern Pack: 5 patterns of your choice from Kate Oates
knit bingo 2023
〰️
knit bingo 2023 〰️

Bingo Time, y'all! It’s the 5th Annual

2023 Knit bingo sponsored by Joji & Co. featuring patterns by Caitlin Hunter & kate oates
NOTE: The instructions for the game are exactly the same as 2022! Click here to see if last year’s post looks familiar. If so, you’re good to go (except of course you’ll want to read on about your designers this year!)
Bingo begins on June 1!
Purchase your Knit Bingo card by May 30, 2023 to be ready for the first play and receive your card before the first pattern goes out. Each card is created manually, so purchases made after the deadline will be fulfilled within 24 hours. for any questions, email knitbingo@gmail.com

Caitlin & Kate
I am so honored to have Caitlin Hunter of Boyland Knitworks joining me this year. Whether you know it or not, you’ve most likely seen her stunning colorwork and creative silhouettes in the knitting community. I’ve gotten to know Caitlin over the past few months as we were housemates at VK Live, and then co-teachers at the Hill Country Weavers Knitting in the Hills Retreat! She’s just as stylish and fabulous in person as you’d expect and she was a true and kind encouragement to me during both events when I was struggling to press on through some physical pain.
There are Bingo prizes to be claimed. Whoop! Um, does anyone NOT know about my obsession with Joji’s bags? Well, Joji & Co is our official sponsor this year and the grand prize winner will receive a $100 gift card. I know, I know, I can’t play 😜
We like to build anticipation, so when we kick-off Bingo on June 1, we will reveal the rest of the prizes!

About the Designers
Caitlin Hunter of Boyland Knitworks draws inspiration for her designs from nature. Her classic designs are approachable for knitters of all skill levels who are looking to try new techniques. Caitlin’s patterns are highly customizable and she loves the shared creativity that happens between knitters and herself. Caitlin lives in Homer, Alaska with her husband and three boys. You can check her out @boylandknitworks on instagram.
Kate Oates creates patterns for everyone, from wee to very grand indeed. Her designs are as wearable as they are stylish and offer a variety of customization options alongside an extensive size range. Kate considers herself a detail-oriented designer focused on providing patterns that make you feel as incredible as you look and are as enjoyable to knit as they are to wear. You can check her out on instagram: @kateoatesdesign for her work on adult garments and accessories, @tottoppers for her kid-stuff and more family-oriented posts and @rosyknitter for her gardening obsession.
How to Play the Game
Hint: If you’ve played with me in the past, the process is pretty much the same!
This post is filled with all the detailed information you could possibly want, but if you still have questions, e-mail us at knitbingo@gmail.com.
critically important: If you did not receive your confirmation PDF after checkout, something happened and we want to fix it sooner rather than later as no confirmation = no pattern delivery! your spam filter might have decided to spew hate on us, or you might have accidentally mistyped your e-mail address. e-mail us asap so we can figure it out before the game begins.
Getting prepared. Click here to purchase your Bingo card and receive daily pattern deliveries. after purchase, look for an e-mail from help@kateoatesdesign.com which will include a link to download your confirmation PDF with further instructions. If you place your order prior to May 30, 2023, you’ll receive your randomized, individual card prior to the first pattern delivery. If you register after that time, you’ll receive your card within 24 hours. don’t worry if you miss a pattern or two at the beginning as we will absolutely get you caught up and no one can score a bingo in 2 days 🧶. If you would like to participate in the game, but aren’t able to purchase a card at this time, you can e-mail us to request a card without pattern delivery. we will be delighted to have you play the game and be eligible for prizes, Don’t be shy about asking, ok?
Playtime. From June 1-June 25, you’ll be receiving a surprise knitting pattern (or two) in your inbox! This is really what Knit Bingo is all about, as these patterns are valued at over $250 total, and you’re getting them for just over $1 each = win-win. Each pattern will have a corresponding number which you will cross out on your card each day. Patterns will be sent by 5pm EDT/2pm PDT. We serve a variety of time zones, so this allows us to adjust the timing so that no one knows exactly when to expect it. we don’t want our east coasters to always have an advantage over those in later zones so the timing of your delivery will vary just like the patterns do! by all means, if you have not received your daily pattern by the deadline, contact us so we can sort you out.
Winning. In our game, BINGO is 5 numbers crossed off in a row either vertically, horizontally or diagonally. As soon as you have a Bingo, e-mail us with the photo or screenshot of it! You must include that photo or screenshot of your card showing your winning line. Because we award prizes in the order they are received, you are not declared a winner until we are able to verify that you do have a BINGO by cross checking our numbers with your card! We gave a lot of thought to this, but since we go by the order emails are received and it does take a moment to take the photo, attach and send, we feel it would be unfair to “count” emails that don’t include all the information needed right front the start. If you do send us a note without the photo, you aren’t disqualified, but you’ll want to resend ASAP with your proof.
If you are one of the first 12 knitters to share your Bingo with us, you are eligible for a prize! This year when you win, you will get to choose the prize that you are most excited about from our list. The list will get smaller as each prize is claimed. we aren’t going to say exactly how many prizes we have right now 🙃 but there are at least 12!
Bingo will continue through June 25, even if/when all prizes have been claimed. once all prizes are claimed, our note will remind you that there is no longer any need to e-mail us about your Bingo and we hope that you will continue to enjoy the expansion of your library and, hopefully, queue!
and here’s why!
You can skip this section if you wish as it is only explanatory, but for those of you that are curious about bingo methodology and why we do things the way we do, we don’t mind sharing at all! as bingo has gained momentum and participants, the prizes have been claimed more quickly so we have tried to increase the challenge a bit. there are more patterns included in the game than there are numbers on your card. Your card will be missing 5 numbers, so sometimes the daily pattern will not be on your card. there are also no free spaces, you’ll have to get all 5 in a row to win. The anticipation is so fun and we want to hang on to our prizes as long as we can.
the first couple of game years, we were able to offer multiple daily delivery methods. there were separate player lists depending on where each knitter wanted to store their pattern. you can imagine that this caused some issues— certain groups would receive their patterns/numbers before others, more lists = more errors, it was very labor intensive for your designers, and so on. we know that ravelry does not work for everyone and is not always your preferred storage space but fortunately, ravelry does offer a gift delivery method. using this feature, individuals can choose whether they would like to download and store their pattern through their own system and/or add it to their library. as noted in your confirmation PDF, you’ll want to be sure to have the e-mail address downloads@ravelry.com in your address book, unblocked and unfiltered, as this is how the daily pattern will arrive. We will be sending your pattern to the e-mail address provided from your Bingo card purchase through the Ravelry gift feature. All participants will receive their e-mail at the same time and then be able to decide where to store the pattern as best suits individual needs.
Put your Pattern where you want it.
When you receive your daily e-mail, it’ll look like this and you may save to your device or add to Ravelry Library. Either way, step 1 is to click the download button! Note: If you are not signed in to your Ravelry account before clicking the link in your e-mail, or you do not use Ravelry, you will see “sign in to store on Ravelry” in place of the checkbox shown at the upper top right.
After you click the button, you’ll arrive on a landing page. This page has a link for the actual file download, and a checkbox that refers to your Ravelry Library. The set-up below shows the set-up for saving the file to your device ONLY. Just click that link and you’re all set.
The exact same page is below, but this is what it looks like when storing to your library.
So there you go! A more detailed set of instructions than you could ever need for clicking a button!
prize shipping
each year, We have been inching more towards physical prizes because everything is just more fun with tangible goodies, don’t you agree? We want to include as many knitters as possible. This year we will be shipping internationally for up to $30.00 USD. If your shipping costs exceed this amount, we may contact you to see if you would like to cover that cost or would rather switch to a digital award.

Thanks a million!
To our primary sponsor this year! Knitters, you’ll never regret supporting Joji & Co and your yarn will thank you for being cared for so very glamorously.
Bloom Hat: Loopy Leaf for the win!
I had so much fun designing Bloom for LYS Day, April 29, 2023 in conjunction with a special visit to YarnByrds! This creative technique adds texture and I can imagine using it in all kinds of ways. Below the video tutorial are written instructions you can use to practice.
loopy leaf (worked over a single st looping to the right [LR] or the left [LL])
Tip: To more easily identify the space used to create your leafy loops, use a removable marker to encircle the entire V of the bottom stitch in your twisted knit column. The space on each side of your column where the marker passes through the fabric indicates the space where the crochet hook should be inserted.
Instructions begin at LR/LL location:
Move yarn to back and let it hang.
Insert crochet hook from RS to WS of fabric between twisted knit st column and purl st next to it on Round 1 of pattern. For right-looping leaf (LR), use the space to the right of the bottom knit column; for left-looping leaf (LL), use to the space to the left. Loop will not cross over knit column.
With crochet hook, grab working yarn loosely from WS and pull through to RS.
Place loop on RH needle. Tighten it gently so that loop does not affect tension of fabric but lies neatly.
Knit 1 st.
Pass loop over knit st.
Continue in pat.
Waist Shaping that Works
This design element can make it or break it! Take a few minutes to plan your waist shaping for a super flattering sweater fit. Waist shaping is designed to highlight your… drumroll please… waist! The problem is, we don’t all have our waist in the same place and we certainly don’t all share the same figure. Without overcomplicating waist shaping, there are a couple of easy ways to modify it so that it works for your body.
Determine the location of your natural waist.
Choose your shaping style & location.
Compare your measurements to the pattern.
Modify your pattern, if necessary, to customize your project!
locate your natural waist
Determine where the smallest part of your waist is located to make sure that your garment shaping hits the spot. To do this easily and all by yourself, take a piece of scrap yarn and tie it around the small of your waist. Next, measure straight down from the back of your neck to where your tape measure hits the string. This is your Back-Waist Length measurement! When you’re working from the top down, you can use this measurement to make sure that all decrease rounds are completed prior to this length. If you’re working from the bottom up, you’ll want to subtract this length from the total length of your garment to calculate the length that should be worked before your decreases are completed. Keep in mind that you will want an inch or two of plain length surrounding the small of your waist. Meaning, there should be some space between your final shaping decrease and your first increase to avoid creating a point in your garment.
choose your shaping style & location
Your body shape should influence the style of shaping you choose! The most flattering knits will outline your natural shape, highlighting it. This is especially true when it comes to waist shaping. For curvier individuals, those born with that lovely hourglass shape, I recommend shaping towards the sides of your sweater. Anywhere in the underarm area is considered on the side. Individuals who are more straight-waisted can instead work shaping on the front and back of the garment instead of minimizing fabric in an area where the body is not getting smaller.
compare your measurements to the pattern
Take a look at how your pattern has set up waist shaping and calculate the total number of rows/rounds worked during the shaping repeat itself. For example, if your pattern calls for decreasing every 8 rounds a total of 4 times, multiply 8 x 4 = 32 rounds. You’ll then need to use your row gauge to translate rounds to inches (or cm!). Write this number down.
In a top down pattern, add up any measurements that take place prior to waist shaping repeats. This may include: Yoke/Armhole Depth and additional length after Sleeve separation, before beginning a shaping repeat. Add this length to the shaping length from above to calculate the Back Waist length measurement of the pattern.
In a bottom up pattern, add the length prior to shaping in the hip area. This would include the garment hem and any plain length before shaping. Subtract this length from the total length of your garment to calculate the Back Waist length measurement of the pattern.
modify your pattern if needed
Once you know the pattern’s Back Waist length measurement, compare it to your own. If it matches or is slightly smaller, you should be good to work the shaping as it is set up in the pattern. If the pattern Back Waist length is longer than yours, you’ll want to redistribute the shaping rounds to complete them so that they are located at the small of your waist. In a top down sweater, this means working shaping rounds more closely together and for bottom up sweaters, you’ll need to space the decreases further apart or work more plain length before beginning them. Typically, waist shaping is mirrored with Hip Increase Rounds depending on the total length of your sweater. Feel free to experiment with the spacing of these rounds based on the distance between the small of your waist and your hip circumference, just like you’ve done for the waist. There is no reason that you need to maintain the same distance between your increase rounds as you do for your decreases, do what works for your body!
placing shaping at the front & back
To work waist shaping on the front & back of your sweater, place 4 shaping markers so that they are symmetrically located somewhere between 1/4 and 1/3 away from the center underarm. For example, if your sweater has 200 stitches before shaping, this translates to 100 stitches on each front and back. 100/4 = 25 stitches and 100/3 = 33.3 stitches. Therefore, place your shaping markers somewhere between 25-33 stitches away from the center underarm on both the Front & Back, depending on where it makes sense for stitch patterns featured in the design. The sample rounds below are written with end-of-round located approximately at center back.
sample shaping rounds
Front & Back Waist Shaping Round: [Work in pat to marker, sm, k2tog, work to 2 sts before marker, ssk, sm] twice—4 sts decreased.
Front & Back Hip Shaping Round: [Work in pat to marker, sm, M1R, work to marker, M1L, sm] twice—4 sts increased.
placing shaping at the sides
To work shaping on the sides of your sweater, determine the location of the center underarm. If there are an even number of underarm sts, place 2 markers, one at each underarm. If there an odd number of underarm sts, place 4 markers total, 2 markers surrounding each center underarm stitch. The sample rounds below are written with end-of-round located approximately at center back.
sample shaping rounds
Side Waist Shaping Round (even underarm sts): [Work in pat to 3 sts before marker, k2tog, k1, sm, k1, ssk] twice—4 sts decreased.
Side Waist Shaping Round (odd underarm sts): [Work in pat to 2 sts before marker, k2tog, sm, k1, sm, ssk] twice—4 sts decreased.
Side Hip Shaping Round (even underarm sts): [Work in pat to 1 st before marker, M1R, k1, sm, k1, M1L] twice—4 sts increased.
Side Hip Shaping Round (odd underarm sts): [Work in pat to marker, M1R, sm, k1, sm, M1L] twice—4 sts increased.
Enjoyed this tutorial? Consider a donation to help me continue to create tutorials for knitters!

Briocherie: Quickie refresher tutorials for the skills you need!

Hello Briocherie!
Welcome to my Brioche refresher tutorials page! This is the central location to view my support videos that can help you to make your own Briocherie Pullover: brkyobrk, brk3tog and brsssk are all included. There is no audio within the videos. Written instruction slides are provided for thorough instruction, just pause to read them thoroughly & enjoy! If you find my tutorials helpful, I’d love to have your support with a pattern purchase.
The Briocherie sweater is made awesome by Spincycle Yarns, their colors are incomparably spectacular and I’ve used two different yarns in my sweater: Dyed in the Wool (main color, sport weight & color changing) and Versus (contrast color, dk weight & more consistent color).
abbreviations
brk: brioche knit or bark | brkyobrk: 2-st inc. (see video) | brk3tog: 2-st right-leaning dec. (see video) | brsssk: 2-st left-leaning dec. (see video) | LH: left hand | MC: main color | P, p: purl | RH: right hand | sl: slip | sl1yof: sl 1, yo, bring yarn to front, ready to brioche purl | st(s): stitch(es) | yfsl1yo: yarn forward, sl 1 st, yo, ready to brioche knit | YO: yarn over
There’s just one increase featured in briocherie and its the easy peasy brkyobrk. this increase is worked from a marked stitch in an mc knit column during an mc layer.
brkyobrk
Into a single st, brk1, leaving st on the LH needle, yarn forward under needle then over needle to back, brk1 into same st—2 sts inc.
These three loops are resolved on the next row as followed: sl1yof, p1, sl1yof.
the brk3tog (brioche knit 3 stitches together) is a brioche knit decrease that slants to the right. you will decrease two stitches. this decrease is worked over a marked stitch in an mc knit column during an mc layer.
brk3tog
Brk 3 sts together for a right-leaning 2-st decrease. The process for a Brk3tog begins 2 sts before the marked stitch. Note that a wrap is worked along with its stitch as only 1 st.
Sl 1 st knitwise, sl 1 st knitwise, brk these 2 sts tog, sl st back to LH needle, pass marked st over the brk st, move stitch back to RH needle.
the brsssk (brioche slip slip knit) is a brioche knit decrease that slants to the left. you will decrease two stitches. this decrease is worked over a marked stitch in an mc knit column during an mc layer.
brsssk
3 sts are worked together for a left-leaning 2-st decrease. This decrease process begins at the marked stitch itself. Note that a wrap is worked along with its stitch as only 1 st.
Sl 1st knitwise, sl 1 st knitwise, brk the next st on LH needle. Pass the slipped sts over the brk st one at a time, leaving the marked stitch on top.
Enjoyed this tutorial? Consider a donation to help me continue to create tutorials for knitters!
Bingo Time, y'all! All your questions, answered.
Knit Bingo 2022
sponsored by Tolt Yarn and Wool, along with me, Jill & Claire
The game begins on June 1! Purchase your Knit Bingo card by May 31, 2022 to be ready for the first play on Wednesday. This year I’ve asked two brilliant & experienced designers to work with me for an even larger pattern variety! Check out the work of Jill Zielinksi aka Knitterella & Claire Borchardt aka Autumn & Indigo as they will be making appearances in your inbox throughout the game! As always, there are prizes to be claimed. Whoop! Tolt Yarn & Wool is our official sponsor this year. They have contributed a $50.00 USD gift card which we have decided to include in our prizes, instead of just using it on ourselves 😜. Tolt is a wonderful shop to support, whether online or in person. They have a phenomenal selection of anything you need for your projects and the staff is so knowledgeable. Next time your own LYS doesn’t have it, get your fingers headed over to Tolt’s website and give them a try! This post is filled with all the detailed information you could possibly want, but if you still have questions, e-mail us! We have sprinkled some prize images throughout, so enjoy the sneak peeks. More prize info is at the end of this post!

About the Designers
Claire Borchardt focuses her design work on patterns that are classic and timeless, yet still modern and chic, integrating lace and textures in most of her work. She strives to create pieces that are closet staples that can be worn with just about anything.
Kate Oates creates patterns for everyone, from wee to very grand indeed. Her designs are as wearable as they are stylish and offer a variety of customization options alongside an extensive size range. Kate considers herself a detail-oriented designer focused on providing patterns that make you feel as incredible as you look and are as enjoyable to knit as they are to wear.
Jill Zielinski’s graphic design background is evident in her unique designs and bold colorwork. Not limited to one design aesthetic; Jill designs patterns that are both simple and classic, as well as designs that are bold and colorful with a modern flair. Recently, she started her own yarn company called North Bay Fiber which focuses on breed specific yarns, 100% sourced, dyed, and milled in the U.S.A.

How to Play the Game
Hint: If you’ve played with me in the past, the process is pretty much the same!
Getting prepared. Click here to purchase your Bingo card and receive daily pattern deliveries. If you sign up before this Sunday, you’ll get a confirmation PDF and I’ll be sending out your randomized, individual cards Monday (a few may go out early Tuesday but I’ll get them out ASAP!) If you register after this weekend, you’ll still receive all of the above, but your card will be sent at any point before the first pattern is announced, including moments before. If you would like to participate in the game, but aren’t able to purchase a card at this time, you can e-mail us to request a card. Although you will not receive the patterns, you will be eligible for the prizes. Don’t be shy about this!
Playtime. From June 1-June 25, you’ll be receiving a surprise knitting pattern (or two) in your inbox! This is really what Knit Bingo is all about, as these patterns are valued at over $200 total, and you’re getting them for just over $1 each = win-win. Each pattern will have a corresponding number which you will cross out on your card each day. Patterns will be sent by 2pm EDT/11am PDT. We serve a variety of time zones, so this allows us to adjust the timing here are there so that no one knows exactly when to expect it.
Winning. As soon as you have a Bingo, e-mail us and tell us! Please include a photo or screenshot of your filled card.
If you are one of the first 12 knitters to share your Bingo with us, you are eligible for a prize! This year when you win, you will get to choose the prize that you are most excited about from our list. The list will get smaller as each prize is claimed.
Bingo will continue through June 25, even if/when all prizes have been claimed. At that time, our note will remind you that there is no longer any need to e-mail us about your Bingo and we hope that you will continue to enjoy the expansion of your library and, hopefully, queue!
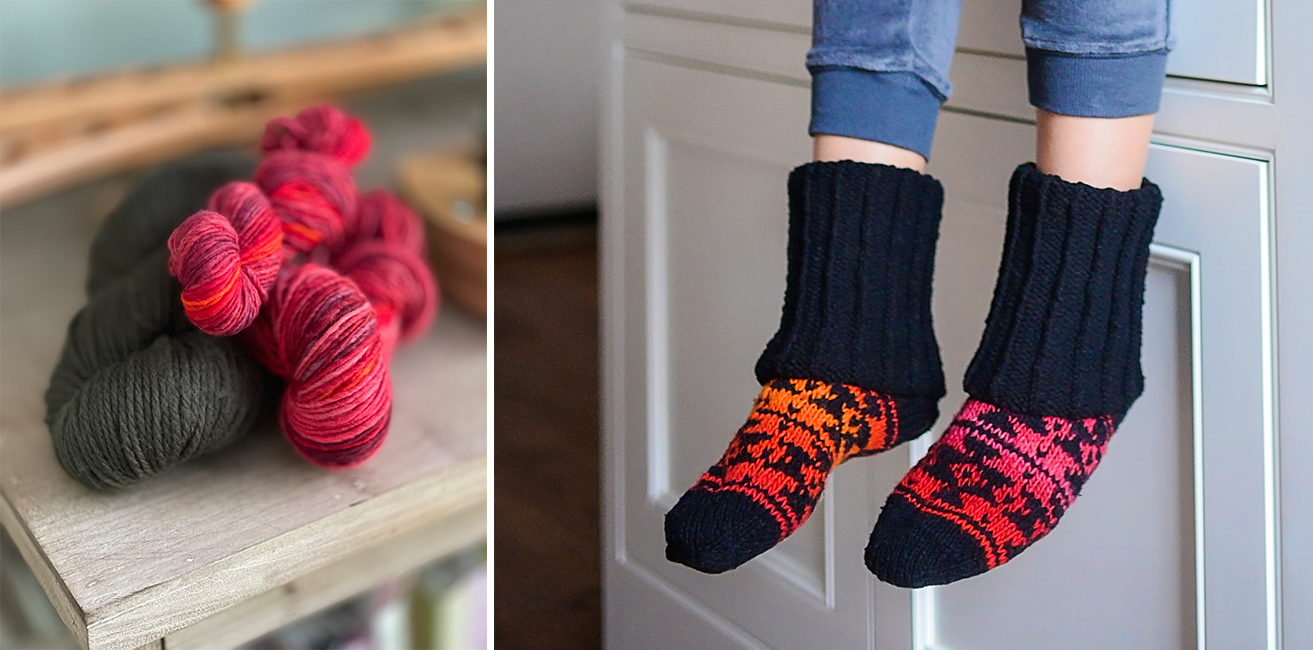
New this Year
Nothing fancy but we did up the challenge just a little. In the last couple of years, we ran out prizes more quickly than I would have liked so there are just a couple of tweaks to the process. First, you’ll notice that there are more patterns included than there are numbers on your card. Your card will be missing 5 numbers, so sometimes the daily pattern will not be on your card. Second, there are no free spaces this year! That’s right, you’ll have to get all 5 in a row to win. The anticipation is so fun and we want to hang on to our prizes as long as we can. 😂 If for some reason we have made it too hard (doubtful!), we have a trick up our sleeve that we can begin at any time.
The other tweak is daily delivery method. Up to now, we kept two separate player lists going: one for e-mail pattern delivery and the other for Ravelry. We have come up with a better way, for so many reasons! Be sure to have the e-mail address downloads@ravelry.com in your address book, unblocked and unfilitered, as this is how the daily pattern will arrive. We will be sending your pattern to the e-mail address provided from your Bingo card purchase through the Ravelry gift feature. All participants will receive their e-mail at the same time and then be able to individually decide where to store the pattern. Important: If you checked out from an e-mail address you do not regularly use, click here to e-mail us the requested change.
Put your Pattern where you want it.
When you receive your daily e-mail, it’ll look like this and you may save to your device or add to Ravelry Library. Either way, step 1 is to click the download button! Note: If you are not signed in to your Ravelry account before clicking the link in your e-mail, or you do not use Ravelry, you will see “sign in to store on Ravelry” in place of the checkbox shown at the upper top right.
After you click the button, you’ll arrive on a landing page. This page has a link for the actual file download, and a checkbox that refers to your Ravelry Library. The set-up below shows the set-up for saving the file to your device ONLY. Just click that link and you’re all set.
The exact same page is below, but this is what it looks like when storing to your library.
So there you go! A more detailed set of instructions than you could ever need for clicking a button!
Prizes
Hold on to your needles, because Bingo prizes have never been better. This year, knitters will be able to choose their prizes based on what is available at the time of their win! We are still going to tease you a little as many prizes include extra(s) not included in the description. Numbers below are not in any kind of order, but just so you can easily identify which package you are snagging. We will let you know your options after you e-mail us your bingo and again, order and timing matters, first come, first serve!
Shipping
We have been inching more towards physical prizes because everything is just more fun with yarn, don’t you agree? We want to include as many knitters as possible. This year we will be shipping internationally for up to $30.00 USD. If your shipping costs exceed this amount, we may contact you to see if you would like to cover that cost or would rather switch to a digital award.
Finally, the big reveal.
$50 gift card from Tolt Yarn & Wool + Mondovi pattern by Claire
Sweater quantity of North Bay Fiber Elemental (dyed in your color choice!) + Rosewood Pullover pattern by Kate
Choose any booklet from Kate: Math for Hats, New Guy, New Girl, Topped for a Year or Topped for Another Year
4 Skeins Knitting for Olive Heavy Merino+ pattern of your choice from Jill
$25 Gift Card to Shop LaMercerie + pattern of your choice from any one of us
3 Skeins of North Bay Fiber Elemental (dyed in your color choice!) + Mineral Point Shawl pattern by Claire
Single Pattern Bundle: Your choice of a single pattern from each of us (3 patterns total!)
Urban Smirk Tea Towel, 1 skein Malabrigo Worsted, and your choice of a single pattern from each of us (3 patterns total!)
Notions bundle including 2 enamel pins, knitters washi tape, Soak Wash & Flatter Spray + Lovebirds Hat pattern & a yarn kit (Spincycle! Magpie!) to knit it by Kate Oates
Grown by Kate + a single Tot Toppers pattern of your choice so you can match (or coordinate!) with a kiddo!
5 Skeins of North Bay Fiber Heritage in Chinook, Pumpkinseed, or Bullhead + Angler Shawl pattern by Jill
Waxed canvas drawstring project bag by Tannei Casey + Switchback Slippers pattern & a yarn kit (Spincycle! YOTH!) from Kate
Thank you Tolt Yarn & Wool sponsoring!

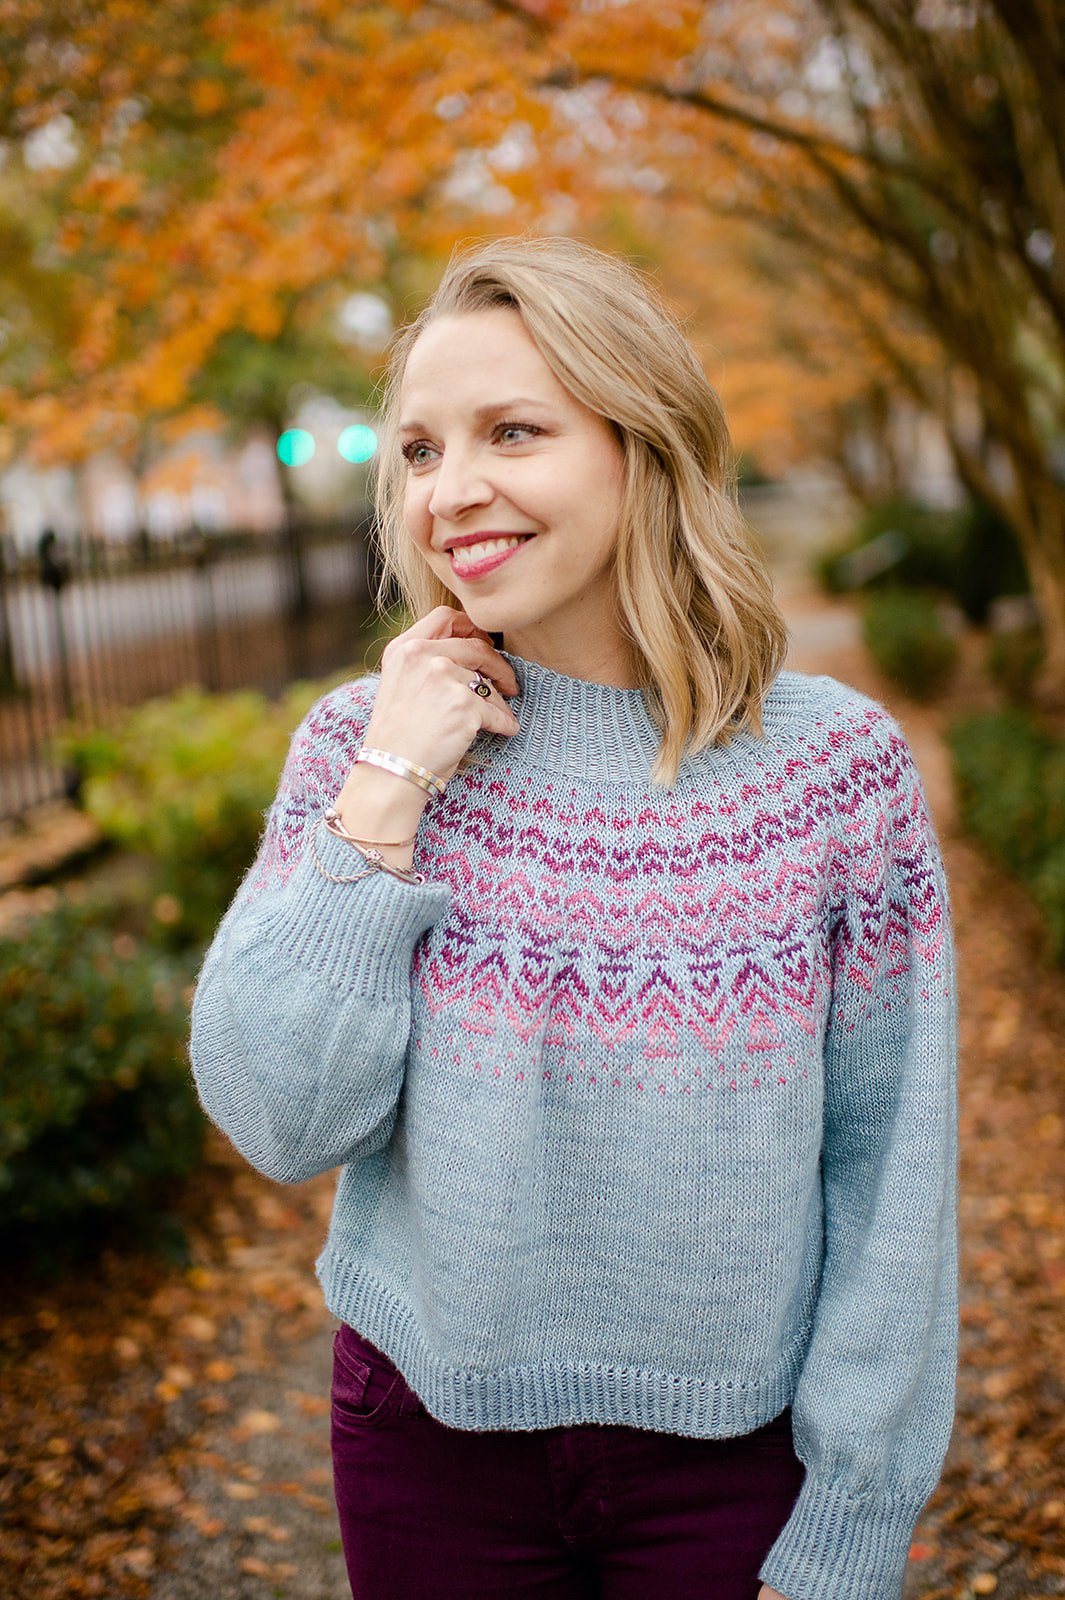
Separating Sleeves from Body: Top Down Seamless Sweater Knitting + Cable Cast-On
If you’ve never knit a top down seamless sweater, I have the perfect video tutorial for you today! This one works step by step through the process of separation and also includes a tutorial within for the Cable Cast-On. You can view all my tutorials here. In this tutorial, the sweater featured is constructed with seamless set-in sleeves. However, the process of separating sleeves by placing stitches on hold, casting on stitches at the underarm, & joining the front & back is pretty much the same no matter what construction style you are working. You can use this video for raglan & yoked sweaters as well, as long as they are worked from the top down!
Enjoyed this tutorial? Consider a donation to help me to continue to create tutorials for knitters!

Top-Down, Seamless, Set-in Sleeves: a thing you should NOT ignore.
This amazingly flattering construction method provides a tailored fit at the shoulders and can go anywhere from there!
The Sweater Patterns featured in this video at the time of publication are:
Julie Twist
Just Nicole
Little White Cardi
Naveen
Enjoyed this tutorial? Consider a donation to help me to continue to create tutorials for knitters!
Textured Dot Tutorial + a few handy Colorwork Tips
I didn’t create this stitch, but I’m obsessed with it! Hence my decision to go full on Dottie and create a 4-piece collection! Here’s a video demonstration of the technique as used within stranded colorwork. Written step-by-step instructions are also included underneath the videos, as are a few tips for colorwork that are especially useful with the Textured Dot. Dots are performed by creating several loops of yarn that are then worked together with the stitch already on your needle.
Work in pat to location of Dot.
With CC: Insert RH needle underneath MC bar between first and second st on LH needle, wrap yarn as if to knit around RH needle and draw needle to RS with this loop, do not drop loop,
Insert RH needle above this same bar between sts on LH needle and wrap yarn as if to knit, draw needle to RS with both loops, do not drop loops,
Bring working yarn through tips of LH and RH needles, ready to purl,
Purl first st on LH needle,
Skipping purled st and from WS, insert tip of LH needle into both loops on RH needle,
Holding working yarn securely so as not to drop purled st, slip loops over purled st.
Repeat Steps 1-7 to work your Dotted round!
Since I’m already blogging about Dottie, I thought I’d throw in a few of my favorite colorwork tips in case they are new to you.
First things first, yarn choice! Not only is it imperative to get the appropriate weight, you’ve got to find a yarn that is colorwork friendly. You want a “sticky” animal fiber as opposed to an extra smooth yarn from a plant. This is because you want the two yarns to work together to make your fabric, so using fibers that will bloom together and eventually felt slightly will not only give your sweater a more polished look, but will also make the strands felt to the WS of your sweater naturally over time.
Secondly, color dominance! This will make such a big difference in your projects if you’re not already doing it. Intentionally choose which color you want to POP. For Dottie, I’d say it should be your Dot color. Here’s a great post from Ysolda on how to achieve dominance!
Always stretch out the stitches on your Right Hand needle before switching colors and don’t tug too tightly on that strand when you begin to work with it. You want to give yourself enough of a float that your fabric has a little bit of give. I find that spreading the stitches works perfectly for me to get just the right length float (and of course, I do have a lot of practice hours under my belt).
Blocking. Is. Magic. This is true in 98% of knitting projects but especially so in colorwork. Blocking will help even out your tension and help the fibers become one. Expect your project to grow a bit in its bath and to look so much better once it is dry. You can steam block before binding off to check your length but you’ll probably still get a little more length after the bath.
Alright, I could go on and on but I think I’m gonna call it and finally introduce you to Dottie!

Enjoyed this tutorial? Consider a donation to help me continue creating tutorials for knitters!